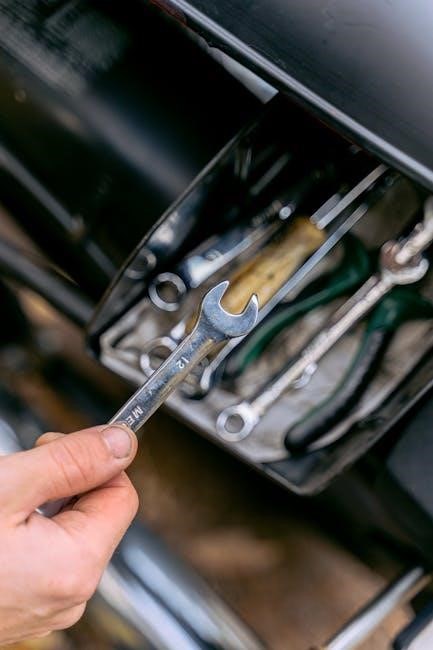
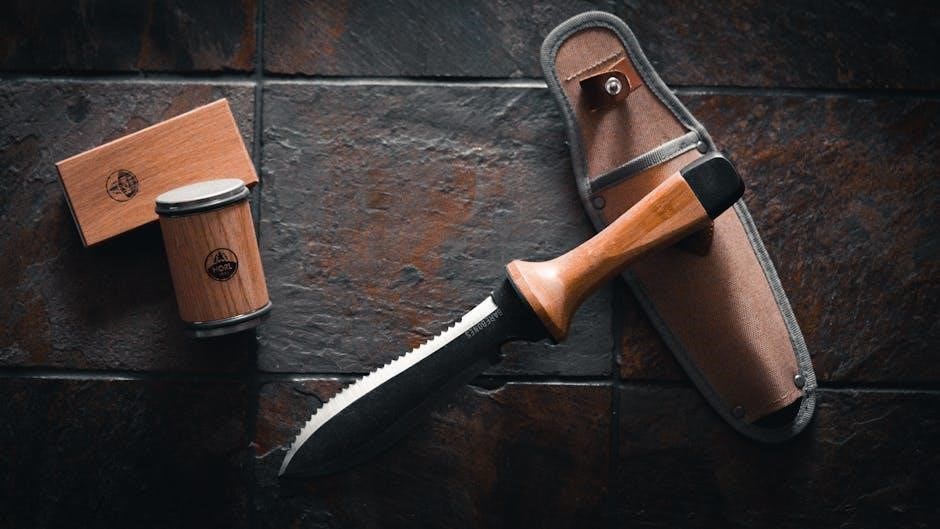
The Chef’s Choice Knife Sharpener is a premier tool restoring knife edges for optimal performance. It solves the issue of dull knives with innovative technology‚ trusted in kitchens worldwide for its ease and versatility across various blade types.
1.1 Overview of the Chef’s Choice Brand
Chef’s Choice is a renowned brand specializing in high-quality knife sharpeners and culinary tools. With a strong focus on innovation‚ the brand has earned a reputation for delivering reliable and efficient sharpening solutions. Founded with the goal of providing professional-grade tools for home and professional cooks‚ Chef’s Choice has expanded its product line to include a variety of electric and manual sharpeners. Their commitment to precision engineering and user-friendly designs has made them a trusted name in the culinary industry. Each product is designed to enhance knife performance and durability‚ ensuring optimal results for cooking enthusiasts worldwide.
1.2 Importance of Knife Sharpness in Cooking
A sharp knife is essential for safe‚ efficient‚ and precise cooking. Dull knives require more force‚ increasing the risk of accidents and uneven cuts. Sharp blades ensure clean cuts‚ preserving the quality and appearance of ingredients. They also enhance control during chopping‚ slicing‚ and mincing‚ making cooking tasks faster and more enjoyable. A dull knife can damage food‚ leading to wasted material and less flavorful dishes. Maintaining sharp knives is crucial for both professional chefs and home cooks to achieve optimal results in the kitchen.
1.3 Brief History of Chef’s Choice Sharpener Models
Chef’s Choice knife sharpeners have a rich history dating back to their inception in the early 1980s. Initially known for their manual sharpening tools‚ the brand quickly gained recognition for their innovative approach. Over the years‚ they transitioned to electric sharpeners‚ combining advanced diamond stone technology with user-friendly designs. Their models have evolved to cater to both professional chefs and home cooks‚ earning a reputation for reliability and effectiveness. Today‚ Chef’s Choice sharpeners are regarded as industry standards‚ reflecting their commitment to quality and innovation in knife sharpening. Their continuous improvement has solidified their place as a leader in the market.

Key Features and Benefits of Chef’s Choice Knife Sharpeners
Chef’s Choice sharpeners combine innovative diamond stone technology‚ multiple sharpening stages‚ and built-in angle selection. They offer versatility for straight and serrated blades‚ ensuring precise edges with minimal metal removal. These features provide professional-level results‚ making them ideal for home cooks and chefs alike.
2.1 Diamond Stone Technology
Chef’s Choice sharpeners utilize diamond stone technology‚ embedding diamonds in a metal bond for exceptional sharpening efficiency. This method ensures precise edge alignment and consistent results. Diamonds are harder than traditional stones‚ making them highly effective for sharpening steel blades. The technology minimizes metal removal while achieving a razor-sharp edge‚ preserving the knife’s longevity. It also allows for quick sharpening‚ making it ideal for both straight and serrated knives. This feature enhances the overall sharpening experience‚ providing professional-grade results with minimal effort and time.
2.2 Multiple Sharpening Stages
Chef’s Choice sharpeners feature multiple sharpening stages‚ each designed for specific tasks. The first stage typically sharpens and sets the knife’s edge‚ while subsequent stages refine and polish it. This multi-stage process ensures a razor-sharp edge with minimal effort. The stages are carefully calibrated to handle both straight and serrated blades‚ providing versatility. This feature allows users to achieve professional-grade results by progressively sharpening‚ honing‚ and polishing their knives in a systematic manner‚ ensuring optimal edge retention and performance.
2.3 Versatility for Different Knife Types
Chef’s Choice sharpeners are designed to accommodate a wide variety of knife types‚ including straight-edge‚ serrated‚ and fillet knives. The sharpeners feature adjustable settings to handle different blade angles and materials‚ ensuring optimal results for each knife. This versatility makes them ideal for both home cooks and professional chefs‚ as they can maintain edge geometry and sharpness across diverse knife styles. Whether sharpening a chef’s knife or a serrated utility knife‚ Chef’s Choice sharpeners adapt seamlessly‚ providing consistent performance and extending the life of your knives.
2.4 Built-in Angle Selection
Chef’s Choice sharpeners feature a built-in angle selection system‚ allowing users to choose the ideal sharpening angle for their knives. This feature ensures precise edge alignment and optimal sharpness. The preset angles cater to both straight-edge and serrated blades‚ eliminating the need for guesswork. By maintaining the correct angle‚ users can achieve a sharper‚ more durable edge while minimizing the risk of damaging the blade. This innovative design makes the sharpening process easier and more efficient for cooks of all skill levels.
Safety Precautions When Using Chef’s Choice Sharpeners
Always wear protective gloves and eyewear. Keep fingers away from blades and moving parts. Ensure the sharpener is stable and placed on a firm surface.
3.1 General Safety Guidelines
Always prioritize safety when using Chef’s Choice sharpeners. Wear protective gloves and eyewear to prevent injury. Ensure the sharpener is placed on a stable‚ flat surface. Keep loose clothing or long hair tied back. Maintain a clean‚ dry workspace to avoid accidents. Never sharpen near children or pets. Avoid sharpening damaged or excessively dull knives‚ as they may break. Always follow the manufacturer’s instructions and stay focused during the sharpening process to prevent mishaps.
3.2 Electrical Safety Tips
For safe operation of Chef’s Choice sharpeners‚ follow these electrical guidelines. Always ensure the sharpener is placed on a dry‚ stable surface away from water sources. Avoid using damaged cords or plugs‚ as they can pose a shock hazard. Never submerge electrical components in water. Use only the original or manufacturer-recommended power adapter. Keep children away from electrical parts. Unplug the sharpener when not in use or during maintenance. Regularly inspect the cord and plug for damage. Ensure proper grounding to prevent electrical incidents.
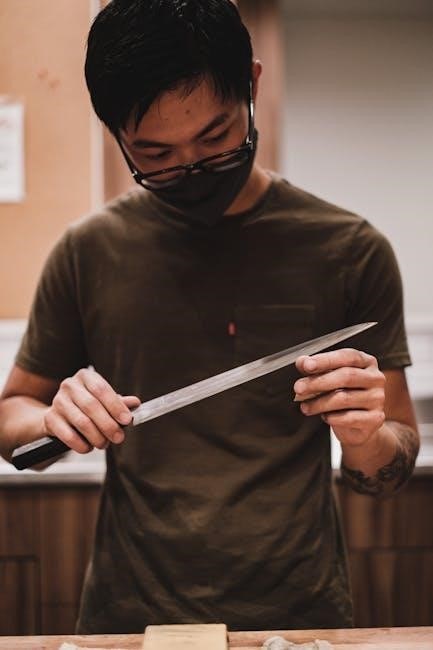
3.3 Handling the Knife Safely
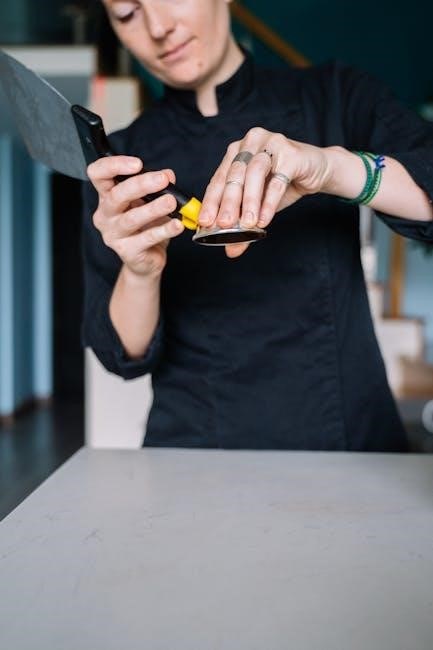
Always handle knives with care to prevent accidents. Ensure the knife is securely positioned during sharpening‚ with the blade facing away from your body. Maintain a firm‚ controlled grip to avoid slippage. Keep fingers away from the sharpening edge‚ especially when the knife is moving. Store knives in a safe place when not in use. Never sharpen a knife while holding it loosely or in an unstable position. Use a cut-resistant glove if possible to protect your hands from potential slips. Always be mindful of the knife’s edge and avoid touching it during or after sharpening.

Step-by-Step Instructions for Using Chef’s Choice Sharpener
Learn to sharpen knives effectively with clear‚ easy-to-follow steps‚ ensuring proper techniques for safety and consistent results.
4.1 Pre-Sharpening Preparation
Before sharpening‚ ensure the knife is clean and dry. Inspect the blade for nicks or damage. Place the sharpener on a stable surface and plug it in. Select the appropriate sharpening slot based on the knife type. For straight-edge knives‚ align the blade with the guide. For serrated knives‚ use the specialized slot. Always refer to the manual for specific model instructions. Proper preparation ensures safety and optimal sharpening results.
4.2 Setting Up the Sharpener
Place the Chef’s Choice sharpener on a stable‚ flat surface. Plug in the device and ensure it is positioned away from water. For electric models‚ check the power cord is securely connected. Adjust the sharpening angle using the built-in guide‚ typically set between 20° and 30°. Position the knife in the appropriate slot‚ aligning the blade with the guide. Ensure the knife is straight and evenly placed for consistent sharpening. For manual models‚ assemble any additional components as per the instructions.
4.3 Sharpening Process for Straight Blades
Insert the straight blade into the sharpening slot at the recommended angle. Gently draw the knife through the slot from heel to tip‚ using light pressure. Repeat this process 2-3 times‚ flipping the knife to sharpen both sides. For electric models‚ maintain steady movement as the wheels sharpen the edge. For manual models‚ ensure consistent strokes. After sharpening‚ inspect the edge and repeat if needed. Always sharpen in one direction to avoid damaging the blade. This method ensures a sharp‚ even edge for straight blades.
4.4 Sharpening Serrated Knives
For serrated knives‚ use the Chef’s Choice sharpener designed for serrated edges‚ such as models with a diamond stone. Place the knife in the serrated slot‚ aligning the tool with the serrations. Lightly draw the knife through the slot from heel to tip‚ focusing on one serration at a time. Repeat for each serration‚ ensuring even sharpening. Avoid applying too much pressure‚ as this can damage the serrated edge. Serrated knives typically require less frequent sharpening than straight blades. Use this method to maintain their unique cutting performance without altering the serrated pattern.
4.5 Honing and Polishing
Honing and polishing are essential final steps in the sharpening process. Honing aligns the knife’s edge‚ maintaining sharpness‚ while polishing refines it for optimal performance. Chef’s Choice sharpeners often include specific stages for these processes. After sharpening‚ run the knife through the honing stage to realign the edge. Then‚ use the polishing stage with a finer abrasive to smooth and enhance the blade. Regular honing and polishing will keep your knife in peak condition‚ ensuring precise cuts and extending its lifespan. These steps are vital for maintaining both straight and serrated blades effectively.
Models and Their Specific Features
Chef’s Choice offers various models‚ such as the Professional 100 with diamond stone technology‚ and Model 120 with compact design for versatile sharpening needs and precision.
5.1 Chef’s Choice Professional 100 Diamond Hone
The Chef’s Choice Professional 100 Diamond Hone is a high-end electric sharpener designed for precision and versatility. It features advanced diamond stone technology for razor-sharp edges and minimal metal removal. This model is ideal for both straight and serrated knives‚ ensuring durability and consistent results. Its precise angle control and automatic edge-guidance system make it user-friendly. The Professional 100 is a top choice for home cooks and professionals alike‚ offering superior sharpening performance with minimal effort. Its compact design and low maintenance make it a practical addition to any kitchen.
5.2 Chef’s Choice Model 120
The Chef’s Choice Model 120 is an electric knife sharpener designed for ease and efficiency. It features a 3-stage sharpening system with diamond abrasive wheels for precise edge shaping; The model accommodates both straight and serrated knives‚ ensuring versatile use. Its automatic angle adjustment ensures a perfect edge every time. Compact and durable‚ the Model 120 is ideal for home and professional kitchens. It offers consistent results with minimal effort‚ making it a reliable choice for maintaining sharp knives. Its straightforward design ensures long-lasting performance.
5.3 Chef’s Choice Model 15
The Chef’s Choice Model 15 is a compact and efficient electric knife sharpener designed for home cooks and professionals. It features a two-stage sharpening system‚ combining diamond abrasives for sharpening and a polishing stage for honing. The model is versatile‚ accommodating straight-edge and serrated knives‚ and includes a built-in angle guide for precise edge alignment. Its compact design saves counter space‚ and the easy-clean feature makes maintenance simple. Known for its durability and consistent results‚ the Model 15 is a reliable choice for maintaining sharp knives with minimal effort.
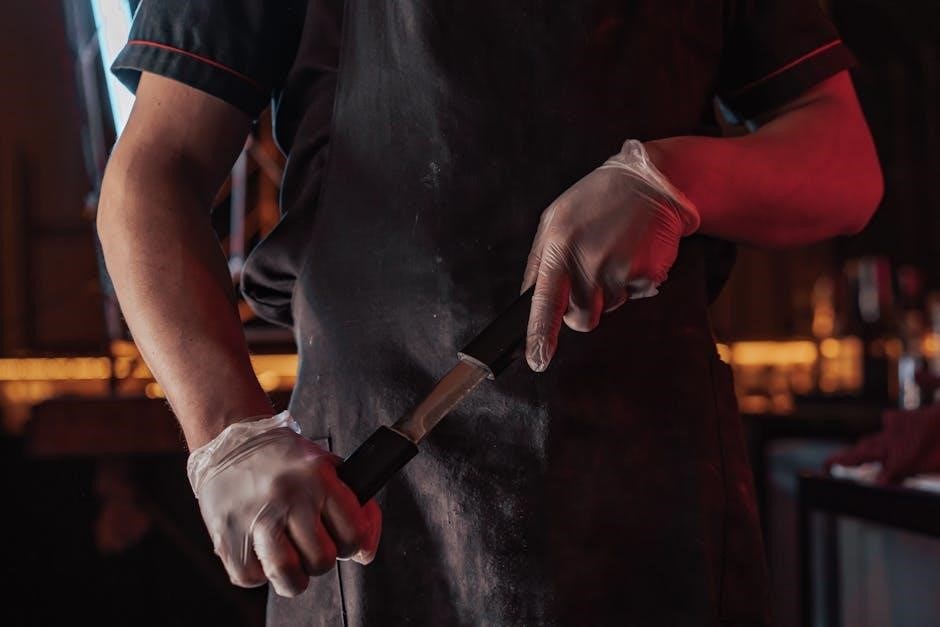
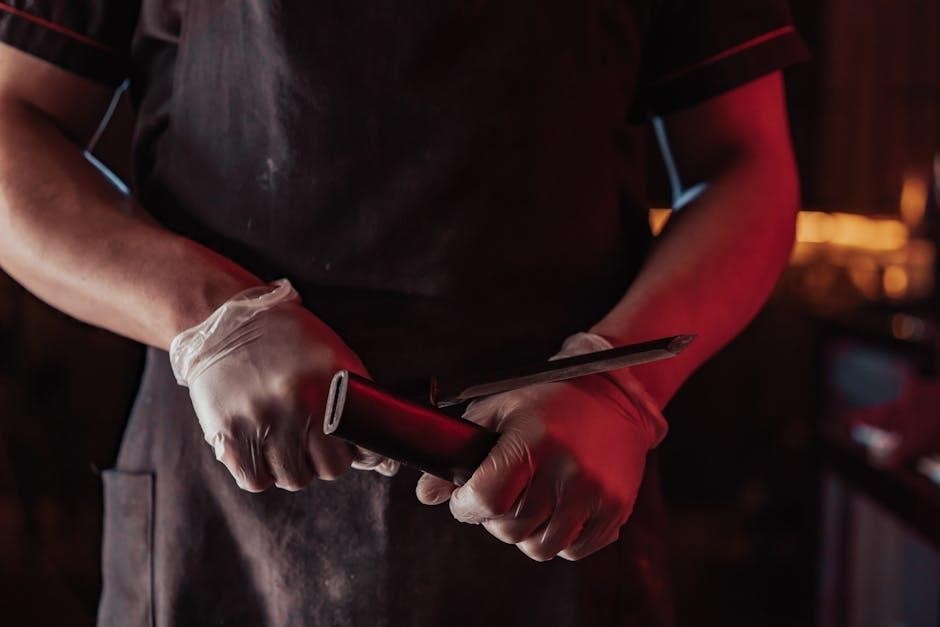
5.4 Chef’s Choice Model 310
The Chef’s Choice Model 310 is a manual knife sharpener designed for precision and ease of use. It features a 3-stage sharpening system with diamond stones for sharpening‚ honing‚ and polishing. This model is ideal for straight-edge knives and ensures a razor-sharp edge with minimal effort. Its compact design makes it perfect for home use‚ while the manual operation allows for full control over the sharpening process. The Model 310 is a great choice for those seeking a reliable‚ non-electric sharpener that delivers professional results.
5.5 Chef’s Choice Model 130
The Chef’s Choice Model 130 is a compact and efficient electric knife sharpener designed for home and professional use. It features a 3-stage sharpening system with diamond abrasive wheels‚ ensuring precise edge restoration. The sharpener is versatile‚ accommodating both straight and serrated knives. Its built-in angle guide ensures consistent sharpening angles‚ while the compact design saves countertop space. The Model 130 is easy to clean and maintain‚ making it a practical choice for those seeking reliable performance without advanced features. It’s ideal for sharpening a variety of knives efficiently.
5.6 Chef’s Choice Model 250
The Chef’s Choice Model 250 is a versatile electric knife sharpener designed for both straight-edge and serrated knives. It features CrissCross technology‚ which creates a sharp‚ long-lasting edge by sharpening and honing in two stages. The compact design includes a built-in angle guide for precise sharpening. Suitable for home and professional use‚ it works efficiently on various knife types‚ ensuring consistent results. The Model 250 is praised for its ease of use and durability‚ making it a reliable choice for sharpening and maintaining knives with minimal effort.
5.7 Chef’s Choice Model 463
The Chef’s Choice Model 463 is a versatile electric knife sharpener designed for both straight-edge and serrated blades. It features advanced diamond stone technology for precise sharpening and a three-stage system for sharpening‚ honing‚ and polishing. The model includes built-in angle selection‚ ensuring optimal edge geometry for various knife types. Known for its durability and ease of use‚ the Model 463 is a favorite among home cooks and professionals. Its compact design and consistent results make it a reliable choice for maintaining sharp knives with minimal maintenance required.
5.8 Chef’s Choice Model 1520
The Chef’s Choice Model 1520 is a high-end electric knife sharpener designed for precision and versatility. It features a advanced three-stage sharpening system‚ combining coarse‚ medium‚ and fine diamond stones for flawless edge restoration. The model includes a built-in angle guide‚ ensuring optimal sharpening angles for straight-edge and serrated knives; Compact and durable‚ the 1520 is ideal for both home and professional use‚ offering consistent results and long-lasting performance. Its sleek design and user-friendly interface make it a favorite among chefs and knife enthusiasts seeking superior sharpening outcomes.
Sharpening Techniques and Best Practices
Mastering sharpening techniques ensures optimal results with Chef’s Choice sharpeners. Maintain consistent angles‚ apply light pressure‚ and hone regularly for a razor-sharp edge. Avoid over-sharpening to prevent damage.
6.1 Understanding Sharpening Stages
Sharpening stages are essential for achieving a razor-sharp edge; The Chef’s Choice sharpener typically includes multiple stages‚ starting with coarse grinding to remove metal and establish the edge. Subsequent stages refine the edge‚ progressing to finer abrasives for polishing. Each stage ensures a smooth transition from shaping to sharpening‚ preventing over-aggressive removal of metal. Understanding these stages helps users optimize their sharpening process‚ avoiding unnecessary damage to the knife. Proper progression through each stage is key to achieving a professional-grade finish.
6.2 Choosing the Right Angle
Choosing the right angle is crucial for effective sharpening with the Chef’s Choice Knife Sharpener. The sharpener features a built-in angle selection guide‚ ensuring precise alignment for optimal results. For straight-edge knives‚ a 20-degree angle is typically recommended‚ while serrated knives may require a slightly wider angle‚ between 20 and 30 degrees. Proper angle selection ensures even edge geometry‚ prevents damage‚ and maximizes the knife’s cutting performance. Always refer to the specific knife type and its intended use to determine the ideal sharpening angle.
6.3 Avoiding Common Mistakes
When using the Chef’s Choice knife sharpener‚ avoid applying too much pressure‚ as it can damage the blade or the sharpener. Ensure the knife is aligned correctly using the built-in angle guide to prevent uneven sharpening. Sharpening in one direction only is essential; reversing the direction can dull the edge. Additionally‚ avoid sharpening serrated knives on straight-edge stages‚ as this can cause damage. Regularly cleaning the sharpener and replacing worn abrasive components will maintain its performance. By avoiding these mistakes‚ you can achieve consistent results.

Maintenance and Care of the Sharpener
Regularly clean the sharpener with a soft cloth and avoid harsh chemicals. Store it in a dry place to prevent rust. Replace worn parts promptly.
7.1 Cleaning the Sharpener
Regular cleaning of your Chef’s Choice knife sharpener ensures optimal performance and longevity; For electric models‚ turn the sharpener upside down to remove loose metal particles. Use a soft brush or cloth to wipe away debris from the sharpening wheels. For stone or diamond abrasive surfaces‚ dampen a clean cloth and gently scrub‚ avoiding soaking the unit. Never use harsh chemicals or submerge electrical components in water. Allow all parts to air dry before storage. For non-electric parts‚ a mild detergent and water solution can be used‚ followed by thorough drying.
7.2 Storing the Sharpener Properly
Proper storage is essential to maintain the performance and longevity of your Chef’s Choice knife sharpener. Always clean the sharpener thoroughly before storing it to prevent residue buildup. Store it in a cool‚ dry place‚ away from direct sunlight and moisture. Use the original packaging or a protective case to shield it from dust and accidental damage. Avoid exposing the sharpener to extreme temperatures or humidity‚ as this can degrade the abrasive components. Handle the sharpener with care‚ ensuring the sharpening wheels or stones are protected. Regularly inspect the storage area to ensure it remains clean and dry. By following these steps‚ you can preserve the sharpener’s efficiency and extend its lifespan.
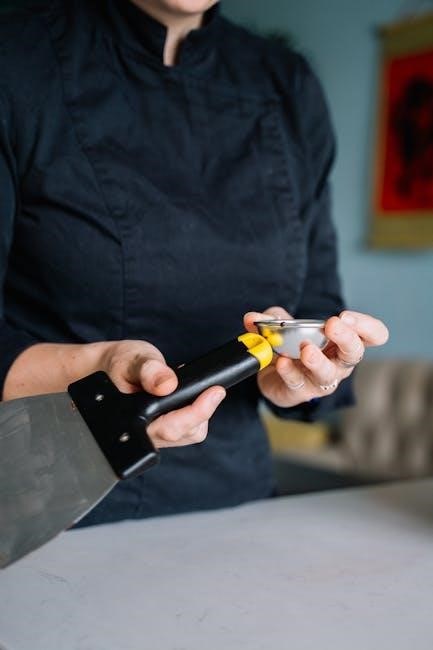
7.3 Replacing or Refreshing Abrasive Components
Regular maintenance of the Chef’s Choice knife sharpener involves replacing or refreshing its abrasive components to ensure optimal performance. Over time‚ the sharpening stones or diamond-coated surfaces may wear out‚ reducing their effectiveness. Users should inspect these parts periodically and replace them when necessary. For most models‚ replacement components are readily available from the manufacturer or authorized retailers. Refreshing the abrasive surfaces restores the sharpener’s ability to hone knives efficiently‚ maintaining razor-sharp edges and extending the tool’s lifespan. Always follow the manufacturer’s guidelines for replacement to ensure proper functionality.

Troubleshooting Common Issues
Common issues include knives not sharpening evenly or the sharpener malfunctioning. Check for proper alignment‚ clean debris‚ and ensure correct angle settings. If issues persist‚ contact support.
8.1 Knife Not Sharpening Properly
If your knife is not sharpening properly‚ check the angle guide alignment and ensure the knife is placed correctly in the slots. Verify that the sharpening stage is appropriate for the knife’s condition. Dull or damaged blades may require starting with a coarser stage. Also‚ ensure the sharpener is clean and free of debris‚ as clogged abrasives can reduce effectiveness. Follow the manufacturer’s instructions for proper technique and maintenance to achieve optimal results. Regularly refreshing the abrasive surfaces can also improve performance. Always maintain consistent pressure and motion for best outcomes.
8.2 Uneven Edge or Damage
An uneven edge or damage during sharpening can occur due to incorrect angle alignment or excessive pressure. To address this‚ ensure the knife is held at the recommended angle using the built-in guide. Apply light‚ consistent pressure to avoid applying uneven stress. If damage occurs‚ restart the sharpening process with a coarse stage to reset the edge. For minor unevenness‚ switch to a finer stage to polish and even out the blade. Always inspect the knife after each stage to prevent further issues.
8.3 Sharpener Not Turning On
If your Chef’s Choice knife sharpener fails to turn on‚ first check the power source. Ensure the unit is properly plugged into a functioning electrical outlet. Verify that the outlet is not overloaded with other appliances‚ as this may cause a circuit overload. Inspect the power cord for visible damage or wear. If the issue persists‚ check your circuit breaker or fuse box to ensure the circuit hasn’t tripped. If all these steps fail‚ contact Chef’s Choice customer support for further assistance‚ as it may indicate a technical malfunction.
Tips for Achieving Optimal Results
Consistent angle maintenance and light pressure yield the best outcomes. Regularly monitor the edge’s progress and avoid over-sharpening. Proper handling ensures safety and precision. Use the correct sharpening stage for your knife’s condition to achieve a razor-sharp finish.
9.1 Using the Correct Technique
To achieve optimal results with the Chef’s Choice knife sharpener‚ proper technique is essential. Always maintain the recommended angle for your knife type‚ as specified in the manual. Apply light‚ consistent pressure and draw the knife through the sharpening slots in a smooth‚ steady motion. Avoid applying too much force‚ which can damage the blade or the sharpener. Keep the knife aligned properly to ensure an even edge. Regular practice will help refine your skills‚ leading to sharper‚ more precise blades with each use.
9.2 Sharpening Frequency
Sharpening frequency depends on knife usage and type. For home cooks‚ sharpening every 2-3 months is sufficient‚ while professional chefs may need to sharpen weekly. Regular maintenance ensures optimal performance and prevents dulling. A simple test: if the knife struggles to slice a tomato or paper‚ it’s time to sharpen. Light honing between sharpenings can maintain edge retention. Consistency is key to extending knife life and maintaining effectiveness. Adjust frequency based on usage and knife type for best results with your Chef’s Choice sharpener.
9.3 Combining with Other Sharpening Tools
Combining the Chef’s Choice knife sharpener with other tools can enhance sharpening results. For instance‚ using a sharpening stone or steel after the Chef’s Choice can refine the edge further. This approach is particularly useful for achieving extreme sharpness or maintaining precision. Additionally‚ incorporating a honing steel into your routine can help maintain the blade’s edge between sharpening sessions. By integrating multiple tools‚ you can create a comprehensive sharpening system tailored to your needs‚ ensuring your knives remain in optimal condition for any culinary task.
The Chef’s Choice knife sharpener is a reliable tool for maintaining sharp blades‚ enhancing cooking efficiency. Its ease of use and effectiveness make it a valuable addition to any kitchen.
By following the instructions and tips‚ users can achieve professional-grade sharpness‚ ensuring optimal performance and longevity of their knives. A must-have for home cooks and professionals alike.
Chef’s Choice continues to set standards in sharpening technology‚ delivering consistent results that elevate culinary experiences. Invest in a sharp future with this trusted sharpening solution.
10.1 Summary of Key Points
The Chef’s Choice knife sharpener is a versatile and efficient tool designed to restore and maintain knife sharpness. It features diamond stone technology for precise sharpening and multiple stages to handle different blade types. Safety precautions‚ such as proper handling and electrical care‚ are crucial for optimal use. Regular maintenance‚ including cleaning and storing‚ ensures longevity. Troubleshooting common issues like uneven edges or malfunctioning motors can be addressed with simple checks. By following the instructions and best practices‚ users can achieve professional-grade sharpness consistently. Proper technique and sharpening frequency are key to maintaining knife performance.
10.2 Final Thoughts on Chef’s Choice Sharpener
The Chef’s Choice Knife Sharpener is a exceptional tool that combines innovation and efficiency to deliver razor-sharp results. Its diamond stone technology and multiple sharpening stages ensure a precise edge‚ while the built-in angle selection simplifies the process. Whether you’re a professional chef or a home cook‚ this sharpener consistently delivers professional-grade sharpness. Its durability and ease of use make it a worthwhile investment for anyone seeking to maintain their knives in optimal condition. A must-have for any kitchen.