manual transmission mercedes

Manual transmission Mercedes vehicles offer a unique driving experience, combining precision control and performance. They appeal to driving enthusiasts who value the connection between driver and car.

1.1 Overview of Manual Transmissions in Mercedes-Benz Vehicles

Manual transmissions in Mercedes-Benz vehicles are traditionally associated with driving purists, offering precise control and a direct connection to the car. These systems typically feature a clutch pedal and gearshift, allowing drivers to manually select gears for optimal performance. While less common in modern Mercedes models, manual transmissions remain popular in certain European market vehicles, emphasizing fuel efficiency and driver engagement.

1.2 Importance of Manual Transmissions for Driving Enthusiasts

Manual transmissions hold a special place for driving enthusiasts, offering unparalleled control and precision. They allow drivers to fully engage with the vehicle, fostering a deeper connection to the road. For those who prioritize performance and driving experience, manual transmissions provide a more immersive and rewarding journey, making them a preferred choice for purists seeking authenticity and thrill behind the wheel.

History of Manual Transmissions in Mercedes-Benz

Mercedes-Benz has a rich history with manual transmissions, dating back to its early models in the late 1800s. These transmissions were essential in the automotive industry’s formative years, providing the necessary control and efficiency for drivers. Over the decades, Mercedes-Benz continued to innovate and refine its manual transmission technology, ensuring it remained a staple in many of their vehicles even as automatic transmissions gained popularity. The enduring presence of manual transmissions in Mercedes-Benz reflects the brand’s commitment to both performance and driver engagement, catering to enthusiasts who value the tactile experience of driving.

2.1 Early Models Featuring Manual Transmissions

Mercedes-Benz’s earliest models, such as the Benz Patent-Motorwagen (1886), featured manual transmissions. These early systems were simple, with fewer gears, but laid the foundation for modern automotive technology. By the early 1900s, manual transmissions became a standard feature in Mercedes vehicles, offering drivers control and efficiency. The Daimler Motor Company’s Model 8/18 PS (1909) showcased improved manual gear systems, reflecting the brand’s commitment to innovation and performance.

2.2 Evolution of Manual Transmission Technology in Mercedes-Benz

Mercedes-Benz’s manual transmission technology evolved significantly over the decades. Early models featured non-synchronized gears, transitioning to fully synchronized systems in the 1950s for smoother shifting. The 1980s introduced lightweight materials and improved gear ratios for better performance. Modern systems, like the AMG 7-speed manual, offer precise control and efficiency. Despite advancements in automatics, Mercedes continued refining manuals, ensuring a balance of performance and driver engagement, though availability has declined in recent years.

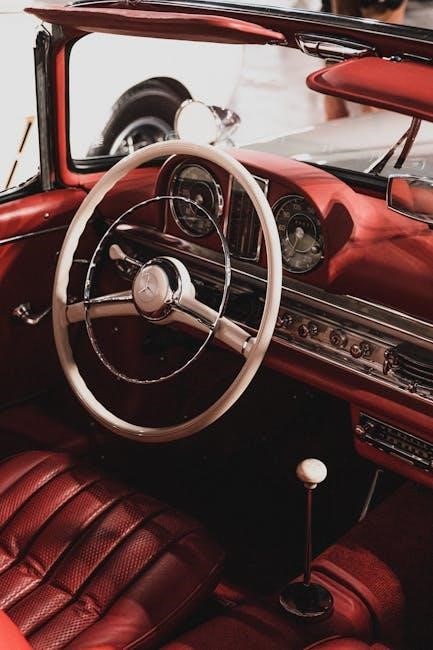
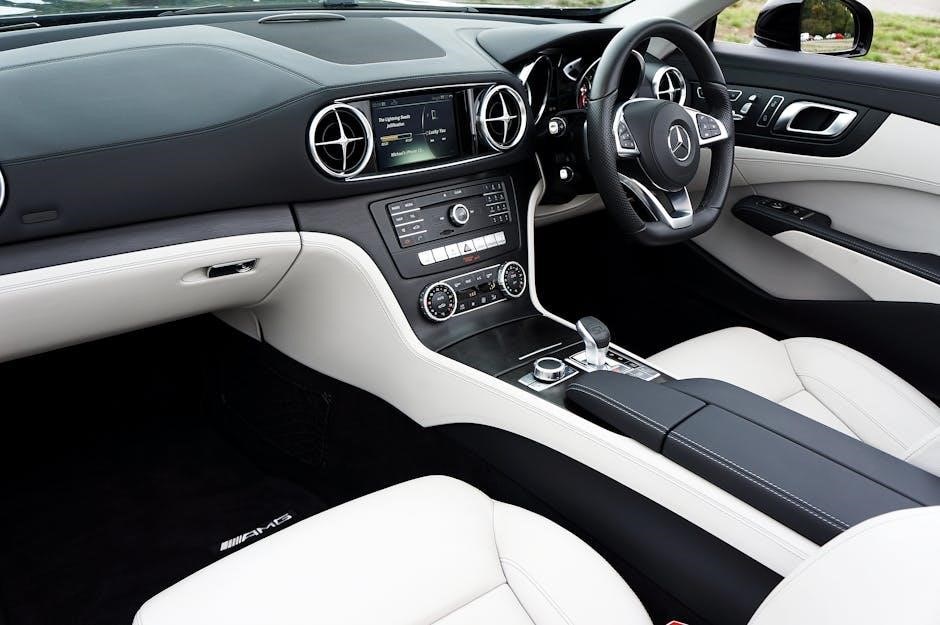
Driving Experience with Manual Transmission Mercedes

Driving a manual transmission Mercedes engages the driver, offering full control and enhancing performance. It creates a direct connection between the driver and the vehicle, providing a more immersive and thrilling driving experience.

3.1 Benefits of Manual Transmission for Control and Performance

Manual transmissions in Mercedes-Benz vehicles deliver exceptional control and performance, allowing drivers to precisely manage gear shifts. This direct engagement enhances acceleration and responsiveness, particularly in dynamic driving conditions. The ability to manually select gears provides better fuel efficiency and a more connected driving experience, making it a preferred choice for enthusiasts who value precision and power behind the wheel.

3.2 Tips for Mastering the Manual Transmission in Mercedes-Benz Cars

Mastering a manual transmission in Mercedes-Benz cars requires practice and patience. Start by familiarizing yourself with the clutch and gearshift operation. Slowly release the clutch while pressing the accelerator for smooth starts. Shift gears smoothly, avoiding abrupt movements. Use the clutch fully to prevent wear and tear. Practice in a safe, open area to build confidence. Feather the clutch at low speeds for better control, and always use the correct gear for the driving situation to optimize performance and efficiency.

Technical Specifications of Manual Transmission Mercedes

Mercedes manual transmissions typically feature a six-speed gearbox with optimized gear ratios for smooth acceleration. The dual-mass clutch ensures precise pedal feel, while synchronizer rings enhance shifting smoothness.

4.1 Key Components of the Manual Transmission System

The manual transmission system in Mercedes vehicles includes a six-speed gearbox, dual-mass clutch, and synchronizer rings for smooth shifting. The clutch pedal, gearshift lever, and linkage connect driver input to the transmission, ensuring precise control. Internal components like bearings and seals maintain durability, while electronic controls optimize performance and efficiency. Together, these elements provide a responsive and reliable driving experience.

4.2 Gear Ratios and Their Impact on Performance

Mercedes manual transmissions feature strategically designed gear ratios to optimize acceleration, fuel efficiency, and driving dynamics. Lower gears provide strong torque for quick launches, while higher gears enhance cruising efficiency. The carefully calibrated ratios ensure smooth power delivery across the RPM range, catering to both city driving and highway performance. This balance of ratios contributes to the vehicle’s overall responsiveness and driver satisfaction.

Maintenance and Care for Manual Transmission Mercedes

Regular maintenance is crucial for extending the life of a manual transmission. This includes timely oil changes, clutch inspections, and fluid checks to ensure optimal performance and durability.

5.1 Regular Maintenance Requirements for Optimal Performance

Regular maintenance for manual transmission Mercedes involves checking transmission fluid levels, inspecting the clutch system, and replacing worn components. Ensuring clean fluid and proper clutch alignment prevents wear and tear, while timely replacements avoid costly repairs. Following the manufacturer’s schedule guarantees smooth operation and extends the lifespan of the transmission system.

5.2 Common Issues and Solutions for Manual Transmissions

Common issues with manual transmissions in Mercedes include worn clutch plates, fluid leaks, and gear misalignment. Addressing these promptly prevents further damage. Replacing worn components and sealing leaks ensures smooth shifting. Regular fluid changes and inspections by certified technicians help maintain optimal performance and reliability, extending the transmission’s lifespan and preventing costly repairs down the line.

Fuel Efficiency and Manual Transmission Mercedes

Manual transmissions in Mercedes often improve fuel efficiency by enabling better driver control over gear shifts and engine speed, reducing unnecessary fuel consumption during driving.

6.1 How Manual Transmissions Improve Fuel Efficiency

Manual transmissions in Mercedes vehicles enhance fuel efficiency by allowing drivers to control gear shifts directly, optimizing engine speed for specific driving conditions. This reduces unnecessary fuel consumption and promotes more efficient power delivery. Unlike automatics, manuals avoid the energy losses associated with torque converters, enabling better energy utilization and improved mileage, especially in city driving or hilly terrain where precise control is beneficial.

6.2 Comparing Fuel Economy Across Different Mercedes-Benz Models

Mercedes-Benz models with manual transmissions often demonstrate varying fuel economy depending on the specific model and driving conditions. For instance, the A-Class and C-Class manuals typically offer better mileage in city driving, while larger models like the E-Class manual may show slightly lower efficiency. Comparing these models reveals that smaller, lightweight manual-transmission vehicles generally achieve superior fuel economy, making them a practical choice for eco-conscious drivers seeking performance and efficiency.

Manual vs. Automatic Transmission in Mercedes-Benz

Manual transmissions offer better fuel efficiency and driver control, appealing to enthusiasts. Automatics prioritize convenience and smoothness, ideal for urban driving and traffic conditions.

7.1 Pros and Cons of Manual vs. Automatic Transmissions

Manual transmissions offer better fuel efficiency, driver engagement, and control, but require skill and effort. Automatics provide convenience, smooth acceleration, and ease in traffic, but may lack performance edge and cost more. Manuals suit enthusiasts, while automatics cater to comfort seekers. Each has its trade-offs, making the choice dependent on driving habits and preferences.

7.2 Which Transmission Type is Better for Specific Driving Conditions

Manual transmissions excel in scenarios requiring precise control, such as uphill driving or performance-oriented situations, offering better fuel efficiency and driver engagement. Automatics, however, provide superior convenience and ease in heavy traffic and long commutes. The choice depends on driving habits and conditions, with manuals favoring control and efficiency, and automatics catering to comfort and simplicity.

Future of Manual Transmissions in Mercedes-Benz

Manual transmissions face declining demand due to automation trends, but Mercedes-Benz may continue offering them in niche models, blending tradition with modern hybrid or electric innovations.

8.1 Industry Trends and the Decline of Manual Transmissions

The automotive industry is shifting toward automatic and dual-clutch transmissions due to technological advancements and consumer preferences for convenience. This trend has led to a significant decline in manual transmission popularity across various markets, including Mercedes-Benz models.

8.2 Will Mercedes-Benz Continue to Offer Manual Transmissions?

Mercedes-Benz is expected to continue offering manual transmissions in select models, primarily for niche markets and driving enthusiasts. However, the focus has shifted toward automatic and dual-clutch transmissions due to declining demand. The company may prioritize manuals in performance-oriented vehicles, ensuring a balance between tradition and technological advancement to cater to specific customer preferences and regional demands, particularly in Europe.

Manual Transmission Mercedes Models

Mercedes-Benz offers manual transmissions in select models like the AMG C-Class and E-Class, catering to driving enthusiasts who prefer precise control and a more engaging experience.

9.1 Popular Mercedes-Benz Models with Manual Transmissions

Mercedes-Benz offers manual transmissions in select models, including the AMG C-Class and E-Class. These vehicles are favored for their precise control, sporty feel, and enhanced driving engagement. The manual option is particularly popular among driving enthusiasts who value the connection between driver and car. These models combine performance with fuel efficiency, making them a desirable choice for those seeking a traditional driving experience.

9.2 Discontinued Models That Once Featured Manual Transmissions

Mercedes-Benz has discontinued several models that once offered manual transmissions, such as the A-Class and B-Class. These compact cars were popular for their fuel efficiency and sporty handling. Additionally, the CLA and GLA models in certain markets also featured manual options before transitioning to automatics. Even the S-Class historically lacked a manual option, reflecting the brand’s shift toward prioritizing comfort over driver engagement in its lineup.

Owner Reviews and Feedback

Owners praise manual transmission Mercedes for its precise control and engaging driving experience. Many highlight the satisfaction of shifting gears, while others note the learning curve required.

10.1 What Owners Love About Manual Transmission Mercedes

Owners often praise manual transmission Mercedes for its precise handling and driver engagement. The ability to control gear shifts enhances the driving experience, offering a sense of connection to the vehicle. Many appreciate the thrill of mastering the clutch and accelerator, while others value the performance boost it provides. The manual transmission is frequently highlighted as a key feature that makes driving a Mercedes-Benz a more enjoyable and immersive experience.

10.2 Common Complaints and Criticisms from Owners

Some owners express frustration with the learning curve of manual transmissions, particularly in stop-and-go traffic. Others critique the clutch pedal’s feel and the gearshift’s notchiness. A few mention difficulty in mastering smooth starts on inclines. Additionally, the physical effort required for frequent shifting in urban driving is a common complaint. Limited availability in higher-end models also disappoints enthusiasts seeking manual options in premium vehicles.

Expert Opinions and Ratings

Experts praise manual transmission Mercedes for their precision and control, offering a more engaging driving experience. They highlight the vehicles’ reliability and performance capabilities, making them a top choice for enthusiasts.

11.1 What Automotive Experts Say About Manual Transmission Mercedes

Automotive experts often commend manual transmission Mercedes for their exceptional driving experience, offering precise control and a direct connection to the vehicle. Many highlight the smooth gear transitions and the ability to optimize performance, especially in sport-oriented models. Experts also note the reliability and durability of these transmissions, making them a preferred choice for enthusiasts seeking a more engaging and traditional driving experience.

11.2 Performance and Reliability Ratings

Manual transmission Mercedes models are renowned for their exceptional performance and reliability. These transmissions are praised for their smooth gear shifts, responsive acceleration, and fuel efficiency. Owners and critics alike highlight their robust engineering, which ensures durability and minimal mechanical issues. With consistent high ratings, manual transmissions in Mercedes vehicles remain a top choice for drivers seeking both power and dependability behind the wheel.

Manual transmissions in Mercedes-Benz vehicles offer a unique blend of driving engagement, performance, and efficiency, making them a cherished option for enthusiasts despite evolving automotive trends.

12.1 Summary of Key Points

Manual transmissions in Mercedes-Benz vehicles provide enhanced driver control, performance, and fuel efficiency. They cater to enthusiasts seeking an engaging driving experience. Regular maintenance is essential for optimal functionality. While industry trends favor automatics, Mercedes-Benz continues to offer manual options in select models. Owners praise the precision and thrill of manual driving, though some note the learning curve. Overall, manual transmissions remain a beloved choice for driving purists.

12.2 Final Thoughts on Manual Transmission Mercedes

Manual transmissions in Mercedes-Benz vehicles remain a timeless choice for driving purists. They offer unparalleled control, performance, and a deeper connection to the road. While industry trends lean toward automatics, Mercedes continues to cater to enthusiasts with select manual models. For those who value the thrill of driving, manual transmissions are a testament to the joy of being behind the wheel.

hyrox 8 week training plan pdf

Hyrox is a demanding fitness competition blending strength, cardio, and endurance challenges․ This 8-week training plan offers a structured approach to build physical and mental fitness progressively, ensuring peak race readiness․

What is Hyrox?

Hyrox is a unique fitness competition that combines strength training, cardio, and endurance challenges․ It consists of eight functional fitness workouts, such as sled pushes, rowing, and wall balls, interspersed with 1 km runs․ The event demands a blend of speed, strength, and stamina, making it a comprehensive test of full-body fitness․ Held in major cities worldwide, Hyrox attracts a diverse range of participants, from elite athletes to everyday fitness enthusiasts․ Its structured format and varied challenges make it a rewarding yet demanding experience for those who embrace physical and mental toughness․

Why an 8-Week Training Plan is Effective

An 8-week training plan for Hyrox is ideal for building progressive fitness and avoiding burnout․ It allows for a balanced mix of strength, endurance, and skill development, ensuring well-rounded preparation․ The structured timeline enables gradual increases in intensity and volume, enhancing adaptability and performance․ This period also supports mental toughness and strategic pacing, crucial for Hyrox’s demands․ By peaking at the right time, athletes can confidently tackle the event, knowing they’ve optimized their training and recovery․ Consistency and progression are key, making an 8-week plan both effective and sustainable for achieving peak race readiness․

Structure of the 8-Week Hyrox Training Plan

The 8-week Hyrox plan combines strength, endurance, and functional movements, with progressive overload and balanced recovery․ Each week focuses on specific goals, ensuring consistent improvement and peak readiness․

Weekly Breakdown: Progression and Goals

The 8-week Hyrox plan is divided into phases, each with specific objectives․ Weeks 1-2 focus on building a foundational base of strength and endurance․ By Week 3, Hyrox-specific movements are introduced, simulating race conditions․ Weeks 4-5 emphasize endurance and functional skill development, while Weeks 6-7 push intensity and race simulations․ The final week (Week 8) includes a taper to allow recovery and peak performance․ Each phase progressively increases intensity and volume, ensuring athletes adapt and improve without overtraining․ The structured progression ensures a balanced approach to fitness, targeting all aspects needed for Hyrox success․

Training Frequency: 3-4 Sessions per Week

The Hyrox training plan recommends 3-4 sessions weekly, each lasting about an hour․ This frequency balances intensity with recovery, allowing progressive fitness gains․ Sessions are divided into strength, endurance, and functional skill development․ For example, one day focuses on strength training like squats and deadlifts, while another emphasizes endurance with interval runs or rowing․ Functional movements, such as sled pushes and wall balls, are also incorporated to mimic race conditions․ This structured approach ensures consistent improvement in speed, power, and cardiovascular fitness without overtraining, making it ideal for both intermediate and advanced athletes preparing for Hyrox events․

Key Components of the Hyrox Training Plan

The plan combines strength training for power, endurance exercises for cardiovascular fitness, and functional movements to enhance skill and adaptability, ensuring comprehensive preparation for Hyrox events․

Strength Training for Power and Endurance

Strength training is a cornerstone of the Hyrox plan, focusing on compound movements like squats, deadlifts, and bench presses to build power and muscular endurance․ These exercises target the lower body and core, essential for Hyrox events․ Progression involves increasing intensity and volume over the 8 weeks, incorporating functional movements such as sled pushes and wall balls to simulate race conditions․ The goal is to enhance overall strength while maintaining endurance, ensuring athletes can handle the rigorous demands of the competition․ This balanced approach prepares the body for both the physical and mental challenges of Hyrox․

Endurance Training for Cardiovascular Fitness

Endurance training is vital for Hyrox, focusing on building cardiovascular fitness through running and cardio exercises․ The plan incorporates long steady-state runs to enhance muscular endurance and interval runs to boost speed and anaerobic capacity․ Tempo runs at a challenging pace improve lactate threshold and running efficiency․ These sessions progressively increase in intensity and duration over 8 weeks, ensuring athletes develop the stamina needed for Hyrox’s demanding 1 km runs between workouts․ Consistency and gradual progression are key to preparing the cardiovascular system for the race’s unique demands, ensuring athletes can maintain pace and endurance throughout the event․

Functional Movements and Skill Development

Functional movements are core to Hyrox training, enhancing athletic proficiency and race-specific skills․ The plan emphasizes exercises like burpees, lunges, and wall balls to mimic competition demands․ Skill development focuses on mastering techniques for sled pushes, rowing, and other Hyrox stations․ Athletes practice these movements in controlled settings to build efficiency and reduce fatigue․ Progression involves increasing reps and intensity, ensuring seamless transitions during races․ Dedicated sessions refine coordination and adaptability, crucial for Hyrox’s diverse challenges, helping athletes maintain consistency and peak performance throughout the event․

Nutrition and Recovery Strategies

A balanced diet fuels performance, with carbs, protein, and healthy fats essential for energy․ Adequate hydration supports recovery, while rest days and active recovery prevent overtraining․

Importance of a Balanced Diet

A well-balanced diet is crucial for optimizing performance and recovery in Hyrox training․ It provides the necessary energy, supports muscle repair, and enhances endurance․ Focus on whole foods like lean proteins, complex carbs, and healthy fats to fuel workouts and aid recovery․ Hydration is equally vital, ensuring proper bodily functions and performance․ A structured meal plan helps maintain consistency, preventing fatigue and injury․ Tailoring nutrition to individual needs ensures athletes are prepared for the physical demands of Hyrox, supporting both strength and cardiovascular fitness effectively throughout the 8-week plan․

Rest and Active Recovery Techniques

Rest and active recovery are essential for allowing the body to repair and adapt after intense Hyrox training․ Techniques like light yoga, stretching, and swimming promote blood flow without excessive strain․ Scheduling rest days prevents overtraining, ensuring muscles rebuild and strengthen․ Incorporating activities such as walking or gentle cycling aids in active recovery, maintaining mobility while reducing muscle soreness․ Adequate sleep and stress management further support recovery, enabling athletes to perform at their best․ Balancing rest with training is vital for peak performance and long-term progress in the Hyrox 8-week plan․

Equipment and Gear for Hyrox Training

Essential tools include a rowing machine, wall balls, sleds, barbells, and kettlebells․ These simulate race conditions and build strength and endurance for Hyrox-specific challenges effectively․

Essential Tools for Hyrox Workouts

A rowing machine is crucial for building cardiovascular endurance and simulating race-specific rowing segments․ Wall balls and sleds are key for strength and power development․ Barbells and kettlebells are essential for functional movements like squats and lunges, while jump ropes and medicine balls enhance agility and core strength․ These tools replicate Hyrox race conditions, ensuring athletes are well-prepared for the demands of the event․ Having access to these equipment pieces allows for effective training and progression throughout the 8-week plan․

Simulating Race Conditions

Simulating race conditions is vital for Hyrox preparation․ Replicate the event format by alternating 1 km runs with functional workouts, such as sled pushes and wall balls․ Incorporate rowing machine intervals to mimic race-specific demands․ Progressively increase intensity and volume to build race-day readiness․ Use interval runs and strength circuits to adapt to the unique challenges of Hyrox․ This approach ensures athletes are mentally and physically prepared for the demands of competition, fostering resilience and strategic pacing․ Consistent simulation builds confidence and reduces race-day surprises, helping athletes peak when it matters most․

Pre-Event Taper and Race Preparation

Reduce training volume by 40-60% in the final week to allow recovery․ Use dynamic stretching, light cardio, and mental rehearsals to prime the body for peak performance․

Reducing Training Volume Before the Event

Reducing training volume by 40-60% in the final week allows the body to recover and adapt․ This taper phase minimizes fatigue and prevents overtraining injuries, ensuring peak performance․ Replace high-intensity workouts with light activities like yoga or swimming to maintain mobility․ Focus on active recovery, such as stretching and foam rolling, to promote muscle repair․ Mental preparation becomes key during this period, with visualization techniques and race strategy reviews․ Properly timing the taper ensures athletes feel fresh and ready to tackle the Hyrox event with optimal energy and focus․

Priming the Body for Peak Performance

Priming the body involves strategic techniques to enhance physical and mental readiness․ Dynamic stretching and light cardio activate muscles and improve circulation․ Mental rehearsals of race scenarios build confidence and focus․ Proper hydration, balanced nutrition, and sufficient sleep are crucial for optimal energy levels․ Techniques like visualization and breathing exercises reduce stress and sharpen focus․ Gradual tapering of intense workouts ensures muscles are rested yet ready․ This comprehensive approach ensures athletes feel mentally sharp, physically prepared, and fully optimized for peak performance on race day․

Consistency and mental toughness are key to success․ Stay committed to the 8-week plan, trust the process, and believe in your preparation․ Race day confidence awaits!

Maintaining Consistency and Mental Toughness

Consistency is the backbone of any successful Hyrox training plan; Athletes must commit to regular workouts, ensuring progressive overload and adaptation․ Mental toughness is equally crucial, as Hyrox demands resilience and focus․ Techniques like visualization, positive self-talk, and goal-setting can enhance mental fortitude․ Staying disciplined and motivated, even during challenging sessions, is vital for reaching peak performance․ Remember, consistency breeds confidence, and mental strength transforms challenges into opportunities for growth․ By maintaining both, athletes can overcome obstacles and achieve their Hyrox goals with determination and resilience․

Final Summary: Getting Race Ready

The 8-week Hyrox training plan is a comprehensive journey to peak fitness, blending strength, endurance, and skill development․ By following the structured progression, athletes build confidence and avoid injury․ Tapering in the final week allows recovery, ensuring optimal performance․ Proper nutrition, hydration, and mental preparation are key․ Equip yourself with the right gear and mindset․ Stay focused, trust the process, and embrace the challenge․ With dedication and consistency, you’ll cross the finish line strong, prepared, and proud of your hard-earned progress․ Race readiness is achieved through discipline and strategic preparation—now is your time to shine․

venum gi size guide

Venum offers high-quality BJJ GIs in various sizes (A0-A4, F1-F4) and colors (white, black, blue). This guide helps determine the perfect fit through detailed measurements.

1.1 Overview of Venum BJJ Gis

Venum BJJ Gis are renowned for their premium quality, durability, and stylish designs. Available in sizes from A0 to A4 and F1 to F4, they cater to all body types and preferences. The Gis are crafted from high-grade materials, ensuring comfort and performance during training or competitions. Popular models like the Venum Contender and Venum Contender Evo offer a perfect blend of functionality and aesthetics. Designed for both men and women, these Gis feature tailored cuts, reinforced stitching, and breathable fabrics. Whether you’re a beginner or an advanced practitioner, Venum’s BJJ Gis provide a superior training experience. Their size charts ensure accurate fitting, making them a top choice for BJJ enthusiasts worldwide.

1.2 Importance of Proper Sizing

Proper sizing is crucial for comfort and performance in BJJ. A well-fitted GI ensures freedom of movement, preventing restrictions during rolls and drills. If the GI is too tight, it can cause discomfort and inhibit mobility. Conversely, an overly loose fit may lead to fabric bunching or exposure during training. Proper sizing also ensures compliance with competition regulations, as GIs must meet specific measurements. Additionally, sizing affects the GI’s durability, as improper fits can lead to premature wear. Venum’s size guide provides detailed measurements to help practitioners choose the ideal fit, balancing comfort, performance, and adherence to standards. Accurate sizing ensures optimal training and competition experience.

Venum GI Size Options

Venum offers an extensive range of GI sizes from A0 to A4 and F1 to F4, catering to men, women, and kids, with colors like white, black, and blue.

2.1 Sizes Available (A0, A1, A1.5, A2, A2.5, A3, A4, F1, F2, F3, F4)

Venum offers a wide range of BJJ GI sizes to accommodate different body types and preferences. The sizes available include A0, A1, A1.5, A2, A2.5, A3, A4, F1, F2, F3, and F4. These sizes cater to both male and female practitioners, ensuring a proper fit for everyone. The A sizes are primarily designed for adult male practitioners, while the F sizes are tailored for women, offering a more fitted cut. Each size corresponds to specific height, sleeve length, and leg length measurements, ensuring a comfortable and functional fit for training and competition. Venum’s size variety guarantees that practitioners can find a GI that matches their body type and performance needs.

2.2 Size Chart Measurements (Height, Sleeve Length, Leg Length)

When using the Venum GI size chart, measurements are categorized into three key areas: height, sleeve length, and leg length. Height is measured from the floor to the top of the head while standing against a wall without shoes. Sleeve length is calculated from the center back of the neck to the wrist, ensuring proper coverage. Leg length is measured from the natural waistline to the ankle bone. These measurements are crucial for selecting the correct size, as they ensure the GI fits comfortably and meets competition standards. Proper alignment with the size chart guarantees optimal performance and mobility during training or competition.

How to Measure Yourself

Measure height, sleeve length, leg length, and waist size accurately. Place against a wall for height, measure sleeves from shoulder to wrist, and legs from waist to ankle. Use a tape measure for waist size, ensuring it’s not too tight. This ensures the best fit for your Venum GI.

3.1 Measuring Height

To determine your height accurately for the Venum GI size guide, stand against a flat wall without shoes. Ensure your feet are flat on the floor, with your shoulders relaxed and back straight. Place a measuring tape or another object horizontally against the wall just above your head. Mark the spot where the tape meets the wall. Measure the distance from the floor to this mark using a measuring tape or ruler. This will give you your precise height, which is essential for selecting the correct GI size. Accurate height measurement ensures a proper fit, preventing sleeve or pant length issues. Always double-check your measurements for consistency.

3.2 Measuring Sleeve Length

To measure your sleeve length accurately, stand straight and relax your arms by your sides. Place the tape measure at the center of your back, just below the base of your neck. Extend the tape measure over your shoulder, down your arm, and stop at your wrist. Ensure the tape measure follows the natural curve of your arm but remains straight. This measurement will help determine the correct sleeve length for your Venum GI. Accurate sleeve length ensures proper fit and comfort during training. Refer to Venum’s size chart to match your measurement with the appropriate GI size. This step is crucial for optimal performance and mobility on the mat.

3.3 Measuring Leg Length

To measure your leg length for a Venum GI, stand against a wall without shoes. Mark the top of your head on the wall, then measure from this point to the floor. This gives your total height, which helps determine the appropriate GI size. Ensure the tape measure is straight and not angled. Leg length is crucial for ensuring the pants are not too long or too short. For accurate sizing, match this measurement to Venum’s size chart. If your leg length aligns with a specific size, it guarantees a proper fit. Always consider shrinkage when choosing your size, as GIs may shrink slightly after washing.

3.4 Measuring Waist Size

To measure your waist size for a Venum GI, wrap a tape measure around your natural waistline, just above your hips. Ensure the tape is not overly tight or loose. This measurement helps determine the optimal fit for the gi’s waist and closure system. Stand upright and relax your stance for accuracy. If you’re unsure, use a mirror to verify the tape’s position. Proper waist measurement ensures the gi sits comfortably and provides the right amount of coverage and support. Accurate sizing is crucial for both performance and comfort during training or competition.

Choosing the Right Fit

Compare your measurements with Venum’s size chart to ensure a balanced fit. Opt for a larger size for a looser GI or a smaller size for a fitted style.

4.1 Tips for Selecting the Perfect Size

To ensure the best fit, measure your height, sleeve length, and leg length accurately. Compare these measurements with Venum’s size chart; Consider whether you prefer a loose or fitted GI. If unsure, opt for the larger size for a comfortable fit. Keep in mind that GIs may shrink slightly after washing. Check the weight and material of the GI, as heavier models might feel tighter. If you’re between sizes, choose based on your preference for sleeve and pant length. Refer to Venum’s specific charts for men, women, or kids to match your measurements precisely. This ensures optimal comfort and performance during training.

4.2 Understanding Fit Preferences (Looser vs. Fitted)

Choosing between a looser or fitted GI depends on personal preference, training style, and comfort. A looser fit provides more mobility, ideal for drills or casual training, while a fitted GI offers a snug feel, often preferred for competitions. Venum GIs cater to both preferences, with sizing options ensuring comfort and performance. Consider body type, movement needs, and fabric shrinkage when deciding. For a looser fit, opt for a slightly larger size; for a fitted feel, choose a smaller size. Balancing aesthetics, functionality, and regulation requirements helps in making the right choice for optimal performance on the mat.

Venum Size Charts

Venum provides detailed size charts for Men’s BJJ GIs, Women’s BJJ Kimonos, and Kids’ BJJ Kimonos, including measurements for height, sleeve length, and leg length;

5.1 Men’s BJJ GI Size Chart

Venum’s Men’s BJJ GI Size Chart provides a detailed guide to help athletes choose the right fit. Sizes range from A0 to A4, catering to different body types. Each size corresponds to specific measurements for height, sleeve length, and pant length. For example, A0 fits shorter practitioners with smaller frames, while A4 accommodates taller and broader individuals. The chart ensures accuracy by measuring height without shoes, sleeve length from the shoulder to the wrist, and pant length from the waist to the ankle. By aligning these measurements, practitioners can select a GI that meets competition standards and personal comfort preferences. Proper fit is essential for performance and compliance with BJJ regulations.

5.2 Women’s BJJ Kimonos Size Chart

Venum’s Women’s BJJ Kimonos are designed to provide a comfortable and precise fit for female practitioners. The size chart includes options from F1 to F4, catering to various body types and preferences. Each size corresponds to specific measurements for height, sleeve length, and leg length, ensuring accuracy. For instance, F1 suits shorter athletes with narrower builds, while F4 accommodates taller individuals with broader frames. The chart also considers shrinkage, a common factor in GI sizing, to help choose the perfect fit. Women are advised to measure themselves carefully and compare their dimensions to the chart for optimal comfort and performance on the mat. Proper sizing ensures compliance with competition standards and enhances training efficiency.

5.3 Kids’ BJJ Kimonos Size Chart

Venum offers a range of sizes for kids’ BJJ kimonos, ensuring a perfect fit for young practitioners. Sizes typically range from F1 to F4, catering to different age groups and body types. To determine the correct size, measure the child’s height, sleeve length, and leg length accurately. Place the child against a wall without shoes to measure height. Sleeve length is measured from the center back to the wrist, and leg length from the waist to the ankle. Choose the size that aligns with these measurements for optimal comfort and movement. Proper sizing ensures the gi fits well and meets competition standards. Always refer to Venum’s official size chart for precise measurements.

Factors Influencing Size Selection

Shrinkage, weight fluctuations, and GI style impact size choices. Choose larger sizes for looser fits or smaller for fitted styles, considering personal comfort and training needs.

6.1 Shrinkage and Weight

Shrinkage and weight are critical factors when selecting a Venum GI. High-quality BJJ GIs, like those from Venum, are made from thick, durable fabrics that can shrink slightly after washing. This shrinkage can affect the fit, particularly in sleeve and leg lengths. Practitioners should consider their weight and body type when choosing a size, as heavier individuals may prefer a slightly larger GI for comfort. Additionally, weight fluctuations can impact how the GI fits over time. Venum size charts account for shrinkage, but it’s essential to measure carefully and consider whether you prefer a looser or tighter fit after washing. This ensures optimal performance and comfort during training.

6.2 GI Cut and Style

The GI cut and style significantly influence size selection. Venum offers various styles, such as standard, slim, and competition cuts, each designed for different preferences and body types. Slim-cut GIs provide a more fitted look, while standard cuts offer a looser fit. Competition cuts are tailored for athletes, balancing comfort and regulation requirements. The style also affects sleeve and pant lengths, with some designs featuring shorter or longer cuts for specific needs. Understanding your preferred fit and training style helps narrow down the ideal GI. Always consider how the cut aligns with your body type and training goals for optimal performance and comfort on the mat.

left center right rules pdf

Left Center Right (LCR) is a popular, fast-paced dice game suitable for players of all ages. It involves strategic chip passing based on dice rolls;

1.1 Overview of the Game

Left Center Right (LCR) is a fast-paced, family-friendly dice game where players pass chips based on the outcomes of rolling three dice. Each die directs chips to the left, center, or right, with dots allowing players to keep chips. The goal is to be the last player with chips. It’s easy to learn, requiring three or more players and starting with an equal number of chips. The game combines luck and strategy, making it enjoyable for all ages. Official rules are available as a downloadable PDF for clarity.

1.2 History and Popularity of LCR

Left Center Right (LCR) has gained widespread popularity as a simple yet engaging dice game suitable for all ages. While its exact origins are unclear, it has become a staple at gatherings and parties due to its easy-to-learn nature. The game’s versatility allows it to be enjoyed by small or large groups, making it a favorite for family events and casual meetups. Its popularity is further boosted by the availability of official rules and printable guides, ensuring clarity and accessibility for new players.

Setup and Equipment

The game requires three LCR dice, three or more players, and chips or tokens. Each player starts with an equal number of chips. Official rules are available in a downloadable PDF guide for clarity.

2.1 Materials Needed to Play

To play Left Center Right, you need three specialized LCR dice, a set of chips or tokens, and at least three players. Each player starts with an equal number of chips. If LCR dice are unavailable, regular six-sided dice can be used with predefined rules. The game also requires a flat surface for rolling dice and a central area for placing chips. For convenience, printable guides and official rules are available in a downloadable PDF format online.

2.2 Number of Players and Initial Chip Distribution

Left Center Right requires a minimum of three players, though it can accommodate larger groups. Each player begins with an equal number of chips, typically three per person. If there are more players, additional tokens or coins can be used to ensure everyone starts with the same amount. The initial chip distribution ensures fairness and sets the stage for the game’s competitive and strategic nature.

Basic Rules of Left Center Right

Left Center Right involves rolling dice and distributing chips based on the dice faces. Players pass chips left, center, or right, or keep them. The goal is to be the last player with chips remaining.

3.1 Understanding the Dice Directions

Left Center Right dice are labeled with directions (Left, Center, Right) and dots. Each face determines chip distribution: Left passes chips to the left player, Center adds chips to the pot, and Right passes to the right. Dots allow players to keep chips. Standard substitutions are: 4 (Left), 5 (Center), 6 (Right), and 1-3 (dots). Special rules, like passing two chips for multiple directions, enhance gameplay. The rules are detailed in the official PDF and Google Doc for clarity. This system ensures fast-paced, strategic fun for all ages.

3.2 Rolling the Dice and Distributing Chips

Players roll dice equal to their current chip count, with each die determining chip distribution. For each Left, pass a chip to the player on your left; for Center, place a chip in the center pot; and for Right, pass a chip to the player on your right. Dots allow you to keep a chip. Multiple direction rolls require passing multiple chips. The process repeats until one player remains with chips, winning the game. Strategy is key to retaining chips. The official PDF outlines these rules in detail.

3.3 Special Rules and Variations

Some versions of LCR introduce special rules, such as rolling three dots, which may allow a player to keep all their chips. Variations include themed editions or alternative dice assignments. For example, assigning specific faces to left, right, or center adds diversity. Optional rules may also include keeping a chip for certain symbols, like hearts. These variations enhance gameplay and strategy, offering unique twists for players seeking more complexity. The official PDF details standard and optional rules for customization.

Gameplay Mechanics

Gameplay involves rolling dice based on the number of chips a player has, with each die directing chips left, right, or center. The game continues until one player holds all chips.

4.1 Turn-Based Rolling and Chip Passing

Players take turns rolling dice, with the number of dice rolled matching the number of chips they currently hold. Each die face corresponds to a direction: Left, Right, or Center, or dots (keep). Players pass chips according to the rolled directions, ensuring dynamic interaction. The game progresses clockwise, with each roll determining chip distribution. Rolling dots allows players to retain chips, adding strategic retention opportunities. This turn-based system ensures engaging and unpredictable gameplay for all participants.

4.2 Handling Multiple Dice Rolls

When rolling multiple dice, each die independently determines chip distribution. Players roll as many dice as they have chips, with each die face indicating a direction or a dot. Multiple directions may require passing chips to left, right, or center simultaneously. Dots allow players to keep chips, reducing the number of dice rolled in future turns. Strategic decision-making is crucial, as managing multiple rolls can lead to rapid chip loss or retention, adding excitement and challenge to the game.

Winning the Game

The game concludes when one player holds all the chips. This player is declared the winner. The objective is to accumulate all chips by strategically passing them.

5.1 Endgame Conditions

The game concludes when only one player remains with chips, making them the winner. The center pot is typically not part of the final chips, as it’s a communal pool. Players are eliminated when they run out of chips, and the last player standing claims victory. The objective is to strategically pass chips to others while retaining as many as possible. The game’s end is determined by the depletion of chips among all but one player, ensuring a clear winner.

5.2 The Last Player with Chips

The last player with chips is declared the winner, as all others have depleted their chip reserves. This player claims all remaining chips in the center pot, solidifying their victory. The game’s conclusion is straightforward, with the final player standing as the ultimate winner. The excitement lies in the unpredictability of chip distribution, making it a thrilling race to be the last one holding chips.

Strategies and Tips

Strategies involve managing chips wisely and adapting to dice outcomes. Tips include focusing on chip retention and minimizing losses through smart decisions during rolls.

6.1 Maximizing Chip Retention

Maximizing chip retention is crucial for success in Left Center Right. Focus on holding onto dots, as they allow you to keep chips. Minimize passing chips by strategically rolling dice that result in fewer passes. Avoid unnecessary risks, especially when chip counts are low. Adapt your strategy based on the number of chips you have, ensuring you retain as many as possible to stay in the game longer and increase your chances of winning.

6.2 Avoiding Common Mistakes

Avoiding common mistakes in Left Center Right is key to improving your gameplay. Many players overlook the importance of managing their chip count strategically. Ignoring the value of dots, which allow you to keep chips, can lead to unnecessary losses. Additionally, poor timing when passing chips to the left, center, or right can deplete your resources quickly. Stay focused on your chip count and adapt your strategy to minimize losses, ensuring you retain enough chips to stay competitive throughout the game.

Variations of the Game

Left Center Right offers themed versions and alternative rules, such as special dice assignments or bonus chips, adding diversity to the classic gameplay experience.

7.1 Alternative Rules and Expansions

Players can modify Left Center Right by assigning different dice faces or adding special rules, such as bonus chips for rolling three dots. Themed versions, like holiday editions, offer unique twists. Expansions may include additional dice or tokens, enhancing gameplay complexity. These variations allow players to customize the game to suit their preferences, keeping it fresh and engaging while maintaining the core mechanics of chip distribution and strategic passing.

7.2 Themed Versions of LCR

Themed versions of Left Center Right add unique twists, such as holiday editions or special event-based rules. For example, a Christmas-themed version involves passing “gifts” instead of chips, with the goal of ending up with the most gifts. Other themes may include custom dice designs or special actions tied to specific events. These variations allow players to customize the game for different occasions, making it more engaging and tailored to their preferences while maintaining the core gameplay mechanics.

Left Center Right is an engaging, easy-to-learn game perfect for all ages, combining luck and strategy. Its simplicity makes it a great social activity for any gathering.

8.1 Final Thoughts on LCR

Left Center Right is a simple yet engaging game that combines luck and strategy, making it accessible to all ages. Its fast-paced nature ensures quick rounds, keeping players entertained. The goal of being the last with chips adds excitement, while the rules remain easy to grasp. Whether played casually or competitively, LCR is a great social activity that fosters fun and interaction among participants. It’s a perfect choice for gatherings, offering hours of enjoyment for everyone involved.

8.2 Encouragement to Try the Game

LCR is an easy-to-learn game perfect for all ages. Its quick rounds make it ideal for parties or family nights. Minimal equipment is needed, making it accessible to everyone. The game is a great way to bring people together, fostering laughter and fun. If you’re looking for an engaging and simple game, LCR is an excellent choice that ensures everyone has a great time.

Additional Resources

Find the official Left Center Right rules PDF in the download section. Access the Google Doc version here:https://docs.google.com/document/d/1CP-lDIRQlz3ksakaZG99HghOUKCvcW2jECi_qXUgB3U/edit?usp=sharing. Discover printable guides and dice for enhanced gameplay.

9.1 Accessing the Official Rules PDF

The official Left Center Right rules are available as a downloadable PDF. Visit the download section or access the Google Doc version here: Google Doc Link. This PDF provides detailed instructions, setup guidelines, and gameplay rules. It’s an essential resource for new players and hosts. Print it for easy reference during gatherings or share it with friends to ensure everyone understands the rules before starting the game.

9.2 Finding Printable Guides and Dice

Printable guides for Left Center Right are widely available online. You can download PDF rules sheets with a green felt background and red dice designs. Additionally, printable chip templates are offered for those without physical tokens. Dice can be purchased or substituted with standard six-sided dice using assigned rules. Visit the official resources or online marketplaces for themed versions, such as Christmas or outdoor variations. Ensure you have all materials before starting the game for a smooth experience.

house of the dragon season 2 episode 1 parents guide

This guide provides essential insights for parents considering House of the Dragon Season 2 Episode 1. Rated TV-MA and 18 in some regions, the episode contains graphic violence, explicit sexual content, and strong language. Understanding the mature themes and intense scenes is crucial for making informed decisions about viewing with minors. This guide helps navigate the complexities of the show’s content, ensuring responsible and mindful consumption.

Content Rating Overview

House of the Dragon Season 2 Episode 1 is rated TV-MA in the U.S. and 18 in the UK and New Zealand. It contains graphic violence, explicit sex scenes, and strong language, making it unsuitable for younger audiences.

2.1. TV-MA Rating and Its Implications

The TV-MA rating signifies content intended for mature audiences only. This includes explicit sex scenes, graphic violence, and strong language. The rating implies that the episode is unsuitable for viewers under 17, as it contains elements that may be disturbing or inappropriate for younger audiences. Parents are strongly advised to exercise discretion and consider the potential impact on minors.

2.2. Severe Content Categories: Sex, Violence, and Profanity

House of the Dragon Season 2 Episode 1 contains explicit sexual content, graphic violence, and frequent profanity. Sex scenes include full frontal nudity and implied acts, while violence involves brutal killings and gore. Strong language is prevalent throughout, adding to the mature tone. These elements are intense and may be disturbing for younger or sensitive viewers, aligning with the TV-MA rating and reinforcing the need for parental discretion.

Violence and Gore in Episode 1

Episode 1 features graphic violence and gore, including brutal killings and intense battle scenes. A child’s implied off-screen murder adds to the disturbing content, making it unsuitable for young audiences.

3.1. Graphic Violence and Gore Scenes

Episode 1 contains graphic violence and gore, including brutal killings and intense battle scenes. A child’s implied off-screen murder and childbirth complications with graphic imagery are particularly disturbing. These scenes are not suitable for young audiences due to their intensity and mature nature.

3.2. Specific Violent Acts and Their Impact

Episode 1 features graphic violence, including decapitations and mutilations, which are depicted in vivid detail. The emotional weight of these acts intensifies their impact, making them unsuitable for younger viewers. Parents should be aware that such content may provoke strong emotional responses and is not appropriate for children due to its mature and disturbing nature.

Sexual Content and Nudity

The episode contains explicit sex scenes and graphic nudity, including full frontal depictions. These elements are frequent and detailed, making the content unsuitable for younger audiences. Parental discretion is strongly advised due to the mature nature of these scenes.

4.1. Explicit Sex Scenes and Nudity

House of the Dragon Season 2 Episode 1 features explicit sex scenes, including simulated acts and full frontal nudity. A notable orgy scene with graphic content and incestuous themes is present, alongside other intimate moments. These scenes are detailed and frequent, contributing to the show’s mature rating; Parents should be aware of the explicit nature of these sequences, as they are unsuitable for younger audiences and may require careful consideration before allowing minors to view.

4.2. Orgy Scene and Incestuous Themes

House of the Dragon Season 2 Episode 1 includes a graphic orgy scene with full frontal nudity, involving multiple characters. This sequence is explicit and extends to incestuous themes, adding layers of complexity and moral ambiguity. The content is deeply mature and potentially distressing, making it unsuitable for younger audiences. Parents should be particularly cautious due to the nature of these scenes, which are central to the episode’s adult-oriented narrative and themes.

Offensive Language and Profanity

Frequent offensive language and strong profanity are present, making it unsuitable for young viewers. The TV-MA rating reflects its mature themes and explicit content.

5.1. Frequency and Severity of Curse Words

The episode features frequent and severe use of curse words, contributing to its TV-MA rating. Profanity is intense, with characters often using explicit language in tense and emotional scenes. This makes the content unsuitable for younger audiences, emphasizing the need for parental discretion. The harsh language aligns with the show’s mature themes, reflecting the gritty and volatile world portrayed.

Mature Themes and Complex Relationships

The episode explores intricate alliances, power struggles, and betrayal, weaving a complex web of political intrigue and emotional depth. These themes require a mature audience.

6.1. Betrayal, Power Struggles, and Political Intrigue

Episode 1 delves into the Targaryen family’s internal conflicts, showcasing betrayal and ruthless power struggles. Political intrigue dominates as alliances are forged and broken, highlighting the dangerous pursuit of the Iron Throne. These mature themes are central to the narrative, emphasizing the consequences of ambition and deception, making it unsuitable for younger audiences unfamiliar with such complex moral dilemmas and strategic manipulations.

6.2. Emotional and Psychological Complexity

Episode 1 explores deep emotional struggles and psychological depth, particularly among key characters like Rhaenyra. The narrative delves into personal turmoil, loyalty conflicts, and the emotional toll of power. These complex themes add layers to the story but may be challenging for younger viewers to process. The intricate character dynamics and moral dilemmas highlight the maturity of the content, making it essential for parental discretion and guidance.

Trigger Warnings for Sensitive Viewers

Episode 1 contains disturbing imagery, including childbirth complications and graphic violence. Sensitive viewers should be aware of intense emotional and violent scenes that may cause distress. Parental guidance is strongly advised to protect younger audiences from potentially traumatic content.

7.1. Childbirth Complications and Graphic Scenes

The episode features a harrowing childbirth scene with graphic complications, including a mother undergoing a violent procedure to save her child. This intense sequence, combined with the implied off-screen murder of a child, carries significant emotional weight. These scenes may deeply disturb sensitive viewers, particularly those affected by similar experiences. Parental guidance is essential to protect younger audiences from such traumatic content.

7.2. Implied Off-Screen Violence and Disturbing Imagery

Episode 1 includes disturbing imagery, such as a child’s implied off-screen murder, which adds emotional distress. The childbirth scene, involving graphic violence, further intensifies the unsettling atmosphere. These elements, while not explicitly shown, carry a strong psychological impact. Parents should exercise caution, as such content may trigger sensitive viewers, especially those affected by similar themes. The implied violence and haunting visuals heighten the episode’s mature tone and potential for emotional distress;

Age Recommendations and Restrictions

House of the Dragon Season 2 Episode 1 is rated TV-MA, recommending viewers be 17 or older due to mature content, including graphic violence and explicit scenes.

8.1. Minimum Age Requirement for Viewing

House of the Dragon Season 2 Episode 1 is rated TV-MA, suggesting viewers should be at least 17 years old. This recommendation aligns with the presence of graphic violence, explicit sexual content, and strong language. The mature themes and intense scenes make it unsuitable for younger audiences, emphasizing the need for parental discretion to protect children from exposure to potentially harmful or disturbing material.

8.2. Reasons Behind the Mature Content Warning

The mature content warning for House of the Dragon Season 2 Episode 1 stems from its graphic violence, explicit sexual scenes, and strong profanity. These elements, combined with intense emotional and psychological themes, create a viewing experience unsuitable for minors. The explicit nature of the content necessitates the TV-MA rating, ensuring parents are aware of the potential impact on younger viewers and can make informed decisions regarding access.

Comparison with Other Episodes in Season 2

Episode 1, while containing graphic content, is relatively tamer compared to later episodes. Subsequent episodes intensify in violence, explicit scenes, and disturbing themes, escalating the mature elements significantly.

9.1. Intensity of Content in Episode 1 vs. Others

Episode 1 of Season 2 contains graphic violence and explicit scenes but is relatively less intense compared to subsequent episodes. Later episodes escalate in severity, featuring more disturbing themes, prolonged gore, and intense sexual content. While Episode 1 sets a mature tone, the season progresses with heightened intensity, making it crucial for parents to assess each episode’s content before allowing teen viewing.

Parental Discretion Advised

House of the Dragon Season 2 Episode 1 contains mature content, including graphic violence, explicit sexual scenes, and strong language. Parental guidance is strongly recommended.

10.1. Guidance for Watching with Teenagers

Parents should carefully consider the maturity of their teenagers before allowing them to watch House of the Dragon Season 2 Episode 1. The episode contains graphic violence, explicit sexual content, and strong language, making it unsuitable for younger or sensitive teens. It is advisable to preview the content beforehand to assess its appropriateness. Accompanying the viewing with open conversations can help teenagers understand the context and themes. Setting clear boundaries and discussing the differences between fiction and real-life values is essential for younger audiences.

10.2. Importance of Post-Viewing Discussions

Engaging in post-viewing discussions with teenagers is crucial after watching House of the Dragon Season 2 Episode 1. Parents should address the graphic violence, explicit content, and complex themes to ensure understanding and context. These conversations can help teens differentiate between fiction and real-life values, fostering critical thinking and emotional resilience. Open dialogue encourages reflection on the show’s moral dilemmas and promotes a healthier perspective on its mature elements.

Streaming Platform Ratings and Warnings

HBO rates House of the Dragon Season 2 Episode 1 as TV-MA, indicating mature content. Neon self-rates it as 18, warning of disturbing content, nudity, and explicit sex scenes, aligning with global streaming standards for adult audiences.

11.1. HBO’s Content Advisory for Episode 1

HBO rates House of the Dragon Season 2 Episode 1 as TV-MA, noting content that may disturb, offensive language, sex scenes, and violence. The advisory highlights graphic violence, strong sexual content, including nudity and simulated sex acts, and frequent use of profanity.

Parental discretion is strongly advised due to mature themes and disturbing imagery, such as implied off-screen violence and childbirth complications. HBO’s warning ensures viewers are informed about the episode’s unsuitability for younger audiences.

11.2. Neon’s Self-Rating and Content Warnings

Neon has self-rated House of the Dragon Season 2 Episode 1 as suitable for viewers aged 18 and above. The platform issues warnings for content that may disturb, nudity, and explicit sex scenes. Neon’s rating aligns with the episode’s graphic violence, strong sexual content, and mature themes, ensuring viewers are aware of its adult-oriented nature and potential to unsettle sensitive audiences.

Impact on Younger Audiences

House of the Dragon Season 2 Episode 1 contains mature themes and graphic content that may have severe emotional and developmental effects on younger viewers. The intense violence, explicit sexual content, and disturbing scenes are inappropriate for children, making it essential for parents to restrict access and ensure the content is not suitable for underage audiences.

12.1. Potential Emotional and Developmental Effects

Exposure to House of the Dragon Season 2 Episode 1’s graphic violence, explicit sexual content, and disturbing themes can lead to emotional distress in younger audiences. Scenes depicting intense gore, sexual acts, and mature situations may cause fear, anxiety, or confusion. Prolonged exposure could desensitize children to violence or normalize inappropriate behavior, potentially undermining their moral and emotional development. Parents must consider these risks to protect their children from long-term psychological harm.

12.2. Why It’s Not Suitable for Children

House of the Dragon Season 2 Episode 1 contains graphic violence, explicit sex scenes, and strong language, making it unsuitable for children. The intense gore, sexual content, and mature themes can evoke fear, anxiety, or confusion in young viewers. Such exposure may lead to emotional distress and desensitize children to violence or normalize inappropriate behavior, posing risks to their moral and psychological development.

This guide underscores the necessity of parental discretion due to the show’s mature themes, encouraging mindful viewing and open discussions about its content.

13;1. Final Thoughts on the Necessity of the Guide

This guide is essential for parents to understand the mature content in House of the Dragon Season 2 Episode 1, including graphic violence, explicit sex scenes, and strong language. It provides clarity on the TV-MA rating and helps parents make informed decisions about their children’s viewing habits. The detailed breakdown ensures awareness of sensitive themes, enabling families to approach the series responsibly and thoughtfully.

13.2. Encouragement for Mindful Viewing

This guide encourages parents to approach House of the Dragon Season 2 Episode 1 thoughtfully, fostering critical thinking about its mature themes. By discussing the content with teens, parents can help them process complex ideas and emotions. Mindful viewing promotes awareness of personal boundaries and sensitivities, ensuring a balanced entertainment experience while prioritizing emotional well-being and informed choices for younger audiences.

honeywell home alarm manual

Honeywell Home Alarm Systems offer advanced security solutions‚ combining reliability and innovation. Designed for domestic and leisure spaces‚ they provide comprehensive protection with user-friendly interfaces. Total Connect 2.0 enhances remote monitoring‚ while proper installation ensures optimal performance and compliance with local regulations.

1.1 Overview of Honeywell Home Security Solutions

Honeywell Home Security Solutions provide advanced‚ user-friendly systems designed for domestic and leisure premises. These systems integrate seamlessly with smart devices‚ offering features like remote monitoring via Total Connect 2.0‚ scene creation‚ and customizable alarms. With comprehensive user manuals and guides‚ Honeywell ensures easy installation‚ configuration‚ and operation‚ making it a reliable choice for home security needs.

1.2 Importance of Proper System Installation and Configuration

Proper installation and configuration of Honeywell Home Alarm Systems are crucial for ensuring optimal performance and reliability. Incorrect setup can lead to system malfunctions‚ false alarms‚ and compromised security. Following the manufacturer’s guidelines and seeking professional assistance‚ if needed‚ ensures all components function seamlessly and provides peace of mind for homeowners.

System Components and Hardware

Honeywell Home Alarm Systems include advanced hardware like control panels‚ sensors‚ keypads‚ and communication modules. These components work together to provide reliable security and monitoring solutions.

2.1 Key Components of the Honeywell Home Alarm System

The Honeywell Home Alarm System features essential components like control panels‚ sensors‚ keypads‚ and sirens. These elements work together to detect threats‚ alert users‚ and ensure robust security. Sensors monitor activity‚ keypads enable arming/disarming‚ and sirens provide audible alerts. Additional components include communication modules for remote access and power supplies to ensure continuous operation.

2.2 Understanding Sensors‚ Keypads‚ and Control Panels

Sensors detect intrusions and trigger alarms‚ while keypads allow users to arm/disarm the system and enter codes. Control panels serve as the system’s brain‚ processing data and coordinating responses. These components integrate seamlessly to provide robust security‚ ensuring your home is protected with reliable‚ user-friendly technology designed for optimal performance and peace of mind.

Installation and Setup Guide

Installation requires careful setup of sensors and panels‚ following Honeywell guides to ensure optimal functionality and compliance with local regulations.

3.1 Step-by-Step Installation Instructions

Begin by unpacking and inventorying all components. Mount sensors and keypads securely‚ ensuring proper alignment. Connect wiring according to the manual‚ and insert batteries in devices. Power on the system and follow the keypad prompts for initial configuration. Test all sensors and ensure they communicate with the control panel. Verify alarm functionality and review the system’s operation before finalizing the setup.

3.2 Initial System Configuration and Programming

Enter your 4-digit MASTER code‚ then press 63 to access programming. Navigate through the menu to set user codes‚ zones‚ and preferences. Configure alarm suppression and diagnostic settings as needed. Ensure all sensors are enrolled and test the system to confirm proper functionality. Save changes and exit programming mode to finalize the configuration.

Arming and Disarming the System

Arm the system using your 4-digit MASTER code and follow on-screen instructions. Disarm by re-entering your code to ensure security and ease of use.

4.1 How to Arm the System for Maximum Security

To arm the system‚ enter your 4-digit MASTER code and follow on-screen instructions. Ensure all doors and windows are closed. The system offers exit delays for safe departure. Select modes like Stay‚ Away‚ or Night for tailored protection. Once armed‚ the system will monitor all zones and trigger alarms upon unauthorized breaches‚ ensuring maximum security for your home.

4.2 Disarming the System and Managing User Codes

To disarm the system‚ enter your 4-digit MASTER code at the keypad. For managing user codes‚ access the system menu by pressing * and your code. Add or delete codes in the user management section. Ensure only authorized users have access to modify settings. Regularly update codes to maintain security‚ and confirm changes to prevent unauthorized access.

Advanced Features and Customization

Honeywell Home Alarm Systems offer customizable alarm zones and user permissions. Create scenes for automated responses and integrate with smart home devices for enhanced security and convenience.

5.1 Customizing Alarm Zones and User Permissions

Customize alarm zones to secure specific areas of your home. Assign unique user permissions to ensure only authorized individuals can access or modify settings. This feature enhances security by allowing tailored access levels‚ reducing unauthorized system changes. Utilize Total Connect 2.0 to manage these settings remotely‚ ensuring your system adapts to your lifestyle and needs efficiently.

5.2 Setting Up Scenes and Automated Responses

Scenes allow you to streamline your security system by grouping actions. Create custom scenarios‚ such as “Away” or “Goodnight‚” to activate multiple settings with one command. Automated responses trigger alarms or notifications based on specific events. Use Total Connect 2.0 to configure these settings‚ ensuring your system reacts intelligently to various situations‚ enhancing both convenience and security.

Monitoring and Remote Control

Total Connect 2.0 enables remote monitoring of your Honeywell Home Alarm System. Arm or disarm the system‚ receive notifications‚ and manage settings via mobile devices for enhanced security and convenience.

6.1 Using Total Connect 2.0 for Remote Monitoring

Total Connect 2.0 offers a robust platform for remote monitoring of your Honeywell Home Alarm System. Users can access real-time status updates‚ arm or disarm the system‚ and receive instant notifications. The platform also allows customization of alerts and integration with smart devices‚ ensuring enhanced security and convenience from any location. This feature is essential for modern home security management.

6.2 Controlling the System via Mobile Devices

Control your Honeywell Home Alarm System effortlessly using the Honeywell Home app on your mobile device. Remotely arm or disarm the system‚ receive instant alerts‚ and manage user codes. The app also allows you to monitor system status and customize settings. This feature enhances convenience and ensures your home remains secure‚ even when you’re not physically present. Mobile control integrates seamlessly with Total Connect 2.0 for a unified experience.

Troubleshooting Common Issues

Identify and resolve system errors‚ address false alarms‚ and manage malfunctions. Refer to user manuals for detailed solutions and diagnostic tools to ensure optimal system performance.

7.1 Identifying and Resolving System Errors

System errors in Honeywell Home Alarm Systems can often be diagnosed through LED indicators or error codes. Users should consult the manual for specific solutions‚ such as resetting the system or replacing faulty components. Regular maintenance and software updates help prevent recurring issues‚ ensuring reliable security and minimizing downtime. Always refer to the official Honeywell troubleshooting guide for detailed instructions.

7.2 Managing False Alarms and System Malfunctions

Regular system checks are crucial for preventing false alarms and malfunctions. Ensure sensors are clean and free from debris to avoid false triggers. Utilize Total Connect 2.0 for remote monitoring and software updates to maintain optimal performance. Educate users on proper system operation to minimize false alarms. Refer to Honeywell’s official troubleshooting guides for detailed solutions and step-by-step instructions.

Maintenance and Diagnostics

Regular inspections of sensors and devices ensure optimal performance. Perform software updates via Total Connect 2.0 for enhanced functionality. Check battery levels and connections to prevent malfunctions.

8.1 Regular Maintenance Tasks for Optimal Performance

Regularly inspect sensors and ensure all connections are secure. Check battery levels in wireless devices and replace them as needed. Update system software via Total Connect 2.0 to maintain functionality. Clean sensors to avoid false alarms and ensure accurate detection. Perform diagnostic tests monthly to identify and address potential issues promptly.

8.2 Diagnostics Tools and System Health Checks

Honeywell Home Alarm Systems include advanced diagnostic tools to identify and resolve issues efficiently. These tools monitor system health‚ detect errors‚ and provide detailed reports. Users can perform routine checks via Total Connect 2.0‚ ensuring optimal performance and security. Regular diagnostics help prevent false alarms and maintain system reliability.

Compliance and Legal Requirements

Honeywell Home Alarm Systems must comply with local laws. Installation may require notifying authorities to avoid fines. Ensure the system does not disable existing alarm equipment.

9.1 Understanding Local Regulations for Alarm Systems

Understanding local regulations for Honeywell Home Alarm Systems is crucial. Systems must comply with area-specific laws‚ often requiring notification to authorities. Proper installation ensures compliance‚ avoiding fines. Some regions mandate permits or specific system standards. Non-compliance can lead to legal issues‚ emphasizing the importance of adhering to local rules before installation.

9.2 Notifying Authorities and Avoiding Fines

Notifying local authorities about your Honeywell Home Alarm System is essential to avoid fines. Many regions require registration of alarm systems‚ and failure to comply can result in penalties; Ensure proper permits are obtained and systems are registered as mandated. Refer to local regulations and your Honeywell manual for specific requirements to maintain compliance and prevent legal issues.

Advanced Security Features and Integration

Honeywell Home Alarm Systems offer advanced integration with smart devices‚ enhancing security through automated responses and scenes; Total Connect 2.0 enables seamless remote control and monitoring‚ ensuring convenience and safety.

10.1 Integrating with Smart Home Devices

Honeywell Home Alarm Systems seamlessly integrate with smart home devices‚ enhancing security and convenience. Total Connect 2.0 enables remote monitoring and control via mobile devices. Users can create custom scenes‚ linking security actions with smart home automation. This integration allows for voice command compatibility with platforms like Amazon Alexa and Google Home‚ ensuring a unified and responsive smart home experience.

10.2 Enhancing Security with Additional Sensors and Accessories

Enhance your Honeywell Home Alarm System with a range of sensors and accessories for comprehensive protection. Smoke detectors‚ motion sensors‚ and panic buttons provide multi-layered security. These devices integrate seamlessly with the system‚ offering real-time alerts and automated responses. Additional accessories like key fobs and remote controls ensure easy system management‚ while advanced diagnostics and tamper-proof features ensure reliability and compliance with safety standards. Customizable solutions adapt to specific security needs. Always use Honeywell-approved devices for optimal performance and compatibility. Regular updates and maintenance ensure system efficiency and safety.upgrade your home security with Honeywell’s robust ecosystem.

iptv channel guide

IPTV offers internet-based TV services, providing live channels, VOD, and time-shifted content․ A channel guide enhances navigation, helping users discover favorite shows and new content efficiently․

1․1 What is IPTV?

IPTV (Internet Protocol Television) delivers television content over internet protocol networks․ Unlike traditional cable or satellite TV, IPTV streams live channels, video-on-demand (VOD), and time-shifted content directly to devices․ It operates using TCP/IP protocols, enabling efficient transmission of audio, video, and data․ This technology allows users to access a wide range of programming, including live TV and on-demand services, through internet-connected devices like smartphones, smart TVs, and set-top boxes․ Its flexibility and convenience make it a popular alternative to conventional broadcasting systems․

1․2 Importance of a Channel Guide in IPTV

A channel guide is essential for IPTV users, enhancing their viewing experience by providing detailed information about available channels and programs․ It helps users navigate through live TV, video-on-demand, and time-shifted content efficiently․ The guide organizes channels logically, making it easier to find favorite shows or discover new content․ By offering a user-friendly interface, it improves accessibility and personalizes the viewing experience, ensuring users can quickly locate and enjoy their preferred programs without hassle․

How IPTV Channel Guides Work

IPTV channel guides function by delivering electronic program guides (EPG), organizing channels, and enabling users to navigate and select content efficiently through user-friendly interfaces․

2․1 Electronic Program Guide (EPG)

An Electronic Program Guide (EPG) is a digital schedule that provides detailed information about TV shows, movies, and events․ It allows users to browse content by time, channel, or genre, enabling easy navigation․ The EPG also includes descriptions, ratings, and broadcast times, helping viewers plan their watching experience․ Advanced EPGs support multi-language audio and subtitles, enhancing accessibility․ Additionally, they often integrate with time-shifting features, letting users record or catch up on missed programs․ This feature-rich system is essential for a seamless IPTV viewing experience, making it a cornerstone of modern entertainment platforms․

2․2 Channel Lineup and Organization

An IPTV channel guide organizes content into a structured lineup, categorizing channels by genre, language, or popularity․ This setup allows users to easily navigate through entertainment, sports, news, and international channels․ Many providers offer customizable lists, enabling users to prioritize favorite channels or hide unused ones․ Advanced guides also support filtering options, such as sorting by HD or SD quality, ensuring a tailored viewing experience․ This organized approach enhances user convenience, making it simpler to find and enjoy preferred content․

Key Features of an IPTV Channel Guide

An IPTV channel guide offers live TV, on-demand content, time-shifting, and multi-language support․ It also provides user-friendly interfaces for easy navigation and personalized viewing experiences․

3․1 Live TV and On-Demand Content

IPTV delivers live TV channels, allowing real-time viewing of shows, sports, and events․ On-demand content enables users to watch programs at their convenience․ This flexibility ensures access to a wide range of entertainment options, catering to diverse preferences․ With a user-friendly interface, viewers can seamlessly switch between live broadcasts and pre-recorded content, enhancing their overall viewing experience․ This feature-rich combination makes IPTV a versatile choice for modern audiences seeking both immediacy and flexibility in their entertainment choices․

3․2 Time-Shifting and Catch-Up TV

Time-shifting allows viewers to watch content at their preferred time, while catch-up TV enables access to previously aired shows․ These features enhance flexibility, letting users enjoy programs without adhering to broadcast schedules․ Advanced IPTV guides integrate these options seamlessly, making it easy to browse and select time-shifted content․ This ensures a personalized viewing experience, catering to individual preferences and schedules․ By offering both live and delayed content, IPTV provides unparalleled convenience and accessibility for its users․

3․3 Multi-Language and Audio Description Support

IPTV channel guides often include multi-language support, allowing users to switch between different languages for audio and subtitles․ This feature caters to diverse audiences, enhancing accessibility․ Additionally, audio description support provides visual content narratives for visually impaired viewers, ensuring inclusivity․ These features make IPTV services more versatile and user-friendly, offering a tailored experience for individuals with specific needs or preferences․ Such enhancements contribute to a more engaging and accessible entertainment experience for all users․

Setting Up an IPTV Channel Guide

Setting up an IPTV channel guide involves selecting a provider, installing the app, and configuring settings for a personalized experience with channel listings and EPG data․

4․1 Choosing a Reliable IPTV Provider

Selecting a trustworthy IPTV provider is crucial for uninterrupted service․ Ensure the provider offers a valid license, a robust channel lineup, and stable streaming quality․ Look for user-friendly interfaces and reliable customer support․ Many providers offer free trials, allowing you to test their services before committing․ Always verify reviews and check for legal compliance to avoid pirated content․ A reputable provider ensures seamless integration of the channel guide and EPG, enhancing your overall viewing experience with minimal buffering or downtime․

4․2 Installing IPTV Software or App

Installing IPTV software or an app is typically straightforward․ Most providers offer downloadable apps for smartphones, smart TVs, or streaming devices․ Users can access the app store, search for the provider’s official app, and install it․ After installation, logging in with credentials provided by the IPTV service grants access to channels and content․ Some services also support third-party apps like Kodi or VLC for playback․ Ensure the app is compatible with your device and internet speed for optimal performance and uninterrupted viewing․

4․3 Configuring the Channel Guide

Configuring the IPTV channel guide involves loading the channel list and EPG data․ Users typically upload an M3U playlist or XMLTV file provided by their IPTV provider․ Once loaded, the channel guide organizes content by genre, language, or user preferences․ Some apps allow customization, such as creating favorites lists or setting reminders․ Ensuring the guide is updated regularly guarantees access to the latest channel lineups and programming schedules․ This step ensures a seamless and personalized viewing experience tailored to individual preferences․

Legal Considerations for IPTV Users

Using licensed IPTV services is crucial to avoid legal issues․ Unlicensed providers often stream pirated content, risking fines or penalties for users․ Always verify provider legitimacy․

5․1 Licensed vs․ Unlicensed IPTV Services

Licensed IPTV services operate legally, holding proper rights to broadcast content․ They ensure quality and reliability, adhering to regulations․ Unlicensed services, however, illegally stream content, risking legal consequences for users․ While unlicensed options may offer more channels at lower costs, they often lack stability and security․ Users should prioritize licensed providers to avoid potential fines or exposure to pirated material․ Legal services may offer fewer channels but provide peace of mind and better performance․

5․2 Avoiding Pirated Content

Avoiding pirated content is crucial when using IPTV services, as it often comes from unlicensed providers․ Pirated content can expose users to legal risks, malware, and poor streaming quality․ To ensure compliance, users should opt for licensed IPTV services that legally broadcast content․ Additionally, verifying provider credentials and reading reviews can help identify reputable services․ Always check for proper licensing and avoid services offering unrealistic channel lineups or suspiciously low prices, as these may distribute illegal content․

Popular IPTV Services with Strong Channel Guides

Popular IPTV services like SSIPTV and Xstream Codes offer strong channel guides with user-friendly interfaces․ These services provide easy navigation, extensive channel lineups, and high-quality streaming experiences․

6․1 Best Legal IPTV Providers

Reputable legal IPTV providers like SSIPTV and Xstream Codes offer high-quality services with strong channel guides․ These providers ensure compliance with licensing laws, delivering a reliable and secure streaming experience․ They feature extensive channel lineups, EPG support, and user-friendly interfaces․ Legal IPTV services prioritize content quality and viewer safety, making them top choices for consumers seeking legitimate alternatives to unlicensed options․ Always opt for licensed providers to avoid risks associated with pirated content and ensure uninterrupted service․

6․2 User-Friendly Interfaces for Channel Navigation

A well-designed IPTV interface simplifies channel navigation, enhancing user experience․ Features like intuitive layouts, genre-based filtering, and search functionalities make it easy to find content․ Many providers offer visually appealing designs with clear channel listings and EPG integration․ Customization options, such as favorites lists, further personalize the viewing experience․ User-friendly interfaces ensure seamless interaction, catering to both tech-savvy users and those less familiar with digital platforms․ This accessibility makes IPTV services more enjoyable and approachable for a broader audience․

Customizing Your IPTV Channel Guide

Customizing your IPTV channel guide allows you to organize content according to your preferences․ Create favorites lists, filter channels by genre or language, and personalize your viewing experience for enhanced convenience and enjoyment․

7․1 Creating Favorites Lists

Creating favorites lists in your IPTV channel guide allows you to organize and quickly access your most-watched channels․ Users can group channels by genre, language, or personal preferences, simplifying navigation․ This feature enhances viewing convenience, enabling easy access to preferred content․ Favorites lists are customizable, ensuring a tailored experience․ By organizing channels into lists, viewers save time scrolling through extensive lineups․ This feature is particularly useful for users with multiple favorite channels, ensuring seamless access and a more enjoyable watching experience․

7․2 Filtering Channels by Genre or Language

Filtering channels by genre or language enhances user experience by tailoring content to specific preferences․ Users can easily sort channels into categories like sports, movies, or news, or select languages such as Spanish, French, or Mandarin․ This feature simplifies navigation, ensuring quick access to relevant content․ By narrowing down options, viewers avoid scrolling through extensive lists․ Advanced IPTV guides also allow multi-language audio support, further personalizing the viewing experience․ This customization ensures users enjoy content that aligns with their interests and linguistic preferences, improving overall satisfaction․

Troubleshooting Common Issues

IPTV users often face issues like buffering or EPG failures․ Troubleshooting involves checking internet connections, updating apps, and ensuring proper device compatibility for optimal performance․

8․1 Fixing EPG Loading Problems

EPG loading issues often occur due to connectivity problems or outdated software․ To resolve this, check your internet connection, ensure your IPTV app is updated, and confirm that your device supports the EPG format․ If the problem persists, clear the app cache or reinstall it․ Corrupted data can also cause EPG failures, so resetting the guide or contacting your IPTV provider for a fresh lineup may be necessary․ Regular updates and stable internet ensure smooth EPG functionality․

8․2 Resolving Channel Buffering or Freezing

Buffering or freezing issues with IPTV channels are often caused by poor internet connectivity or high network congestion․ Ensure your internet speed meets the minimum requirements for streaming․ Restarting your router or switching to a wired connection can improve stability․ Additionally, updating your IPTV app or device firmware may resolve the issue․ If problems persist, try lowering the video quality or clearing the app’s cache․ Contacting your IPTV provider for server checks can also help address persistent buffering or freezing problems․

The Future of IPTV Channel Guides

The future of IPTV channel guides lies in seamless integration with smart devices and AI-driven personalization, enhancing user experience through tailored recommendations and voice control capabilities․

9․1 Integration with Smart Devices

The integration of IPTV channel guides with smart devices is revolutionizing how users access content․ By syncing IPTV guides with smartphones, smart TVs, and voice assistants, viewers can seamlessly navigate channels and schedules across multiple platforms․ This connectivity enables features like multi-device syncing, voice-controlled channel selection, and personalized recommendations based on viewing habits․ Such advancements ensure a unified and intuitive entertainment experience, making it easier for users to discover and enjoy their favorite content anytime, anywhere, with enhanced convenience and accessibility․

9․2 AI-Driven Personalization

AI-driven personalization is transforming IPTV channel guides by tailoring content recommendations to individual preferences․ By analyzing viewing habits and search history, AI algorithms suggest shows, movies, and live events, enhancing user engagement․ Advanced systems adapt to user behavior over time, refining suggestions for a more personalized experience․ Additionally, AI can optimize streaming quality based on internet speed and device capabilities, ensuring seamless playback․ This intelligent approach not only improves content discovery but also elevates the overall entertainment experience, making IPTV more intuitive and enjoyable for users․

bosch 800 manual

The Bosch 800 Series offers high-end appliances with advanced features, energy efficiency, and smart integration, designed for seamless home integration, backed by comprehensive manuals for installation and operation.

1.1 Overview of the Bosch 800 Series Appliances

The Bosch 800 Series includes high-performance appliances like dishwashers and ovens, designed for modern kitchens. Models such as the SGE78C55UC dishwasher offer 6 wash cycles, quiet operation at 42 dBA, and ADA compliance. These appliances are known for their energy efficiency, advanced features, and seamless integration with smart home systems, enhancing convenience and performance.

1.2 Key Features and Benefits

The Bosch 800 Series appliances are known for their quiet operation, energy efficiency, and advanced features. They offer 6 wash cycles, 42 dBA noise levels, and ADA compliance. These appliances provide smart integration, seamless performance, and comprehensive manuals for easy installation and operation, ensuring a premium experience for homeowners.

Installation Instructions

The Bosch 800 Series requires precise installation, including pre-installation checks, proper tool usage, and compliance with safety guidelines. Ensure adherence to manufacturer specifications for optimal performance.

2.1 Pre-Installation Requirements

Ensure you have the Bosch 800 manual and required tools. Verify the unit’s dimensions match your space and comply with embedding schemes. Check power supply compatibility and prepare the installation area according to the manufacturer’s guidelines for a smooth process.

2.2 Step-by-Step Installation Guide

Start by unpacking the appliance and verifying all components. Align the unit with the embedding scheme, secure it firmly, and connect power and water supplies according to the Bosch 800 manual. Ensure proper ventilation, test functionality, and finalize the installation by checking for leaks and operational accuracy.

2.3 Safety Precautions During Installation

Always disconnect power before starting installation. Wear protective gear and ensure the area is clear. Follow the Bosch 800 manual instructions precisely. Use approved tools and avoid over-tightening connections. Ensure proper ventilation and keep children away. Double-check all connections for leaks or damage before restoring power.

Operating the Bosch 800 Series

The Bosch 800 Series operates efficiently with intuitive controls and smart integration. Refer to the Bosch 800 manual for detailed guidance on energy-saving modes and quiet operation.

3.1 Basic Operation and Controls

The Bosch 800 Series features intuitive controls for seamless operation. Users can easily navigate basic settings, including power, temperature, and timer functions, using the touch-sensitive interface. The Bosch 800 manual provides clear instructions for initializing cycles, ensuring efficient and energy-saving performance. Built-in sensors optimize settings for consistent results.

3.2 Advanced Settings and Customization

The Bosch 800 Series offers advanced customization options, allowing users to tailor settings like cooking modes, temperature, and smart integration. The Bosch 800 manual details how to access these features, ensuring optimal performance and personalized cooking experiences. Customizable multi-stage cooking and silent operation enhance versatility and user satisfaction.

3.3 Special Modes and Functions

The Bosch 800 Series features advanced modes like fast preheating and silent operation, enhancing efficiency. Multi-stage cooking and eco-friendly settings offer flexibility and energy savings. These functions, detailed in the manual, ensure tailored cooking experiences, catering to diverse user preferences and culinary needs effectively.

Maintenance and Care

Regular cleaning, troubleshooting, and scheduled maintenance ensure optimal performance and longevity of Bosch 800 Series appliances. Detailed guidance is provided in the manual for proper upkeep.

4.1 Regular Cleaning and Hygiene Tips

Regular cleaning of surfaces and filters is essential for maintaining efficiency. Use mild detergents to avoid damage. Check and clean filters as per the manual. Wipe down surfaces after use to prevent residue buildup, ensuring optimal hygiene and reliable operation.

4.2 Troubleshooting Common Issues

Identify error codes like E01 or E02 in the manual for quick solutions. Check power connections and ensure proper installation. Clean sensors and filters regularly to avoid malfunctions. Refer to the Bosch 800 manual for specific troubleshooting steps and guidance on resolving common operational issues effectively.

4.3 Scheduled Maintenance Recommendations

For Bosch 800 Series appliances, schedule regular cleaning of filters and interior surfaces. Run cleaning cycles every 1-2 months to maintain performance. Check and replace worn-out parts like door gaskets. Descale water systems annually to prevent mineral buildup. Refer to the manual for model-specific maintenance plans to ensure longevity and efficiency.

Technical Specifications

The Bosch 800 Series features advanced engineering with dimensions tailored for standard kitchen layouts, efficient power consumption, and quiet operation, ensuring compliance with energy and safety standards.

5.1 Dimensions and Weight

The Bosch 800 Series appliances are designed with standard kitchen layouts in mind, featuring compact dimensions and balanced weight for stable installation. Specific models like the SGE78C55UC measure 24 inches in width, with height and depth tailored for seamless integration, ensuring ease of installation and optimal performance in various kitchen settings.

5.2 Power Consumption and Efficiency

The Bosch 800 Series is engineered for energy efficiency, with features like Eco-Mode reducing power consumption. Appliances operate at optimized levels, such as 800W for 30 minutes or 600W for 60 minutes, ensuring minimal energy use while maintaining performance, aligning with modern energy-saving standards and user demands for eco-friendly solutions.

5.3 Compliance and Certifications

The Bosch 800 Series adheres to stringent international standards, including ENERGY STAR certification for energy efficiency and ADA compliance for accessibility. Appliances meet safety regulations and environmental guidelines, ensuring reliable performance while minimizing ecological impact, making them a sustainable choice for modern households.

Safety Guidelines

Always follow instructions, use protective gear, and avoid hazardous practices. Ensure proper ventilation and keep flammable materials away. Regular maintenance prevents accidents and ensures safe operation.

6.1 General Safety Precautions

Adhere to the Bosch 800 manual instructions for safe operation. Wear protective gear, avoid hazardous practices, and ensure proper ventilation. Keep flammable materials away and regularly inspect for damage. Follow maintenance schedules to prevent accidents and ensure reliable performance. Always prioritize safety to protect users and maintain appliance efficiency.

6.2 Child Safety Features

The Bosch 800 manual highlights child safety features, including secure locking mechanisms to prevent unauthorized operation. These features ensure safe usage, protecting children from accidental start-ups or adjustments. Parents can rely on these safeguards to create a secure kitchen environment while maintaining appliance functionality and efficiency.

6.3 Emergency Procedures

In case of emergencies, the Bosch 800 manual advises immediate power disconnection and ventilation. Users should avoid hazardous situations and contact customer support for professional assistance. These procedures ensure safety and prevent potential damage, providing clear guidance for urgent scenarios.

Warranty and Support

Bosch 800 Series appliances come with comprehensive warranty coverage and dedicated customer support, ensuring reliable service and assistance for any inquiries or issues, meeting customer needs effectively.

7.1 Warranty Terms and Conditions

The Bosch 800 Series is backed by a comprehensive warranty covering parts and labor for up to one year, with extended options available. Registration is required for full benefits, ensuring protection against defects in materials and workmanship, providing customers with peace of mind and reliable support.

7.2 Contact Information for Customer Support

Bosch customer support is accessible via phone, email, or the official website. Contact details are provided in the manual or on the product packaging. Visit the Bosch website for regional support numbers, email addresses, or live chat options to address any queries or concerns promptly and efficiently.

7.3 Online Resources and FAQs

Bosch provides extensive online resources, including manuals, FAQs, and troubleshooting guides, accessible via their official website. Visit the support section for detailed product information, installation tips, and solutions to common issues, ensuring optimal use of your Bosch 800 Series appliance with 24/7 availability.

Comparison with Other Bosch Series

Bosch 800 Series stands out with advanced features and superior performance compared to 500 and 300 Series, offering higher efficiency and smart technology for enhanced user experience.

8.1 Bosch 800 vs. Bosch 500 Series

The Bosch 800 Series surpasses the 500 Series with advanced features like smart home integration and higher energy efficiency. It also operates more quietly, making it ideal for modern homes. The 500 Series, while reliable, lacks these premium enhancements, offering a more basic experience.

8.2 Bosch 800 vs. Bosch 300 Series

The Bosch 800 Series offers superior features, including advanced smart integration, higher energy efficiency, and quieter operation compared to the 300 Series. While the 300 Series provides reliable performance for basic needs, the 800 Series excels with premium enhancements and customizable settings, making it ideal for modern, tech-savvy households.

8.3 Unique Selling Points of the 800 Series

The Bosch 800 Series stands out with its advanced smart integration via Home Connect, energy-saving Eco-Mode, and silent operation. Its premium design, customizable settings, and comprehensive manual support make it a top choice for modern households seeking innovation, efficiency, and reliability in home appliances.

Eco-Mode and Energy Efficiency

The Bosch 800 Series features an Eco-Mode that optimizes energy consumption while maintaining performance. Advanced sensors and smart technology reduce power use, lowering utility bills and environmental impact.

9.1 Energy-Saving Features

The Bosch 800 Series incorporates advanced sensors and Eco-Mode to optimize energy consumption. These features reduce power usage while maintaining high performance, lowering utility bills and minimizing environmental impact through efficient operation.

9.2 Eco-Mode Operation

The Bosch 800 Series Eco-Mode optimizes energy consumption by automatically adjusting settings to reduce power usage while maintaining performance. Activated manually or via scheduled operation, Eco-Mode leverages advanced sensors to monitor and adapt to your needs, ensuring efficient and environmentally friendly operation without compromising results.

9.3 Environmental Benefits

The Bosch 800 Series contributes to a greener future by reducing energy consumption and lowering carbon footprints. With Energy Star certification, these appliances minimize environmental impact while delivering high performance. Eco-friendly designs and efficient operation make them an ideal choice for environmentally conscious homeowners seeking sustainable solutions.

Advanced Features and Technology

The Bosch 800 Series incorporates cutting-edge innovations like smart integration, sensor-activated controls, and advanced noise reduction. These technologies enhance efficiency and user experience, offering modern convenience.

10.1 Smart Integration and Connectivity

The Bosch 800 Series offers seamless smart integration, enabling control through the Home Connect app. Compatible with voice assistants, it allows remote monitoring and customization. Advanced connectivity ensures synchronization with modern smart home systems, enhancing convenience and efficiency for users.

10.2 Sensor Technology and Automation

The Bosch 800 Series incorporates advanced sensor technology that automates tasks such as load detection and temperature adjustment, ensuring optimal performance. Smart automation adapts to various conditions, providing personalized settings and enhancing operational efficiency and user convenience seamlessly.

10.3 Quiet Operation and Noise Reduction

The Bosch 800 Series features advanced noise reduction technology, ensuring ultra-quiet operation. With sound levels as low as 42 dBA, it minimizes disturbances, making it ideal for modern kitchens. Enhanced insulation and optimized motor designs contribute to its silent performance, providing a peaceful cooking and cleaning environment for users.

User Reviews and Feedback

Users praise the Bosch 800 Series for its quiet operation and efficiency, with high satisfaction ratings. Some note complexity in settings, but overall, it’s a top choice for modern kitchens.

11.1 Customer Satisfaction Ratings

The Bosch 800 Series receives high satisfaction ratings, with users praising its quiet operation and energy efficiency. Many highlight its advanced features and reliability, though some find the settings complex. Overall, it’s well-regarded for its performance and durability, making it a top choice for modern home appliances.

11.2 Common Praise and Criticisms

Users commonly praise the Bosch 800 Series for its quiet operation, energy efficiency, and sleek designs. Critics mention the complexity of advanced settings and occasional inconsistencies in customer support. Overall, the series is lauded for its reliability and performance, though some find certain features overly complicated to navigate.

11.3 Real-World Performance Insights

The Bosch 800 Series consistently delivers strong performance, with users highlighting its quiet operation and energy efficiency. Daily use shows durability, meeting expectations for reliability. Real-world feedback confirms its effectiveness in various tasks, solidifying its reputation as a dependable choice for modern households.

The Bosch 800 Series stands out with its innovative design, offering a perfect blend of performance and energy efficiency. Comprehensive manuals and strong user satisfaction make it a top choice for modern households.

12.1 Summary of the Bosch 800 Series

The Bosch 800 Series is a high-end line of appliances offering advanced features, energy efficiency, and smart integration. With comprehensive manuals, it ensures seamless installation and operation, catering to modern households seeking reliability and superior performance, backed by strong user satisfaction and eco-friendly designs.

12.2 Recommendations for Potential Buyers

For those considering the Bosch 800 Series, it’s ideal for homeowners seeking high-performance, energy-efficient appliances with smart features. Ensure to review the manual for installation and operation tips. Its durability and modern design make it a valuable investment for long-term use and enhanced home convenience.

12.3 Future Updates and Improvements

Future updates for the Bosch 800 Series may include enhanced smart features, improved energy-saving modes, and expanded voice control compatibility. Stay tuned for potential new technologies that could further elevate performance, efficiency, and user convenience, ensuring the series remains a top choice for modern kitchens and eco-conscious homeowners.

audra state park campground map with site numbers pdf

Audra State Park Campground offers a serene retreat with scenic views and diverse camping options. The campground map with site numbers is essential for planning a hassle-free stay, ensuring campers can navigate the area efficiently and make the most of their outdoor adventure.

1.1 Overview of Audra State Park

Audra State Park, located in Barbour County, WV, offers a picturesque landscape with riverside campsites, scenic trails, and abundant wildlife. The park is a favorite for outdoor enthusiasts, providing opportunities for hiking, camping, and nature exploration. Its serene environment and well-maintained facilities make it an ideal destination for both seasoned campers and families seeking a peaceful retreat;

1.2 Importance of the Campground Map with Site Numbers

The campground map with site numbers is crucial for planning a seamless stay at Audra State Park. It provides a clear layout of the campsite locations, helping campers choose spots that suit their needs, such as riverside or shaded areas. The map also highlights trails, amenities, and key facilities, ensuring visitors can navigate the park effortlessly. Additionally, the inclusion of site numbers aids in reservation processes and helps campers locate their designated areas quickly and efficiently.

Audra State Park Campground Map Details

The Audra State Park Campground map details include site numbers, trails, and facilities. It highlights riverside campsites and key amenities, aiding in trip planning and navigation effectively.

2.1 Understanding the Layout of the Campground

The Audra State Park Campground is thoughtfully designed, with campsites strategically placed along the Middle Fork River. The layout ensures easy access to trails, restrooms, and potable water. Campsites are distributed across wooded areas, offering privacy and scenic views. The map provides a clear visual representation of the campground’s structure, helping campers locate amenities and plan their stay efficiently.

The campground’s layout is user-friendly, with site numbers clearly marked. This design allows visitors to navigate the park seamlessly, whether they’re hiking, camping, or exploring the natural beauty of the area. Proximity to trails and facilities varies, so reviewing the map helps campers choose sites that best suit their preferences and needs for an enjoyable outdoor experience.

2.2 How to Read the Site Numbers on the Map

The site numbers on the Audra State Park Campground map are clearly labeled, corresponding to specific campsites. Each number is placed near its location, often alongside symbols or colors denoting site types. Campers can match these numbers with the legend or key provided on the map. This system helps visitors quickly identify their designated area and navigate the park’s layout efficiently, ensuring a smooth and enjoyable camping experience.

Types of Camping Sites Available

Audra State Park Campground offers standard campsites with amenities and primitive sites for wilderness enthusiasts. Tent camping is popular, with many sites located riverside.

3.1 Standard Campsites with Amenities

Audra State Park’s standard campsites provide essential amenities, ensuring a comfortable stay. These include access to restrooms, potable water, and picnic tables. Some sites are located near the river, offering scenic views. The campground map highlights these sites clearly, making it easy for campers to choose a spot that suits their needs. Amenities are well-maintained, enhancing the overall camping experience.

3.2 Primitive Campsites for Wilderness Enthusiasts

Audra State Park offers primitive campsites for those seeking a more secluded, nature-immersive experience. These sites are located in quieter areas, surrounded by dense forests and wildlife. With no modern amenities, they cater to tent camping and backcountry enthusiasts. The campground map clearly marks these sites, ensuring adventurers can find their perfect spot for a true wilderness retreat, away from crowds and disturbances.

How to Download the Audra State Park Campground Map PDF

The Audra State Park Campground Map PDF is available on the official park website. Visit the “Maps” section, select the campground map, and download it for free.

4.1 Official Sources for the Campground Map

The official Audra State Park Campground Map with site numbers is available on the park’s website. Visit the “Maps” or “Plan Your Visit” section for the most accurate and up-to-date PDF version. Additionally, the park’s visitor center provides printed copies upon request. Ensure you use authorized sources to avoid outdated or incorrect information.

4.2 Steps to Access the PDF Version

Visit the official Audra State Park website and navigate to the “Maps” section. Click on the link labeled “Campground Map” to download the PDF. Ensure your device has a PDF viewer installed. For offline use, save the file or print it. If accessing from a mobile device, consider downloading in advance due to potential limited connectivity in the park area.

Planning Your Camping Trip with the Map

Use the map to identify trails, facilities, and scenic spots. Choose a campsite that suits your needs, considering proximity to water and amenities. Plan activities accordingly for a seamless outdoor experience. Save or print the map for offline access to ensure you’re prepared for your adventure at Audra State Park.

5.1 Choosing the Best Campsite for Your Needs

Use the Audra State Park campground map to select a site that matches your preferences. Consider proximity to amenities like restrooms or water access. For scenic views, opt for riverside campsites, while those seeking seclusion may prefer shaded, wooded areas. Evaluate site dimensions to ensure your tent or RV fits comfortably. Check for any specific rules or restrictions on campsite usage to ensure a smooth and enjoyable stay. Plan ahead to secure your ideal spot.

5.2 Identifying Key Facilities and Trails

The campground map helps locate essential facilities like restrooms, water stations, and picnic areas. It also highlights popular trails, such as the Middle Fork River Trail, allowing campers to plan hikes easily. Use the map to find parking areas, shelters, and scenic overlooks. The legend explains symbols for amenities, ensuring campers can quickly identify resources. This feature enhances navigation and helps create a memorable outdoor experience tailored to individual preferences and interests. Plan your adventure with ease using the map’s detailed layout and markings.

Reservation and Booking Information

Plan your stay by using the campground map to select sites based on amenities and proximity to trails. Check availability and fees online, then book through the park’s reservation system to secure your spot in advance, ensuring a smooth camping experience.

6.1 How to Make a Reservation at Audra State Park

To make a reservation at Audra State Park, visit the official website or use the park’s reservation system. Select your preferred dates and campsite using the campground map for reference. Review site details, including amenities and proximity to trails. Complete the booking process by providing required information and payment. Plan ahead, as spots fill quickly during peak seasons. Contact the park directly for assistance or special requests.

6.2 Understanding Campsite Availability and Fees

Check the campground map to review site availability and compare fees. Prices vary based on site type, amenities, and season. Standard sites with electric hookups are more expensive than primitive options. Fees are listed on the park’s website or map. Plan ahead, as availability changes quickly, especially during peak seasons. Contact the park directly for detailed pricing and to confirm site-specific amenities. Discounts may apply for long-term stays or special programs.

Tips for Using the Campground Map

Use the map to locate amenities, trails, and site numbers. Orient yourself with landmarks and check symbols for facilities. Plan your route in advance for easy navigation.

7.1 Navigating the Park Using the Map

The campground map is essential for navigating Audra State Park. It highlights trails, amenities, and site numbers, helping campers locate their spots and nearby facilities. Use the map’s legend to identify symbols for restrooms, water access, and trails. Orient yourself with landmarks like rivers or entrances. Plan your route in advance to explore hiking paths and scenic areas efficiently. This ensures a smooth and enjoyable camping experience.

7.2 Essential Features to Look for in the Map

Key features of the Audra State Park campground map include campsite numbers, trail markings, and symbols for amenities like restrooms and water access. Look for elevation markers to gauge terrain difficulty. Check for picnic areas, parking lots, and scenic overlooks. Note the location of rivers and streams, as some campsites are riverside. This information helps plan activities and ensure a comfortable stay tailored to your preferences and needs.

Nearby Attractions and Activities

Audra State Park is surrounded by scenic beauty, offering access to rivers, waterfalls, and hiking trails. Nearby attractions include historic sites and charming local towns to explore.

8.1 Popular Hiking Trails Near the Campground

Audra State Park features scenic hiking trails that cater to all skill levels. The Middle Fork River Trail and Audra Trail are favorites, offering breathtaking views of waterfalls and rivers. These trails are easily accessible from the campground, making them perfect for a day of exploration. The campground map provides clear guidance, ensuring hikers can navigate effortlessly and enjoy the park’s natural beauty.

8.2 Other Recreational Opportunities in the Area

Beyond hiking, Audra State Park offers fishing, swimming, and picnicking along the Middle Fork River. The park’s scenic waterfalls and riverside areas provide perfect spots for relaxation. Families can enjoy picnic shelters and playgrounds, while nature enthusiasts can explore the park’s diverse wildlife. The campground map highlights these amenities, making it easy for visitors to discover and enjoy all the recreational opportunities available in and around the park.

User Reviews and Testimonials

Audra State Park Campground has received positive reviews from campers, with 4 people sharing their experiences. Many praise the campground map for its clarity and usefulness in planning stays.

9.1 Camper Experiences at Audra State Park

Camper experiences at Audra State Park highlight the beauty and tranquility of the campground. Many appreciate the well-maintained sites and scenic river views. The campground map is praised for its clarity, helping campers locate their sites and nearby facilities. Overall, campers commend Audra State Park for its natural charm and convenient amenities, making it a popular choice for outdoor enthusiasts seeking a peaceful retreat.

9.2 Feedback on the Campground Map’s Usability

Feedback on the Audra State Park campground map highlights its user-friendly design. Campers find the site numbers and layout easy to navigate, ensuring a seamless experience. The map’s clarity aids in locating amenities and trails, enhancing the overall camping trip. Visitors appreciate the detailed information, which helps them plan effectively. The map is widely regarded as an essential tool for making the most of their stay at Audra State Park.

Safety and Regulations

Adhere to park guidelines, including fire safety and wildlife respect. Stay informed about specific rules to ensure a safe and enjoyable camping experience at Audra State Park.

10.1 Campground Rules and Guidelines

Adhere to campground rules at Audra State Park to maintain safety. Keep fires contained, dispose of waste properly, and respect quiet hours. Ensure all gear stays within designated sites. Be mindful of wildlife and avoid feeding animals. Follow posted guidelines to preserve the natural environment and ensure a pleasant experience for all visitors. Familiarize yourself with specific regulations before arrival to avoid any issues.

10.2 Safety Tips for Camping at Audra State Park

Ensure a safe camping experience by staying alert and prepared. Keep a safe distance from wildlife and store food securely. Familiarize yourself with emergency exits and trails using the campground map. Bring necessary supplies, including water, first aid kits, and flashlights. Be mindful of weather conditions and avoid camping near flood-prone areas. Stay informed about park rules and regulations to ensure a secure and enjoyable stay at Audra State Park.

The Audra State Park campground map is an essential tool for navigating and planning your camping trip, ensuring a seamless and memorable outdoor experience.

11.1 Summary of Key Points

The Audra State Park campground map is a vital resource for planning your stay, offering detailed site numbers and layout. It helps campers navigate the park, identify amenities, and choose ideal campsites. The map is available as a PDF for easy access, ensuring a smooth and enjoyable camping experience. By understanding the map, visitors can maximize their time exploring the park’s natural beauty, trails, and recreational opportunities.

11.2 Final Thoughts on Using the Campground Map

The Audra State Park campground map is an invaluable tool for enhancing your camping experience. It provides clear navigation, helps in selecting the perfect site, and highlights key facilities and trails. By using the map, campers can efficiently plan their stay and explore the park’s natural beauty. With user-friendly details and essential information, the map ensures a memorable and stress-free adventure at Audra State Park.

dumbbell full body workout pdf

A full body dumbbell workout is a versatile and efficient way to build strength and muscle. It targets all major muscle groups, improving overall fitness. Perfect for home or gym, it’s ideal for any fitness level.

Overview of the Benefits

Dumbbell full body workouts offer numerous advantages for individuals seeking to improve strength, flexibility, and overall fitness. They are highly efficient, targeting multiple muscle groups in a single session, which saves time and maximizes results. Unlike machine-based exercises, dumbbells allow for natural movement patterns, enhancing functional strength and reducing injury risk. These workouts are also incredibly versatile, suitable for beginners and advanced lifters alike, as weights can be adjusted to match fitness levels. Additionally, dumbbells are cost-effective and space-efficient, making them ideal for home workouts or travel. Regular practice improves muscle balance, coordination, and cardiovascular health. The holistic approach of full body workouts ensures no muscle group is neglected, promoting balanced development. Moreover, the portability and simplicity of dumbbells make them a practical choice for anyone aiming to stay consistent with their training regimen, regardless of location or access to gym facilities.

Importance of Consistency in Dumbbell Training

Consistency is the cornerstone of achieving success with dumbbell full body workouts. Regular training ensures progressive overload, a key principle for muscle growth and strength development. Without consistent effort, muscle gains and improvements in fitness are slow and inconsistent. Dumbbell exercises work multiple muscle groups, but their effectiveness depends on regular practice to build and maintain muscle memory. Over time, consistency enhances coordination, balance, and overall physical performance. It also fosters discipline, which is essential for long-term commitment to fitness goals. Even moderate workouts performed regularly yield better results than intense, sporadic sessions. The body adapts to demands placed upon it, so skipping workouts can hinder progress and lead to plateaus. By incorporating dumbbell training into a consistent routine, individuals can ensure steady progress, improved health, and a stronger, more resilient physique. Consistency not only builds muscle but also supports cardiovascular health and mental well-being, making it a vital component of any successful fitness journey.

Best Dumbbell Exercises for a Full Body Workout

  • Bent Over Rows target the back and shoulders.
  • Dumbbell Lunges work the legs and glutes.
  • Bicep Curls isolate the biceps for strength.
  • Shoulder Press builds shoulder and tricep power.
  • Chest Press engages the chest and triceps.
  • Dumbbell Deadlifts strengthen the entire lower body and core.

Upper Body Exercises

Dumbbell upper body exercises are essential for building strength and definition in the chest, shoulders, arms, and back. These exercises can be performed with minimal equipment, making them ideal for home workouts.

  • Dumbbell Bench Press targets the chest muscles and triceps, promoting a strong and defined chest.
  • Bent Over Rows work the back muscles, improving posture and overall back strength.
  • Shoulder Press isolates the shoulder muscles, enhancing stability and power.
  • Bicep Curls focus on building strong, toned biceps.
  • Tricep Kickbacks target the triceps, essential for arm definition and strength.
  • Lateral Raises sculpt the deltoids, creating broader shoulders.
  • Chest Flys open up the chest, improving flexibility and muscle balance.

These exercises can be combined in various ways to create a comprehensive upper body workout, ensuring full muscle engagement and development.

Lower Body Exercises

Dumbbell lower body exercises are crucial for building strength and stability in the legs, glutes, and hips. These movements not only enhance muscle mass but also improve functional fitness and overall athleticism.

  • Goblet Squats target the quadriceps and glutes, promoting proper form and deep engagement of the lower body muscles.
  • Dumbbell Lunges work the quadriceps, hamstrings, and glutes, improving balance and coordination.
  • Deadlifts engage the entire lower body, including the hamstrings and glutes, while strengthening the back muscles.
  • Dumbbell Step-Ups isolate the quadriceps and glutes, enhancing step-based functional strength.
  • Sumo Squats target the adductors and glutes, providing a wider range of motion for comprehensive lower body development.
  • Calf Raises focus on building strong, defined calf muscles, essential for stability and posture.

These exercises can be incorporated into a workout routine to ensure full lower body engagement, improving both strength and functional fitness.

Core and Functional Movements

Strengthening the core and incorporating functional movements is essential for overall stability and athleticism. These exercises improve balance, posture, and the ability to perform daily tasks with ease.

  • Dumbbell Russian Twists target the obliques, enhancing rotational strength and core stability.
  • Dumbbell Leg Raises focus on the lower abs, improving flexibility and core engagement;
  • Dumbbell Plank Rows strengthen the core while engaging the back muscles, promoting a strong and stable midsection.
  • Dumbbell Side Bends target the obliques and lower back, improving lateral flexibility and strength.
  • Dumbbell Bird Dogs enhance core stability and coordination, challenging both the abs and lower back.

These exercises are designed to build a strong, functional core that supports overall fitness and enhances performance in other exercises.

Sample 4-Day Dumbbell Workout Routine

This structured routine balances full body, upper, lower, and core-focused workouts. It maximizes muscle engagement and recovery, ensuring progressive strength and fitness improvements throughout the week with minimal equipment.

Day 1: Full Body Focus

Start with a dynamic warm-up to prepare your muscles. Focus on compound movements that engage multiple muscle groups simultaneously. Begin with the dumbbell deadlift (3 sets of 8-10 reps), targeting your legs, back, and core. Follow with dumbbell squats (3 sets of 10-12 reps) to emphasize leg strength and stability. Transition to the dumbbell bench press (3 sets of 8-10 reps) for chest and triceps. Include bent-over rows (3 sets of 8-10 reps) to work your back and arms. Finish with dumbbell shoulder presses (3 sets of 10-12 reps) and plank rows (3 sets of 10-12 reps per side) for core engagement and functional strength. Rest for 60-90 seconds between sets and adjust weights as needed. This balanced approach ensures full-body activation and lays a strong foundation for the week ahead.

Day 2: Upper Body Emphasis

Begin Day 2 with a focus on building strength and definition in your upper body. Start with the dumbbell bench press (4 sets of 8-10 reps) to target your chest and triceps. Follow with incline dumbbell presses (3 sets of 10-12 reps) to isolate the upper chest. Move on to bent-over dumbbell rows (4 sets of 8-10 reps) to engage your back and arms. Include dumbbell shoulder presses (3 sets of 10-12 reps) for shoulder development. Finish with bicep curls (3 sets of 12-15 reps) and tricep kickbacks (3 sets of 12-15 reps) to sculpt your arms. Rest for 60-90 seconds between sets and adjust weights as needed. This workout emphasizes compound movements to maximize muscle engagement while incorporating isolation exercises for detailed definition. Focus on maintaining proper form to avoid injury and ensure optimal results. Complete the session with a brief cool-down to promote recovery. This structure ensures a balanced upper body workout that builds both strength and aesthetics.

Day 3: Lower Body Emphasis

Day 3 focuses on strengthening and toning the lower body using dumbbells. Start with goblet squats (4 sets of 8-10 reps) to target the quads and glutes. Next, perform Romanian deadlifts (4 sets of 8-10 reps) to engage the hamstrings and lower back. Move on to dumbbell lunges (3 sets of 10-12 reps per leg) for balanced leg development. Include step-ups (3 sets of 10-12 reps per leg) to improve functional strength and coordination. Finish with calf raises (4 sets of 15-20 reps) to strengthen the lower legs. Rest for 60-90 seconds between sets and adjust weights as needed. This workout emphasizes compound movements to build overall lower body strength while incorporating isolation exercises for targeted muscle development. Focus on maintaining proper form to prevent injury and maximize results. Complete the session with a brief cool-down to promote recovery. This structured approach ensures a comprehensive lower body workout that enhances both power and endurance.

Day 4: Core and Active Recovery

Day 4 focuses on core strengthening and active recovery to enhance overall stability and flexibility. Begin with Russian twists (3 sets of 15-20 reps) to target the obliques. Follow with dumbbell planks (3 sets of 30-60 seconds) to engage the core and improve posture. Perform bird dogs (3 sets of 10-12 reps per side) to strengthen the lower back and promote balance. Include reverse crunches (3 sets of 12-15 reps) to target the lower abs. For active recovery, incorporate light cardio such as brisk walking or cycling for 10-15 minutes, followed by dynamic stretching to improve mobility. Finish with foam rolling or self-myofascial release to aid muscle recovery. This day emphasizes restorative movements and core stability, ensuring your body recovers while maintaining engagement. Keep weights light and focus on controlled movements to avoid strain. This balanced approach supports long-term fitness and injury prevention. Rest and recovery are crucial for muscle growth and overall well-being.