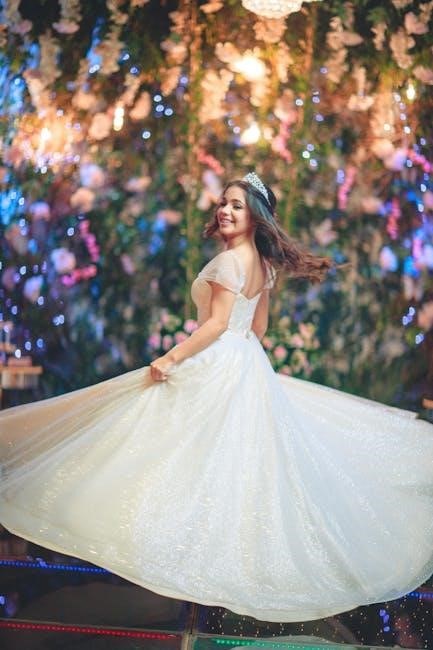
Author Archives: adrianna

nyc handicap parking permit pdf

The NYC Handicap Parking Permit allows individuals with disabilities to park in designated spaces, ensuring accessibility and convenience․ It is issued by the NYC Department of Transportation and requires medical certification․ Eligibility is based on severe mobility impairments, with applications available online or via mail․ The permit is valid only within NYC and must be displayed prominently․ It is essential to follow all rules and regulations to avoid fines or penalties․

Overview of the NYC Handicap Parking Permit Program

The NYC Handicap Parking Permit Program is designed to assist individuals with disabilities by providing accessible parking options․ Managed by the NYC Department of Transportation (DOT), the program offers permits for both temporary and permanent disabilities․ These permits allow holders to park in designated handicap parking spaces throughout New York City․ The program aims to enhance mobility and independence for individuals with severe disabilities․ Permits are invalid outside NYC and must be displayed correctly to avoid fines․ Applicants must meet specific eligibility criteria and provide medical certification․ The program also includes metered parking waivers for eligible individuals․ For more details, visit the NYC DOT website or call (718) 433-3100․

Eligibility Criteria for the NYC Handicap Parking Permit

To qualify, applicants must have a permanent disability that severely impairs mobility or require a private vehicle for transportation․ NYC residency or full-time work/student status is also required․

Medical Certification Requirements for Applicants

Applicants must provide a medical certification from a licensed physician, verifying their disability․ The certification must be completed on Form MV-664․1, detailing the nature and severity of the disability․ This form is mandatory for determining eligibility․ The NYC Department of Transportation (DOT) and the Department of Health and Mental Hygiene (DOHMH) review the application․ If the medical certification is incomplete or insufficient, the DOT will not issue the permit․ Applicants with plates for persons with severe disabilities may also qualify․ Ensure all medical documents are accurate and submitted with the application to avoid delays in processing․

Application Process for the NYC Handicap Parking Permit

The application process involves checking eligibility, collecting required documents, completing Form MV-664․1, and submitting it online or by mail․ Call (718) 433-3100 for assistance․

Step-by-Step Guide to Completing the Application Form

To complete the NYC Handicap Parking Permit application form, start by reviewing eligibility criteria․ Download and print Form MV-664․1 or obtain it from the NYC DOT․ Fill in personal details, including name, address, and contact information․ Section B requires a licensed physician’s certification of your disability․ Attach required documents, such as a valid photo ID, proof of NYC residency, and vehicle registration if applicable․ Ensure all sections are filled accurately to avoid delays․ Sign and date the form․ Submit the application online via the NYC DOT website, by mail, or in person at a designated location․ For assistance, call (718) 433-3100․

Required Documentation for the NYC Handicap Parking Permit

Applicants must submit Form MV-664․1, medical certification, a valid photo ID, proof of NYC residency, and vehicle registration if applicable․ Ensure all documents are current and legible․

Acceptable Forms of Identification and Proof of Residency

To apply for the NYC Handicap Parking Permit, applicants must provide specific documents․ Acceptable forms of identification include a valid NYS Driver’s License, NYS Non-Driver ID Card, or NYC Municipal Identification Card (IDNYC)․ Proof of residency can be demonstrated with a utility bill, bank statement, or lease agreement issued within the last 60 days․ All documents must be current and legible․ Applicants should ensure the information matches the details on their application to avoid delays․ For the most accurate and up-to-date document requirements, visit the NYC Department of Transportation website or contact their office directly․

Types of Handicap Parking Permits Available in NYC

NYC offers temporary and permanent handicap parking permits․ Temporary permits are for short-term disabilities, while permanent permits are for lifelong or long-term mobility impairments requiring ongoing accommodation․

Differences Between Temporary and Permanent Permits

Temporary permits are issued for short-term disabilities, typically up to six months, and require periodic medical recertification․ Permanent permits are for lifelong disabilities with no expected improvement․ Both allow parking in designated spaces, but temporary permits expire and must be renewed, while permanent ones remain valid indefinitely unless revoked․ Temporary permits are ideal for recovery periods, while permanent ones offer long-term solutions for ongoing mobility challenges․ Applicants must provide medical documentation for both types, but temporary permits require updates, ensuring the disability status aligns with the permit’s validity․ This distinction ensures resources are appropriately allocated based on individual needs․

Renewal Process for the NYC Handicap Parking Permit

To renew, submit the updated application with medical certification․ Permits can be renewed online or by mail․ Contact (718) 433-3100 for assistance or more information․

How to Renew an Expired Permit

To renew an expired NYC Handicap Parking Permit, applicants must submit an updated application with current medical certification․ The process can be completed online or by mail․ Visit the NYC Department of Transportation website or contact their office at (718) 433-3100 for detailed instructions․ Ensure all required documents, such as a valid ID and proof of residency, are included․ Renewal applications are typically processed within a few weeks․ If your permit has lapsed, avoid using it until the renewal is approved․ Failure to renew may result in parking violations․ For assistance, refer to the NYC DOT website or call the provided phone number․

Fines and Penalties for Misuse of the Permit

Misusing a NYC Handicap Parking Permit can result in fines ranging from $50 to $150 for first offenses, increasing up to $300 for repeat violations․ Using an expired or unauthorized permit may lead to summonses․ Improper display or unauthorized lending of the permit can also incur penalties․ Fines are strictly enforced to ensure compliance with parking regulations․ Always follow guidelines to avoid legal consequences․ Proper use of the permit is essential to maintain its validity and benefits․ Failure to comply may result in additional fees or permit revocation․ Adhere to all rules to avoid penalties and ensure fair access for all permit holders․

Understanding the Consequences of Parking Violations

Violating NYC handicap parking regulations can lead to significant penalties, including fines ranging from $50 to $300, depending on the offense․ Misuse of a permit, such as parking in reserved spaces without authorization or using an expired permit, can result in summonses․ Repeat offenses may lead to increased fines and potential revocation of the permit․ Additionally, improper display or unauthorized lending of the permit can incur penalties․ It is crucial to adhere to all parking regulations to avoid legal consequences and ensure fair access for all permit holders․ Compliance is essential to maintain the validity and benefits of the NYC Handicap Parking Permit․

Validity of the NYC Handicap Parking Permit

The NYC Handicap Parking Permit is valid only within New York City and cannot be used elsewhere․ Its validity is strictly limited to designated NYC parking spaces․

Where the Permit is Valid and Restrictions

The NYC Handicap Parking Permit is exclusively valid within New York City and cannot be used elsewhere․ It grants access to designated handicap parking spaces, including metered parking spots․ However, permits issued outside of New York State are not recognized in NYC․ The permit must be displayed prominently on the rearview mirror to avoid fines․ It is important to note that the permit does not guarantee a parking spot and cannot be used in no-parking zones or areas with specific time restrictions․ Misuse of the permit can lead to penalties․ For further details, contact the NYC Department of Transportation at (718) 433-3100 or visit their website․

Online Application Process

The NYC Handicap Parking Permit can now be applied for online through the NYC Department of Transportation website․ Visit www․nyc․gov/dot for details․

How to Apply for the Permit Online

To apply for the NYC Handicap Parking Permit online, visit the NYC Department of Transportation website at www․nyc․gov/dot․ Create an account or log in if you already have one․ Fill out the application form by providing required personal and medical information․ Upload a scanned copy of your medical certification and proof of residency․ Submit the completed form and wait for confirmation․ Once approved, your permit will be mailed to you․ Ensure all documents are valid and clearly visible for processing․ The online system streamlines the application process, making it convenient for applicants to submit their requests efficiently․

Important Contact Information

For assistance, contact the NYC Department of Transportation at (718) 433-3100 or visit their website at www․nyc․gov/dot for more information․

Phone Numbers and Websites for Assistance

For inquiries or assistance regarding the NYC Handicap Parking Permit, contact the NYC Department of Transportation at (718) 433-3100․ Visit their official website at www․nyc․gov/dot for detailed information, application forms, and guidelines․ Additionally, the online application portal for the NYC PPPD can be accessed through the same website, allowing applicants to submit their requests conveniently․ These resources provide comprehensive support for applicants, including eligibility criteria, required documents, and step-by-step application processes․ Utilize these contacts to ensure a smooth experience when applying for or renewing your permit․

folding sawhorse plans pdf

Folding sawhorse plans offer a space-saving solution for workshops, providing portability and versatility․ Detailed PDF guides include materials, tools, and step-by-step instructions for easy assembly and storage․

Overview of Folding Sawhorses

Folding sawhorses are versatile, space-saving tools ideal for woodworking projects; Designed for portability, they feature sturdy constructions and compact designs․ Plans often include detailed instructions, materials lists, and diagrams, making them accessible for DIY enthusiasts․ These sawhorses are perfect for workshops with limited space, offering practicality and ease of use for various tasks․

Importance of PDF Plans for Woodworking Projects

PDF plans are essential for woodworking projects, offering clear instructions, materials lists, and diagrams․ They provide step-by-step guidance, ensuring accuracy and ease of execution․ Detailed measurements and 3D models help visualize the project․ PDFs are portable, accessible, and printable, making them ideal for DIY enthusiasts to follow and achieve professional-quality results efficiently․

Benefits of Folding Sawhorses

Folding sawhorses offer space-saving convenience, portability, and versatility․ They provide sturdy support for projects while being easy to store and transport, making them ideal for workshops and outdoor use․

Space-Saving Design

Folding sawhorses are designed to save valuable workshop space by folding flat, allowing for easy storage in compact areas․ Their collapsible nature makes them ideal for small workshops or garages, ensuring they remain out of the way when not in use․ This feature enhances productivity while maintaining a clutter-free environment, perfect for limited spaces․

Portability and Ease of Storage

Folding sawhorses are lightweight and portable, making them easy to transport to job sites or outdoor projects․ Their compact folded design allows for simple storage in small spaces, such as closets or vehicle trunks․ This portability enhances versatility, ensuring your sawhorses are always accessible without compromising valuable storage space in your workshop or home․

Versatility in Woodworking Projects

Folding sawhorses are adaptable tools for various woodworking tasks, from cutting large panels to supporting workbenches․ Their sturdy design allows them to hold heavy materials securely, making them ideal for projects requiring extra support․ Whether working indoors or outdoors, these sawhorses provide reliable assistance, enhancing efficiency and precision in diverse woodworking applications․

Materials and Tools Required

Essential materials include 2×4 lumber, plywood, and hardware like screws; Tools needed are a saw, drill, and wrench for assembly․ Plans often detail exact quantities and specifications․

Lumber and Hardware Needed

  • 2×4 lumber for the frame and legs․
  • 1/2″ plywood for the work surface․
  • Deck screws and bolts for assembly․
  • Optional: Pine studs for added stability․

Plans specify exact lengths and quantities for each material, ensuring a sturdy and functional design․

Essential Tools for Assembly

  • Circular saw for cutting lumber to precise lengths․
  • Cordless drill for drilling pilot holes and driving screws․
  • Impact driver for securing bolts and deck screws․
  • Tape measure for accurate cuts and alignments․
  • Square to ensure all joints are properly aligned․
  • Clamps to hold pieces in place during assembly․
  • Sandpaper to smooth rough edges before final assembly․

These tools ensure a precise and efficient assembly process․

Optional Materials for Added Stability

Enhance stability with optional materials like plywood for the top surface or diagonal braces for added rigidity․ Non-slip rubber pads on legs prevent movement, while steel reinforcements can strengthen the folding mechanism․ These additions ensure durability and reliability for heavy-duty projects․

Step-by-Step Assembly Guide

Cut and prepare lumber according to plans, then assemble the frame and legs․ Attach the folding mechanism securely, ensuring smooth operation․ Use 2x4s for stability and plywood for added support․

Cutting and Preparing the Lumber

Cut 2×4 lumber to specified lengths for legs, rails, and supports․ Measure carefully and use a circular saw for precise cuts․ Sand all pieces to ensure smooth edges and remove splinters․ Check for accuracy in measurements to ensure proper fit during assembly․ Use a miter saw or hand saw for finer adjustments if needed․

Assembling the Frame and Legs

Begin by attaching legs to the frame using deck screws․ Align legs securely with the top rails, ensuring proper alignment for stability․ Use clamps to hold pieces in place while screwing․ Drill pilot holes to avoid splitting wood․ Tighten screws firmly for a sturdy base, preparing the sawhorse for the folding mechanism installation․

Attaching the Folding Mechanism

Attach hinges or folding brackets to the frame and legs, ensuring proper alignment․ Secure the mechanism with bolts or screws, following the PDF plan’s specifications․ Test the folding action to ensure smooth operation․ Tighten all connections for stability and durability, completing the sawhorse’s functional design for easy storage and portability․

Safety Considerations

Ensure proper height and stability to prevent accidents․ Always check load capacity and secure folding mechanisms․ Regular inspections and maintenance are crucial for safe operation and durability․

Proper Height and Stability

Ensure your folding sawhorse is set to a comfortable working height, typically between 34-36 inches, for optimal ergonomics․ Always place it on a level surface and check for even weight distribution to prevent tipping․ Adjust the legs if necessary to maintain balance and stability during use․

Secure Folding and Unfolding

Ensure the folding mechanism is sturdy and securely locked when unfolded․ Regularly inspect hinges and latches for wear․ Test stability before use and avoid overloading to prevent collapse․ Proper alignment during folding ensures smooth operation and prevents damage to the sawhorse or surrounding objects․

Load Capacity and Weight Limits

Always adhere to the specified load capacity and weight limits outlined in your folding sawhorse plans․ Exceeding these can compromise stability and safety․ Ensure materials and construction match the design specifications for optimal performance․ Test the sawhorse with moderate weights first and inspect for any signs of strain before full use․

Storage and Maintenance

Folding sawhorses offer compact storage solutions, ideal for small workshops․ Regularly clean and inspect for damage․ Store in a dry environment to prevent moisture damage and ensure longevity; Apply protective finishes if needed to maintain durability and performance over time․

Compact Storage Solutions

Folding sawhorses are designed for efficient storage, enabling them to be easily stacked or folded flat․ This space-saving feature makes them ideal for workshops with limited room․ Many plans include specific instructions for compact folding mechanisms, ensuring they can be neatly stored away when not in use, keeping your workspace organized and clutter-free․

Regular Maintenance Tips

Regular maintenance ensures longevity and stability of folding sawhorses․ Tighten screws periodically to maintain structural integrity․ Inspect for wear and tear, replacing any damaged parts promptly․ Apply wood sealants or finishes to protect against moisture and extend lifespan․ These simple steps keep your sawhorses reliable and functional for years of woodworking projects․

Protecting Against Moisture and Damage

Protect your folding sawhorses from moisture by applying wood sealants or finishes․ Store them in dry areas, away from direct sunlight․ Regularly inspect for damage and address issues promptly․ Cleaning surfaces and ensuring proper drying after use further extends their lifespan and maintains reliability for consistent performance in various woodworking tasks․

Comparisons with Other Sawhorse Types

Folding sawhorses excel in portability and space-saving design compared to fixed or stackable options․ They offer versatility for various projects while maintaining durability, making them ideal for workshops with limited space․

Fixed vs․ Folding Sawhorses

Folding sawhorses offer superior portability and space efficiency compared to fixed models․ While fixed sawhorses provide stability, folding designs allow easy storage and transportation, making them ideal for workshops with limited space or for outdoor projects․ Their collapsible nature ensures versatility without compromising on durability, catering to both professional and DIY woodworking needs effectively․

Stackable vs․ Non-Stackable Designs

Stackable sawhorses are ideal for workshops with limited space, offering easy storage and transportation․ Non-stackable designs, while less versatile, provide simplicity and sturdiness․ Stackable models often include notched legs for secure nesting, enhancing portability without compromising stability, making them perfect for DIY projects and professional use alike․ Choose based on storage needs and workflow efficiency․

Heavy-Duty vs․ Lightweight Options

Heavy-duty sawhorses are built for intense use, offering exceptional stability and load capacity, ideal for large projects․ Lightweight options prioritize portability and ease of storage, suitable for smaller tasks․ Both designs cater to different needs, ensuring versatility in woodworking projects, whether in professional settings or home workshops, with clear guides in PDF plans for each type․

User Reviews and Testimonials

Users praise the sturdiness and ease of use of folding sawhorses․ Many highlight the value of detailed PDF plans, with some sharing creative modifications for enhanced functionality and customization․

Feedback from Woodworkers

Woodworkers praise the folding sawhorse plans for their thorough instructions and sturdy results․ Many users appreciate the space-saving design, while others highlight successful modifications, like adjusting heights or adding PVC supports for enhanced functionality, showcasing the plan’s adaptability to individual workshop needs and preferences․

Success Stories and Modifications

Woodworkers have successfully built folding sawhorses, often modifying designs for better height or stability․ One user added PVC supports for table saw work, while others adjusted dimensions for stackability․ These modifications highlight the plan’s versatility, allowing craftsmen to tailor the sawhorses to their specific needs and workshop preferences effectively․

Common Praises and Criticisms

Users praise folding sawhorse plans for their sturdiness, space-saving design, and clear instructions․ Many appreciate the portability and versatility, while others highlight the ease of assembly․ However, some critics mention the need for height adjustments and additional supports for heavier loads, suggesting minor tweaks for enhanced functionality and user comfort․

Customization and Upgrades

Users can customize folding sawhorses by adjusting height and width or adding reinforcements for heavy use․ Incorporating extra features like storage compartments enhances functionality, catering to specific needs and preferences while maintaining portability and stability․

Adjusting Height and Width

Customize your folding sawhorse by adjusting its height and width to suit your needs․ Cut legs or top pieces to desired lengths for a comfortable working height․ Users often modify dimensions to accommodate personal preferences, ensuring optimal support and stability․ This customization enhances functionality while maintaining the sawhorse’s portability and foldability for convenient storage․

Adding Reinforcements for Heavy Use

For heavy-duty applications, reinforce your folding sawhorse with metal brackets or steel plates at joints․ Adding gussets or thicker lumber enhances stability․ Some users incorporate PVC or metal supports for extra durability․ These modifications ensure the sawhorse remains sturdy under heavy loads while maintaining its foldable design for convenient storage and transport․

Incorporating Additional Features

Enhance functionality by adding tool trays, clamps, or wheels to your folding sawhorse․ Some plans include optional features like adjustable height settings or built-in measuring guides․ These upgrades improve versatility while maintaining the compact, foldable design․ Customization options allow users to tailor their sawhorse to specific woodworking needs, ensuring maximum utility in various projects․

Folding sawhorse plans offer practical, space-saving solutions for workshops․ Their portability and versatility make them essential for woodworkers․ Start your project today and enjoy the convenience of a foldable design․

Final Thoughts on Folding Sawhorse Plans

Folding sawhorse plans are a practical solution for efficient woodworking․ They offer excellent space-saving benefits, portability, and versatility․ With detailed PDF guides, you can easily build and customize your own․ These designs cater to various needs, ensuring stability and durability․ Perfect for workshops of all sizes, folding sawhorses are a valuable addition to any project․

Encouragement to Start Your Project

Begin your folding sawhorse project with confidence! Detailed PDF plans guide you through each step, ensuring a successful build․ These versatile designs are perfect for woodworkers of all skill levels․ Start today and enjoy the benefits of efficient, space-saving workshop solutions tailored to your needs․

textes avec fautes à corriger pdf

Tools and Resources for Correcting French Texts

Utilize online tools like BonPatron and Correcteur101 for instant corrections․ PDF exercises offer practical error detection, enhancing proficiency in grammar and orthography through interactive learning․

Online Correctors: BonPatron and Correcteur101

BonPatron and Correcteur101 are indispensable tools for correcting French texts․ Both platforms automatically detect errors in spelling, grammar, and syntax, offering suggestions for improvement․ BonPatron is particularly effective at identifying orthographic and grammatical mistakes, while Correcteur101 provides comprehensive corrections, including typographical and stylistic enhancements․ These tools are especially useful for users working with textes avec fautes à corriger pdf, as they enable precise error detection and correction․ By utilizing these resources, learners and professionals can refine their French writing skills, ensuring clarity and accuracy in their texts․ These correctors are user-friendly and accessible, making them essential for anyone seeking to perfect their French language proficiency․

Utilizing PDF Annotation Tools

PDF annotation tools are highly effective for correcting and analyzing textes avec fautes à corriger pdf․ These tools allow users to highlight, underline, and comment directly on the text, making it easier to identify and address errors․ Features like text boxes and sticky notes enable detailed feedback, while strike-through options help visualize corrections․ Tools such as Adobe Acrobat and specialized annotation software provide robust platforms for interactive learning․ Educators often use these tools to create exercises where students can correct errors and receive immediate feedback․ Additionally, collaborative features facilitate peer review, enhancing the learning experience․ By integrating PDF annotation into the correction process, users can engage more deeply with the material, improving their understanding of French grammar and orthography․ This method is particularly beneficial for structured exercises and self-assessment, making it a valuable resource for language learners and educators alike․

French Grammar and Orthography Guides

French grammar and orthography guides are essential resources for correcting textes avec fautes à corriger pdf․ These guides provide detailed explanations of common errors, offering clear examples and solutions․ They cover topics such as verb conjugations, gender rules, and punctuation, ensuring a solid understanding of French language basics․ Many guides include exercises and quizzes to test knowledge and reinforce learning․ Additionally, they often highlight frequent mistakes made by learners, such as confusing homonyms or misusing prepositions․ By referring to these guides, users can identify patterns of errors and improve their writing skills․ They also serve as valuable tools for educators, providing structured lessons and activities․ Overall, French grammar and orthography guides are indispensable for anyone looking to master the language and correct texts effectively․

Understanding and Correcting Common Errors

Identifying common errors in textes avec fautes à corriger pdf involves recognizing frequent mistakes in orthography, grammar, and syntax․ Correction techniques include exercises, guides, and tools to address these issues effectively․

Orthography Mistakes: Examples and Detection

Orthography mistakes in French texts often involve incorrect spellings, such as missing accents or wrong letter usage․ For instance, confusing à and à or misusing é instead of è․ These errors can significantly alter meaning․ Detection requires careful reading and the use of tools like BonPatron and Correcteur101, which highlight mistakes and suggest corrections․ Additionally, exercises in textes avec fautes à corriger pdf provide practical examples, helping learners identify common orthographic issues․ By practicing error detection, users can enhance their French writing skills and produce more accurate texts․ Regular practice with such exercises ensures better retention of correct spellings and reduces future mistakes․

Grammatical Errors: Identification and Rectification

Grammatical errors in French texts often involve incorrect verb conjugations, subject-verb agreement, or pronoun usage․ For example, mistakes like le manger instead of le mange or je vas instead of je vais are common․ These errors can disrupt sentence meaning and clarity․ To identify them, tools like BonPatron and Correcteur101 are invaluable, as they highlight grammatical issues and provide corrections․ Additionally, exercises in textes avec fautes à corriger pdf offer practical examples, allowing learners to practice identifying and rectifying mistakes․ Correcting such errors involves understanding grammar rules, such as verb tenses and pronoun placement․ Regular practice with these exercises helps reinforce proper grammatical structures, ensuring more accurate and fluent writing․ Over time, learners develop a stronger grasp of French grammar, reducing errors in their texts․

Syntax Issues:Improving Sentence Structure

Syntax errors in French texts often result from incorrect word order or misplaced modifiers․ For instance, phrases like Marie le livre a donné instead of Marie a donné le livre disrupt sentence clarity․ Such issues can make texts difficult to understand․ Tools like BonPatron and Correcteur101 help identify these structural problems, offering suggestions to rephrase sentences correctly․ Additionally, exercises in textes avec fautes à corriger pdf provide practical examples, enabling learners to practice restructuring sentences․ Correcting syntax involves understanding proper word placement and clause organization․ Regular practice with these exercises helps improve sentence flow and coherence․ Over time, learners develop a better sense of French syntax, leading to more effective and natural writing․ Mastering sentence structure is essential for clear and professional communication in French․

Best Practices for Effective Text Correction

Proofread carefully, focusing on grammar and punctuation․ Use tools like BonPatron for instant corrections․ Review each error to understand and avoid repetition․ Compare corrected texts with originals to learn from mistakes effectively․

Proofreading Techniques for Accuracy

Effective proofreading involves a systematic approach to identify and correct errors in texts․ Start by reading the text aloud to detect awkward phrasing or grammatical mistakes․ Use tools like BonPatron and Correcteur101 to highlight orthographic and syntactic errors․ Pay attention to common pitfalls, such as incorrect verb conjugations or punctuation․ When working with PDFs, utilize annotation tools to mark and correct errors directly․ It is essential to review each correction to understand the mistake and avoid repetition․ Additionally, comparing the original text with the corrected version helps in identifying recurring errors․ Regular practice with exercises like textes avec fautes à corriger improves accuracy and enhances language proficiency․ By combining these techniques, learners and professionals can ensure their texts are polished and error-free․

Adhering to Style Guides

Adhering to style guides is crucial for maintaining consistency and accuracy in French texts․ When correcting textes avec fautes à corriger pdf, ensure that all modifications align with established French language standards․ Consult authoritative resources like the Bescherelle or the Robert dictionary for proper grammar, orthography, and punctuation rules․ Pay attention to typographical conventions, such as the use of accents and cedillas․ Additionally, familiarize yourself with style manuals like the Guide du rédacteur for professional writing standards․ When correcting PDFs, use annotation tools to highlight deviations from style guidelines․ By following these frameworks, you can produce texts that are not only error-free but also stylistically coherent․ Regular practice with correction exercises helps internalize these guidelines, making adherence to style guides second nature․ This systematic approach ensures clarity, precision, and professionalism in all corrected texts․

Avoiding Typical Pitfalls in French

When correcting textes avec fautes à corriger pdf, it’s essential to watch out for common French pitfalls․ One frequent error is the misuse of homonyms, such as à and à, which are often confused․ Additionally, accents like é, è, and ê are frequently omitted or misapplied․ Another common issue is the incorrect use of prepositions, particularly à and en․ Verbs, especially irregular ones, are prone to conjugation mistakes․ Punctuation errors, such as missing commas or incorrect use of semicolons, can alter sentence meaning․ Lastly, gender and number agreement in adjectives and pronouns are often overlooked․ To avoid these mistakes, use tools like BonPatron and Correcteur101 for automated checks․ Regular practice with correction exercises and reviewing grammar guides can help minimize these errors․ By addressing these typical pitfalls, you can significantly improve the accuracy and clarity of French texts․ Consistent practice and attention to detail are key to mastering these nuances․

Creating Effective Exercises for Learning

Design effective exercises for learning with textes avec fautes à corriger pdf․ These interactive tools help users identify and correct mistakes, improving grammar and orthography skills through practical activities․

Designing Error Detection Activities

Creating effective error detection activities using textes avec fautes à corriger pdf enhances learning by engaging users in identifying and correcting mistakes․ These exercises often include a variety of common errors, such as orthographic, grammatical, and syntactical issues, allowing learners to practice their correction skills in a structured manner․

Begin by selecting a PDF text with intentional errors, ensuring the mistakes are relevant to the learner’s skill level․ Clearly indicate the number of errors and provide guidance on which types of errors to focus on, such as verb conjugations or punctuation․

Incorporate interactive elements, like asking users to underline or highlight errors before correcting them․ This hands-on approach reinforces learning and improves retention․ Additionally, include answer keys or correction guides for self-assessment, enabling learners to track their progress effectively․

These activities are particularly useful for developing a keen eye for detail and fostering a deeper understanding of French grammar and orthography․ Regular practice with such exercises helps learners become more confident in their ability to identify and correct errors independently․

Practical Correction Exercises

Practical correction exercises using textes avec fautes à corriger pdf provide learners with hands-on experience in identifying and correcting errors․ These exercises typically include a variety of texts with intentional mistakes, allowing users to practice their skills in a realistic context․ The errors often cover orthography, grammar, and syntax, making them ideal for improving overall French proficiency․

Begin by selecting a PDF text with marked errors, ensuring the mistakes align with the learner’s skill level․ Exercises may ask users to underline or highlight errors before correcting them, fostering attention to detail․ Some activities include fill-in-the-blank sections or rewriting sentences to reinforce understanding․

These exercises are updated regularly to maintain relevance and variety, ensuring learners encounter a wide range of common mistakes․ By working through these practical tasks, users gain confidence in their ability to correct texts accurately and effectively․

Practical correction exercises complement theoretical learning, making them an essential tool for mastering French grammar and orthography․

Preventive Drills to Avoid Future Mistakes

Preventive drills are essential for avoiding recurring errors in French texts․ By practicing regular exercises, learners can internalize correct grammar, orthography, and syntax, reducing the likelihood of mistakes in future writing․ These drills often include targeted activities such as rewriting sentences, identifying common pitfalls, and completing fill-in-the-blank tasks․

Using textes avec fautes à corriger pdf, users can engage in repetitive practice to reinforce proper language usage․ For example, exercises focusing on frequently confused verb conjugations or homophones help build accuracy․ Interactive PDFs may also include quizzes or timed challenges to enhance retention․

Consistent practice with preventive drills ensures that learners develop a strong foundation in French, enabling them to produce error-free texts with confidence․ These exercises are particularly effective when combined with immediate feedback, allowing users to understand and correct their mistakes immediately․

cake cutting instructions

Discover the art of cutting cakes perfectly with essential tools and techniques. Learn how to achieve clean slices and professional results every time, making every celebration sweeter and stress-free.

Understanding the Importance of Proper Cake Cutting

Proper cake cutting ensures even portions, prevents crumbling, and maintains the cake’s visual appeal. Using the right tools, like a serrated knife and cake leveler, helps achieve clean slices. Even layers guarantee consistency, while brushing crumbs ensures a clean surface. For tiered cakes, stability is key to avoid collapse. Proper cutting enhances presentation, making every slice look professional. It also ensures fair portion distribution, making celebrations stress-free. By following these steps, you can achieve perfect results every time, whether for small gatherings or large events. Proper cake cutting is not just about serving; it’s about creating lasting impressions and enjoyable experiences for everyone.

Essential Tools for Cutting a Cake

A serrated knife ensures clean cuts, while a cake leveler creates even layers. A turntable provides easy access, and a serving spatula helps portion slices neatly and efficiently.

Using a Serrated Knife for Clean Slices

A serrated knife is indispensable for achieving clean, even slices. Its toothed edge effortlessly cuts through cake layers without tearing or crumbling. To use it effectively, ensure the blade is long enough to slice through the entire cake in one smooth motion. Start by cutting the cake down the middle, then make parallel cuts for uniform portions. For layered cakes, gently saw through each layer without applying too much pressure. Brushing crumbs off the knife between cuts prevents transferring them to other slices. For large cakes, consider the grid method: make vertical and horizontal cuts to create thin, rectangular slices. This technique is especially useful for cakes over six inches in size. Always use a sharp knife, as a dull one can tear the cake. Refrigerating the cake for 10 minutes before slicing can also help firm it up for cleaner cuts. These techniques ensure every slice is perfect and professional-looking.

The Role of a Cake Leveler

A cake leveler is a crucial tool for ensuring even layers when cutting and serving cakes. It helps create a stable base, making the cake easier to frost and slice. By trimming the mounded portion of the cake, the leveler allows the layers to fit together seamlessly. This is especially important for tiered cakes, where an uneven base can lead to structural issues. Using a leveler also ensures that each slice is consistent in size and appearance, enhancing the overall presentation. For round cakes, leveling ensures the knife glides smoothly through all layers in one cut. Additionally, leveling prevents the cake from shifting during cutting, reducing crumbs and mess. Whether you’re working with round, square, or irregularly shaped cakes, a leveler is essential for professional-looking results and even portion control. It simplifies the cutting process, making it faster and more efficient for both home bakers and professionals alike.

Preparing the Cake for Cutting

Ensure the cake is stable and even by trimming excess and brushing away crumbs. This step guarantees clean slices and a polished presentation for any celebration or event.

Trimming the Cake for Even Layers

Trimming is essential for ensuring even layers and a stable cake. Start by placing the cake on a flat surface or turntable. Use a serrated knife or cake leveler to slice off any uneven portions, especially domes or excess frosting. For multi-layer cakes, carefully trim each layer individually before stacking. This step prevents the cake from toppling and ensures clean, even slices. If using a knife, make sure it’s long enough to cut through all layers in one smooth motion. Once trimmed, turn the cake over and gently brush away crumbs for a clean surface. Evenly trimmed layers not only look professional but also make the cake easier to cut and serve. This preparation ensures every slice is consistent and visually appealing, making your celebration even more special.

Brushing Crumbs for a Clean Surface

Brushing crumbs is a crucial step to ensure a clean and professional finish. After trimming, use a small, soft-bristled brush or a clean spatula to gently sweep away loose crumbs from the cake’s surface. This prevents crumbs from embedding in the frosting or causing unevenness. For tiered cakes, brush each layer individually before stacking to maintain a polished look. If using a turntable, rotate the cake slowly to access all areas. Lightly brush from the top downward, working in one direction to avoid spreading crumbs. For stubborn crumbs, dampen the brush slightly, but avoid over-moistening to prevent damaging the cake. This step ensures a smooth, even surface for frosting and decorating, making the cake more visually appealing and easier to slice cleanly. A crumb-free surface also enhances the overall presentation, creating a professional finish for any celebration.

Techniques for Cutting Different Cake Shapes

Master cutting techniques for round, square, and irregularly shaped cakes. Use serrated knives for clean slices and grid patterns for larger cakes to ensure even portions and professional results.

How to Cut a Round Cake

To cut a round cake effectively, start by placing it on a stable surface and using a long, sharp serrated knife. Begin by cutting down the middle to ensure even division. For uniform slices, use a gentle sawing motion and consider marking the cake with equally spaced lines before cutting. Remove each slice as you go to maintain stability. For larger cakes, a grid pattern can help achieve consistent portions. When dealing with multi-layered cakes, cut through all layers at once with a sufficiently sharp and long knife. Be mindful of decorations and use a hot knife to prevent smearing frosting. Adjust your technique based on the cake’s texture, and clean the knife between cuts for precise, clean slices. This method ensures each slice is both visually appealing and enjoyable to eat.

Guidelines for Cutting Square or Rectangular Cakes

For square or rectangular cakes, begin by cutting the cake into equal-sized portions using a sharp serrated knife. Start by cutting the cake down the middle lengthwise and then crosswise to divide it into four equal sections. For larger cakes, use a grid pattern to ensure consistent slices. Hold the knife at a slight angle and apply gentle pressure to avoid crumbling. If the cake has multiple layers, cut through all layers at once with a long, sharp knife. For precision, mark the cake with equally spaced lines before cutting. To achieve uniform slices, use a ruler or cake cutter guide. Remove each slice carefully to prevent breaking, especially for layered cakes. Clean the knife between cuts to maintain cleanliness and precision. This method ensures even portion sizes and a professional finish for any square or rectangular cake.

Methods for Cutting Irregularly Shaped Cakes

Cutting irregularly shaped cakes requires a strategic approach to ensure even portions and minimal waste. Begin by visualizing the cake’s natural divisions or symmetry. Use a sharp serrated knife to make clean cuts, starting from the top and working downward in smooth, steady motions. For asymmetrical shapes, mark the cake with toothpicks or a knife tip to guide your cuts. Cut in a radial pattern from a central point for cakes with circular elements, or follow the natural contours for unique shapes. For intricate designs, consider slicing smaller sections first, then combining them into larger portions. Always maintain gentle pressure to avoid breaking the cake. Clean the knife frequently to prevent crumbs from transferring between slices. This method ensures that every piece, no matter the shape, is served neatly and evenly, preserving the cake’s artistic appeal while delivering perfect portions.

Special Considerations for Tiered Cakes

Tiered cakes require careful handling to maintain stability while cutting. Use a serrated knife to slice through each tier separately, starting from the bottom. Ensure even portion control by aligning cuts across tiers for uniformity, preventing the cake from collapsing. Stacking and serving each tier individually can simplify the process, ensuring a clean and professional presentation at events. This method guarantees that each guest receives an equal and visually appealing portion, making tiered cakes a stunning yet manageable centerpiece for any celebration. Always clean the knife between cuts to avoid cross-contamination of flavors or crumbs, enhancing the overall experience. Proper tools like cake stands or levelers are essential for stability, while pre-marking portion lines can guide precise cuts, ensuring every slice is perfect. Attention to detail ensures tiered cakes remain both beautiful and delicious, impressing your guests with both appearance and taste.

Portion Control and Serving Sizes

Portion control ensures every guest receives an equal and satisfying slice of cake. For round cakes, start by cutting a diameter line, then make parallel slices 2 inches apart. For square or rectangular cakes, divide the cake into equal-sized rectangles or squares. Use a serrated knife to cut cleanly through layers, and remove each slice as you go to maintain stability. For tiered cakes, cut one tier at a time, starting from the bottom, to prevent structural collapse. Use a cake stand to elevate and stabilize the cake while cutting. To determine serving sizes, consider the cake’s size and the number of guests. Larger cakes (over 6 inches) should be cut into thin rectangles rather than wedges for uniformity. Marking portion lines beforehand can help guide precise cuts, ensuring consistency. Proper portion control not only enhances presentation but also ensures everyone enjoys a fair share of the celebration. Clean cuts and even slices make the experience memorable and stress-free.

Mastering the art of cake cutting transforms any celebration into a seamless experience, ensuring every guest enjoys a perfect slice. By using the right tools, like serrated knives and cake levelers, and applying techniques tailored to different cake shapes, you can achieve professional results. Proper preparation, such as trimming layers and brushing away crumbs, enhances both presentation and taste. For tiered cakes, portion control and careful slicing prevent structural issues. Whether it’s a round, square, or irregularly shaped cake, following these guidelines ensures clean, even slices. Don’t forget to use printable guides or grid patterns for larger cakes to maximize portions. With practice, you’ll confidently cut cakes like a pro, making every occasion memorable and stress-free. Remember, precise cuts and equal portions create lasting impressions, making your celebrations sweeter and more enjoyable for everyone. Happy baking and serving!

screw measurements guide

Screw measurements are critical for ensuring proper fit and functionality in various applications. Understanding key dimensions like diameter, length, and thread pitch ensures accuracy and reliability in projects. Accurate measurements prevent assembly issues and material damage, making them essential for successful outcomes.

1.1 Understanding Screw Measurements

Understanding screw measurements involves identifying key dimensions like diameter, length, and thread pitch. These measurements determine a screw’s compatibility and performance. Flat head screws are measured from the top of the head, while round heads are measured from under the head. Accurate measurements ensure proper fit and functionality, crucial for selecting the right screw type and avoiding assembly issues. Standard sizes guide these measurements, ensuring consistency across applications.

1.2 Importance of Accurate Screw Measurements

Accurate screw measurements are essential for ensuring proper fit, functionality, and safety in applications. Incorrect measurements can lead to project failure, material damage, or safety hazards. Precise dimensions ensure compatibility with materials and tools, preventing assembly issues. Understanding the significance of diameter, length, and thread pitch helps in selecting the right screw for the job, avoiding costly mistakes and ensuring long-term durability of the final product.

Key Dimensions of Screws

Screw dimensions include diameter, length, thread pitch, and head shape, ensuring proper fit and functionality. These measurements are critical for selecting the right screw for any application.

2.1 Diameter Measurement

Screw diameter is measured from one thread tip to the opposite, including the thread. It’s crucial for ensuring the screw fits the material and application. Using a micrometer or screw gauge ensures accurate measurement. For metric screws, diameter is in millimeters, while imperial sizes use gauge numbers. This measurement is vital for functionality, preventing issues like stripping or poor hold. Accurate diameter ensures compatibility and proper fit in the intended material.

2.2 Length Measurement

Screw length is measured from the head to the tip, varying by head type. Flat head screws measure from the top, while round or hex heads measure from under the head. Length is crucial for ensuring proper fit and functionality. Use a ruler or micrometer for accuracy. Correct length prevents issues like insufficient hold or material damage. Measure on a flat surface, aligning the ruler with the head for precise results. Accurate length ensures optimal performance in applications.

2.3 Thread Pitch and TPI (Threads Per Inch)

Thread pitch is the distance between consecutive threads, while TPI (Threads Per Inch) measures thread density. Both are vital for compatibility and load-bearing capacity. Coarse threads (lower TPI) are stronger for softer materials, while fine threads (higher TPI) are better for harder materials. Measure pitch using a thread pitch gauge. Accurate TPI ensures proper fit and prevents over-tightening, which can damage materials. Standardized pitch and TPI ensure consistency across applications.

2.4 Head Shape and Size

Head shape and size are crucial for functionality and tool compatibility. Common shapes include flat, round, pan, and hex heads, each designed for specific applications. Measurements are taken from the head’s widest point to ensure proper fit. For example, flat heads are measured across the diameter, while hex heads are measured across the flats. Accurate head dimensions ensure compatibility with drivers and prevent stripping or slippage during installation. Proper sizing enhances performance in various projects.

How to Measure Screw Dimensions

Measuring screw dimensions requires precision tools like micrometers or screw gauges. Measure diameter, length, and thread pitch accurately. Use rulers for length and gauges for threads. Ensure proper alignment and avoid rounding errors for reliable results. Accurate measurements are essential for selecting the right screw for your project. Use calibrated tools to maintain consistency and precision in your measurements.

3.1 Measuring Screw Diameter

Measuring screw diameter requires a micrometer or screw gauge for accuracy. The diameter is typically measured across the screw’s shank, including the thread. Place the micrometer’s anvil on one side and adjust until it touches the opposite thread. Ensure the micrometer is calibrated and the screw is aligned properly. Record the measurement in inches or millimeters. For precise results, avoid measuring the head or tip. Accuracy ensures the correct screw size for your application.

3.2 Measuring Screw Length

Measuring screw length involves determining the distance from the screw’s head to its tip. For flat head screws, measure from the top of the head to the tip. For pan or hex head screws, measure from the underside of the head to the tip. Use a ruler or tape measure and align the screw on a flat surface for accuracy. Ensure the screw is straight to avoid incorrect readings. This measurement is crucial for selecting the right screw length for your application.

3.3 Measuring Thread Pitch

Thread pitch measures the distance between consecutive threads and is critical for compatibility. Use a thread pitch gauge or micrometer to determine the pitch. Place the gauge over the threads and match it to the closest measurement. For precise calculations, count the number of threads within a 1-inch span and divide by the length to find threads per inch (TPI). Common TPI ranges from 8 to 32 for most screws, ensuring proper fitment in applications.

Screw Size Standards and Classification

Screw size standards ensure consistency in manufacturing and compatibility across applications. Classification systems organize screws by type, size, and thread specifications, simplifying selection and ensuring proper fitment.

4.1 Standard Screw Sizes

Standard screw sizes are predefined measurements ensuring consistency across manufacturers. These standards specify diameter, length, and thread pitch, making it easier to identify and select the correct screw for any application. Common standards include metric and imperial systems, with sizes like M3.5 or #6-32. Adhering to these standards ensures compatibility and simplifies the procurement process for both professionals and DIY enthusiasts, reducing errors and improving efficiency in projects.

4.2 Screw Classification by Type

Screws are classified into various types based on their application, head shape, and thread design. Common classifications include wood screws, machine screws, and self-tapping screws. Each type serves specific purposes, such as wood screws for timber and self-tapping screws for plastics. Understanding these classifications helps in selecting the right screw for the job, ensuring optimal performance and durability in different materials and environments.

4.3 Imperial vs. Metric Screw Measurements

Screw measurements differ between Imperial and Metric systems. Imperial uses inches and gauge numbers, while Metric uses millimeters. Understanding both is crucial for compatibility. Imperial diameters are often referred to by gauge (e.g., #10 = 4.87mm), while Metric sizes are direct (e.g., 5mm). Length is measured in inches or millimeters. Knowing these standards ensures accurate selection and avoids mismatches, especially in international projects or mixed-system applications.

Tools for Measuring Screws

Essential tools for measuring screws include micrometers, screw gauges, and thread pitch gauges. These tools ensure accurate measurements of diameter, length, and thread pitch, critical for proper screw selection.

5;1 Using a Micrometer

A micrometer is a precise tool for measuring screw dimensions. To measure diameter, place the screw between the micrometer’s anvils and gently tighten. For length, position the screw tip against the anvil and align the head with the micrometer’s scale. Ensure the screw is straight and secure to obtain accurate readings. This tool is ideal for measuring both coarse and fine threads with high precision, ensuring accurate screw size identification for various applications.

5.2 Screw Gauge Usage

A screw gauge is an essential tool for measuring thread pitch and TPI (Threads Per Inch). It consists of multiple blades, each corresponding to a specific thread size. To use it, insert the blade into the screw threads until it fits snugly. Ensure the screw is straight and the blade is aligned with the thread start. This method accurately determines thread pitch, helping identify coarse or fine threads and ensuring compatibility with mating parts. Proper usage ensures precise measurements for screw identification and application.

5.3 Thread Pitch Gauges

Thread pitch gauges are tools used to measure the distance between screw threads, determining TPI (Threads Per Inch) or thread pitch. These gauges consist of multiple blades, each marked with specific thread sizes. To use, insert a blade into the screw threads until it fits snugly. Proper alignment ensures accurate measurement. Thread pitch gauges are indispensable for identifying coarse or fine threads, ensuring compatibility with mating parts. They are available in both imperial and metric sizes, making them versatile for various applications.

Screw Size Chart and Conversion

A screw size chart provides a reference for screw diameters, lengths, and thread pitches. It aids in identifying screw dimensions and converting between imperial and metric sizes.

6.1 Screw Size Chart Explanation

A screw size chart is a reference tool that lists standardized screw measurements. It includes diameters, lengths, and thread pitches, helping users identify screw dimensions. The chart organizes screws by size, making it easier to select the right type for specific applications. Standardized charts ensure consistency across manufacturers, providing clear guidelines for screw selection and usage. They are essential for matching screws to projects accurately, ensuring compatibility and proper fitment. This guide simplifies screw identification and selection processes.

6.2 Converting Imperial to Metric Screw Sizes

Converting imperial to metric screw sizes involves matching diameter and thread pitch. The diameter in inches is converted to millimeters (e.g., 1/4″ becomes 6.35mm). Thread pitch, measured in threads per inch (TPI), is converted to millimeters per thread (e.g., 20 TPI equals 1.27mm pitch). Screw size charts provide direct comparisons, ensuring compatibility. While not always exact, conversions are standardized to align closely with metric equivalents, simplifying global hardware compatibility and project planning.

Common Screw Applications

Screws are used in woodworking, machinery, and construction. Wood screws secure wood, machine screws fasten metal, and self-tapping screws drill into materials like plastic or metal, creating their own threads.

7.1 Wood Screws

Wood screws are designed for securing wood and are commonly used in woodworking, furniture assembly, and decking. They typically feature a sharp point to drill into wood and coarse threads for strong grip. Available in various lengths and gauges, they are ideal for both softwoods and hardwoods. Proper selection depends on the wood type, thickness, and intended use to ensure durability and prevent splitting. Pilot holes may be recommended for precise alignment and to avoid material damage.

7.2 Machine Screws

Machine screws are fasteners designed for securing metal and plastic components. Their size is standardized, measured by numbers ranging from 0 to 14, with larger numbers indicating bigger screws. Key dimensions include diameter, thread pitch, and length. They are commonly used in mechanical assemblies, often paired with nuts or screwed into tapped holes. Proper sizing ensures secure connections and prevents material damage, making them essential for durability in industrial and DIY projects.

7.3 Self-Tapping Screws

Self-tapping screws drill their own holes and create threads in materials like plastic or metal. They are categorized into thread-cutting and thread-forming types. Measurements focus on diameter, length, and thread pitch. Accurate sizing ensures proper fit and functionality, preventing material damage. These screws are ideal for applications requiring quick assembly without pre-drilling, making them versatile for various industries and DIY projects.

Best Practices for Screw Selection

Always match screw type to material and application. Use size charts for accurate dimensions and consider environmental factors like corrosion resistance. Proper selection ensures durability and safety.

8.1 Choosing the Right Screw for the Job

Selecting the right screw involves matching its type, size, and material to the specific application. Consider the thickness of materials, weight load, and environmental conditions. For woodworking, wood screws are ideal, while machine screws suit metal applications. Self-tapping screws are perfect for plastics. Always refer to screw size charts and guides to ensure accurate measurements and compatibility. Proper selection enhances durability and prevents structural issues.

8.2 Avoiding Common Mistakes

Common mistakes in screw measurements include measuring from the wrong part of the head or ignoring thread pitch. Using improper tools, like a standard ruler instead of a micrometer, can lead to inaccuracies. Always measure from the head’s flat surface to the tip for length and ensure the diameter includes the thread. Avoid assuming screw type based on appearance; consult charts to match screws to materials and applications for optimal results;

Screw Measurement Glossary

Key terms include TPI, major, minor, and pitch diameters, tap drill size, and stress area, ensuring accurate measurements and proper screw selection.

9.1 Key Terms and Definitions

TPI (Threads Per Inch): The number of threads within a one-inch length. Major Diameter: The largest diameter of the screw thread. Minor Diameter: The smallest diameter at the base of the thread. Pitch Diameter: The average diameter, crucial for proper fit. Stress Area: The area resisting tension, affecting screw strength. Thread Angle: The angle between threads, typically 60 degrees; Gauge: A measurement system for screw diameters. Shank: The smooth, unthreaded part of the screw. Tap Drill Size: The drill bit size for creating threads.

15 promises of the rosary pdf

The 15 Promises of the Rosary, revealed to Alanus de Rupe, offer blessings to devotees. These sacred vows, attributed to the Virgin Mary, promise protection, grace, and peace to those who pray the Rosary devoutly and faithfully.

Understanding the Significance and Origin

The 15 Promises of the Rosary are deeply rooted in Catholic tradition and are believed to have been revealed by the Virgin Mary herself. These promises serve as a divine guarantee for those who devoutly pray the Rosary, offering spiritual protection, grace, and peace. Originating in the 15th century, the promises were popularized by Alanus de Rupe, a Dominican friar, who played a pivotal role in revitalizing the Rosary devotion. The promises emphasize Mary’s maternal love and intercession, providing believers with hope and assurance in their faith journey. They are often seen as a motivation to embrace the Rosary as a powerful prayer tool, fostering a deeper connection with God and the mysteries of Christ. By understanding these promises, the faithful can appreciate the profound spiritual benefits associated with this timeless devotion. The promises are not just assurances of divine favor but also a call to live a life of faith, prayer, and devotion.

Historical Background of the Rosary Promises

The Rosary Promises trace back to the 15th century, attributed to Alanus de Rupe, a Dominican friar who revived the Rosary devotion. His work laid the foundation for the tradition, emphasizing Mary’s promises to those who pray the Rosary faithfully.

Alanus de Rupe and the Origin of the Promises

Alanus de Rupe, a Dominican friar, is credited with reviving the Rosary devotion in the 15th century. According to tradition, he received the 15 Promises from the Virgin Mary herself, outlining the blessings for those who faithfully pray the Rosary. These promises were revealed to him through divine inspiration and served as a cornerstone for the Rosary’s spiritual significance. Alanus de Rupe’s work not only revitalized the practice but also spread its popularity across Europe. His teachings emphasized the power of the Rosary as a tool for spiritual growth and protection, aligning with the promises Mary bestowed upon the faithful. This historical foundation underscores the enduring relevance of the Rosary in Catholic devotion, offering believers a profound connection to divine grace and peace.

The 15 Promises Explained

The 15 Promises of the Rosary, as revealed to Alanus de Rupe, detail the blessings and graces offered to those who pray the Rosary devoutly. These promises include special protection, signal graces, and eternal salvation, emphasizing the Rosary’s power to bring believers closer to God and Mary’s intercession. Each promise provides spiritual guidance and assurance, reinforcing the Rosary’s role in fostering faith and perseverance.

Detailed Overview of Each Promise

The 15 Promises of the Rosary, attributed to the Virgin Mary, offer profound spiritual blessings to those who pray the Rosary devoutly. These promises are as follows:

  1. To all who recite the Rosary devoutly, Mary promises her special protection and great graces.
  2. Those who persevere in praying the Rosary will be shielded from damnation.
  3. The Rosary will impart spiritual nourishment and console the sorrowful.
  4. The Rosary will destroy vice, decrease sin, and foster virtue.
  5. It will bring divine wisdom and the gifts of the Holy Spirit.
  6. Those who promote the Rosary will be aided by Mary at the hour of death.
  7. Mary will grant graces to all who pray the Rosary, especially in their needs.
  8. The souls of the deceased will benefit from the Rosary’s prayers.
  9. Mary’s protection will extend to the faithful in life and death.
  10. The Rosary will serve as a powerful armor against hell’s evils.
  11. Those who pray the Rosary will experience peace and hope.
  12. Mary will intercede for all Rosary devotees.
  13. Family unity and grace will be granted to Rosary-praying families.
  14. Those who pray the Rosary will receive eternal salvation.
  15. Devotion to the Rosary will be a sign of predestination to glory.

These promises underscore the Rosary’s significance as a powerful prayer tool, offering spiritual guidance, protection, and grace to believers.

Spiritual Benefits of Praying the Rosary

Praying the Rosary fosters inner peace, strengthens faith, and grants perseverance in spiritual life. It offers solace in times of sorrow, divine wisdom, and protection from evil. The Rosary deepens devotion, bringing believers closer to God and His grace.

Inner Peace, Grace, and Perseverance in Faith

The Rosary is a powerful devotion that brings inner peace, grace, and perseverance in faith. By praying the Rosary, devotees experience a deep sense of calm and spiritual strength, helping them navigate life’s challenges. Mary’s promises emphasize her special protection, offering believers refuge from evil and guidance in their spiritual journey. The Rosary also fosters perseverance in faith, enabling individuals to remain steadfast in their devotion despite trials. Through its meditative nature, the Rosary provides an opportunity for reflection on the mysteries of Christ, fostering a deeper connection with God. This devotion not only strengthens faith but also opens hearts to receive divine grace, leading to personal transformation and spiritual growth. The Rosary’s promises highlight its role as a means to attain inner peace, grace, and unwavering commitment to faith, making it a timeless and profound prayer for believers seeking solace and strength in their spiritual lives.

Practical Application in Daily Life

Praying the Rosary daily fosters spiritual discipline and reflection. It can be incorporated into morning or evening routines, offering a moment of calm and focus. Carrying a Rosary or using a prayer app can serve as a reminder to pray throughout the day, helping to apply Mary’s promises in real-life situations and find peace amidst challenges.

Incorporating the Rosary into Prayer and Devotion

Incorporating the Rosary into daily prayer and devotion is a powerful way to deepen one’s spiritual life. The Rosary, with its structured format and meditative nature, provides a meaningful connection to the life of Jesus Christ and the intercession of the Blessed Virgin Mary. By dedicating time each day to pray the Rosary, individuals can experience the grace and protection promised by Mary. The Rosary can be prayed in various settings, such as during personal reflection, within family gatherings, or in community worship. Using Rosary beads as a tactile aid helps focus the mind and heart on the mysteries being contemplated; Praying the Rosary consistently fosters perseverance in faith and strengthens one’s relationship with God. Additionally, reflecting on the 15 promises while praying can inspire hope and trust in Mary’s maternal care. By making the Rosary a part of daily devotion, one can find inner peace, guidance, and spiritual renewal in the midst of life’s challenges.

The 15 Promises of the Rosary offer profound spiritual blessings for the devout. For those seeking deeper understanding, a ’15 Promises of the Rosary PDF’ is available, providing detailed insights and guidance for prayerful reflection and devotion.

The ’15 Promises of the Rosary PDF’ is a valuable resource for those seeking to deepen their devotion. It provides a comprehensive overview of the promises attributed to the Virgin Mary, offering spiritual guidance and encouragement. This document is widely available online, allowing devotees to easily access and reflect on the promises. Many Catholic websites and religious institutions offer free downloads of this PDF, making it accessible to a global audience. The PDF typically includes detailed explanations of each promise, along with prayers and reflections to enhance one’s Rosary practice. It serves as a powerful tool for fostering faith and perseverance, reminding believers of the graces and protections promised through this sacred devotion. For those interested in exploring the Rosary’s spiritual benefits, the PDF is an indispensable companion.

packing list for cuba all inclusive pdf

Discover the charm of Cuba with all-inclusive vacations, offering luxury, relaxation, and cultural experiences. Ensure a seamless adventure with a well-prepared packing list tailored to Cuba’s unique allure.

Why a Packing List is Essential for Cuba

A well-prepared packing list is crucial for Cuba, as limited supply availability and specific entry requirements can make last-minute purchases challenging. Hygiene products, medical supplies, and lightweight clothing are often in demand. Additionally, understanding what to pack avoids bringing prohibited items. A detailed list ensures you’re prepared for diverse weather conditions, cultural norms, and outdoor activities. It also helps you stay organized, reducing stress during your trip. By planning ahead, you can enjoy Cuba’s rich history, vibrant culture, and stunning landscapes without unnecessary hassles. A downloadable PDF packing list tailored for all-inclusive vacations simplifies your preparation, guaranteeing a smooth and enjoyable experience.

Essential Clothing Items for Cuba

Pack lightweight, breathable fabrics, moisture-wicking synthetic blends, and versatile layers. Include quick-drying shirts, hiking shorts, and a fleece for cooler mornings and evenings.

Lightweight and Breathable Clothing

Opt for lightweight, breathable fabrics like cotton blends, linen, or moisture-wicking synthetics to stay cool in Cuba’s tropical climate. Include quick-drying shirts, tank tops, and breathable pants for comfort during outdoor explorations.

Avoid heavy or dark-colored clothing that absorbs heat. Instead, choose light hues and loose-fitting designs for better airflow. Pack versatile pieces that can be layered for cooler evenings or air-conditioned spaces.

Footwear Recommendations

Choose comfortable, versatile footwear for your Cuba trip. Sandals with ankle straps, such as Teva or Chaco, are ideal for walking on beaches and exploring towns. Include a pair of lightweight, breathable sneakers for city tours or hiking excursions.

Ensure your shoes are moisture-wicking to keep feet dry in tropical heat. Pack a pair of dress shoes or nicer sandals for evening events or dining at upscale restaurants. Avoid bulky options to save luggage space. Consider footwear that can be easily dressed up or down, suitable for Cuba’s casual yet vibrant atmosphere.

Toiletries and Hygiene Products

Pack essential toiletries like toothpaste, toothbrushes, shampoo, conditioner, and toilet paper. Include medical supplies such as band-aids and pain relievers to ensure health and hygiene needs are met.

Must-Have Toiletries

When preparing for your Cuba trip, include essential toiletries such as toothpaste, toothbrushes, shampoo, conditioner, and toilet paper. These items may be limited in availability locally, so packing them ensures convenience. Additionally, consider bringing biodegradable soap for eco-friendly travel. Don’t forget personal hygiene items like wet wipes, hand sanitizer, and feminine hygiene products. A travel-sized first-aid kit with band-aids, antiseptic wipes, and pain relievers is also crucial for minor medical needs. Remember to store toiletries in clear, resealable bags for easy airport security checks. Properly packing these essentials guarantees a comfortable and stress-free experience during your stay in Cuba.

Medical and First Aid Supplies

A well-stocked first-aid kit is vital for your trip to Cuba. Include essential medical supplies like band-aids, antiseptic wipes, and pain relievers to handle minor injuries. Don’t forget medications for stomach issues, nausea, and indigestion, as well as any personal prescriptions. Antibiotic cream and insect repellent are also must-haves to prevent and treat bug bites. Consider adding a small supply of cold and flu medication, as these may be harder to find locally. Ensure all prescription drugs are in their original containers with clear labels. A comprehensive first-aid kit will help you stay prepared for any unexpected situations, ensuring your trip remains enjoyable and stress-free.

Important Travel Documents

Ensure a smooth journey by packing essential documents like your passport, visa, and travel insurance. Include a color copy of your passport ID page and hotel reservations for convenience.

Necessary Documents for Entry

When preparing for your Cuba trip, ensure you have all required documents for a smooth entry process. Your passport must be valid for at least six months beyond your return date. A valid tourist visa, also known as a “tarjeta de turismo,” is mandatory for most travelers. Additionally, bring proof of health insurance that covers you in Cuba. It’s wise to carry a printed copy of your hotel reservation or confirmation of accommodation. Keep a color copy of your passport’s ID page in a separate, secure location, and consider emailing yourself a digital version for easy access. These documents are essential for entry and should be readily available upon arrival.

Health and Safety Requirements

Ensure your safety and well-being in Cuba by packing essential health items. Bring all prescription medications in their original containers, along with a detailed list of dosages and your doctor’s contact information. Insect repellent is crucial due to the presence of mosquitoes. A basic first aid kit should include band-aids, antiseptic wipes, and pain relievers. Sunscreen and lip protection with SPF are vital for outdoor exploration. Consider packing a reusable water bottle to stay hydrated. It’s also advisable to carry a copy of your health insurance documents and any relevant medical certificates. Check if any vaccinations are required before your trip and ensure all health precautions are met for a safe and enjoyable journey.

Electronics and Accessories

Pack essential electronics like a phone charger, camera, and extra memory cards. Don’t forget a portable charger for staycations. Include a universal power adapter for Cuba’s outlets.

Essential Electronics

When packing for your Cuba all-inclusive vacation, include essential electronics to stay connected and capture memories. Bring a universal power adapter, as Cuba uses Type A, B, and C plugs. Don’t forget your smartphone, charger, and a portable power bank for extra juice on the go. A camera with extra memory cards is ideal for capturing stunning landscapes and cultural moments. Pack a tablet or e-reader for entertainment during downtime. Ensure all devices are stored safely in your luggage to avoid damage. A travel-friendly USB hub can also be handy for charging multiple devices at once. Lastly, consider bringing a waterproof phone case for water activities.

Sun Protection and Insect Repellent

Protecting yourself from the sun and insects is crucial in Cuba’s tropical climate. Pack a high SPF sunscreen, lip balm with SPF, and a wide-brimmed hat to shield yourself from the intense sun. Don’t forget sunglasses with UV protection for outdoor explorations. Insect repellent is equally important, as mosquitoes can be prevalent. Opt for a DEET-based or picaridin-based repellent for effectiveness. Consider packing lightweight, breathable clothing with built-in UPF protection for added defense. Bring these essentials in sufficient quantities, as they may be harder to find or more expensive in Cuba. Being well-prepared will ensure you enjoy your trip without discomfort from the sun or bugs.

Downloadable PDF Packing Checklist

A downloadable PDF packing checklist ensures a stress-free Cuba trip. This comprehensive guide categorizes essentials like clothing, toiletries, and electronics, helping you prepare effortlessly for your adventure.

How to Use the PDF Packing List

To make your Cuba trip preparation seamless, download and print the PDF packing list. Organize your essentials by category, such as clothing, toiletries, and electronics. Check off items as you pack to ensure nothing is missed. Highlight specific needs based on your travel plans, like beachwear or hiking gear. Review the list before your trip to confirm all items are included. Keep a digital copy on your phone for easy reference during your journey. This checklist is designed to help you stay organized and stress-free, ensuring a memorable and enjoyable Cuba all-inclusive experience.

new home sewing machine manual

Welcome to the New Home Sewing Machine Manual, your comprehensive guide to mastering your sewing machine. This manual covers setup, maintenance, and troubleshooting, ensuring smooth sewing experiences for beginners and experienced users alike.

Importance of the Manual for Beginners

The manual is essential for beginners, providing clear instructions for setting up and operating the machine. It explains basic functions like threading, bobbin installation, and stitch selection, helping new users build confidence. Detailed diagrams and step-by-step guides ensure proper understanding of machine components. Troubleshooting sections address common issues, while safety tips and maintenance advice prevent damage. This guide is a go-to resource for mastering sewing machine setup, operation, and care, making it indispensable for those new to sewing.

Overview of What the Manual Covers

This manual offers a detailed guide to understanding and using your New Home sewing machine; It covers machine components, threading techniques, and bobbin management. Additionally, it provides maintenance tips, such as cleaning and oiling, to keep your machine running smoothly. Troubleshooting sections help resolve common issues like thread tension and jamming. The manual also explores advanced features, including specialized stitches and fabric handling, ensuring users can maximize their machine’s capabilities. Whether you’re a beginner or an experienced sewer, this resource is tailored to enhance your sewing experience.

Understanding the Machine Components

Explore the essential parts of your New Home sewing machine, including the bobbin, needle, and tension controls. Learn how each component functions to ensure smooth operation and optimal results.

Main Parts of the Sewing Machine

The New Home sewing machine features key components like the bobbin, needle, and tension controls. The bobbin holds the bottom thread, while the needle moves up and down to create stitches. Tension dials regulate thread tightness, ensuring balanced stitching. Other essential parts include the presser foot, which holds fabric in place, and the stitch selector for choosing patterns. The spool pins and take-up lever also play crucial roles in thread management. Understanding these elements is vital for effective machine operation and achieving professional results in your sewing projects.

Specialized Attachments and Accessories

The New Home sewing machine offers various specialized attachments to enhance your sewing experience. Optional accessories like buttonholers, zipper feet, and quilting extensions expand the machine’s capabilities. Additional attachments, such as embroidery hoops or walking feet, are available for specific tasks. Essential accessories include extra needles, bobbins, and spool pins, which ensure smooth operation. These attachments and accessories allow you to tackle diverse projects, from basic repairs to intricate designs, making your sewing machine a versatile tool for any fabric or technique.

Basic Operations and Setup

Master the fundamentals of your New Home sewing machine, including threading, bobbin installation, and basic stitch selection. Proper setup ensures smooth operation and optimal sewing results.

Threading the Machine

Threading your New Home sewing machine correctly is essential for smooth operation. Begin by turning the handwheel to raise the needle. Locate the spool pin and guide the thread through the tension discs. Follow the machine’s path, looping the thread around the take-up lever and through the needle’s eye. Ensure the thread is taut but not overly tight. Proper threading prevents knots and ensures consistent stitch quality. Always refer to the manual or online guides for specific model instructions to achieve optimal results.

Winding and Installing the Bobbin

Winding and installing the bobbin correctly ensures proper stitching. Start by cutting a thread length and inserting it into the bobbin. Wind the thread evenly, keeping it taut but not overly tight. Once full, trim the excess and remove the bobbin from the winder. Insert the bobbin into the bobbin case, ensuring it aligns with the machine’s mechanism. Close the shuttle and test by sewing a few stitches to ensure smooth operation. Proper bobbin installation is vital for consistent thread tension and stitch quality.

Maintenance and Care

Regular maintenance ensures optimal performance. Clean the machine, oil moving parts, and check thread tension. Proper care extends the life and efficiency of your sewing machine.

Cleaning the Machine

Regular cleaning is essential for maintaining your sewing machine’s performance. Use a soft brush to remove lint and debris from the bobbin area and tension discs. Avoid harsh chemicals; instead, use a dry cloth to wipe down surfaces. For stubborn dust, a compressed air canister can be effective. Always unplug the machine before cleaning to ensure safety. Pay special attention to the feed dogs and needle plate, as these areas accumulate the most lint. Cleaning after each project prevents buildup and ensures smooth operation. Keep your machine in top condition with consistent care.

Oiling and Lubrication

Regular oiling is crucial for ensuring the smooth operation of your sewing machine. Use high-quality sewing machine oil, applying a few drops to the bobbin area and hook race. Avoid using household oils, as they can damage the machine. Oil the machine weekly or after heavy use to prevent friction and wear. Gently wipe off excess oil with a clean cloth to avoid attracting dust. Proper lubrication keeps the machine running quietly and efficiently, extending its lifespan. Always unplug the machine before oiling for safety.

Adjusting Thread Tension

Proper thread tension is essential for consistent stitching. To adjust the tension, start by threading the machine and pulling the thread gently. Check the tension disks and bobbin case for even tightness. If the stitches are uneven, turn the upper tension dial slightly clockwise for tighter stitches or counterclockwise for looser stitches. Test the tension by sewing a straight line on scrap fabric. Ensure the take-up lever is in its neutral position for accurate adjustments. Keep the manual nearby for specific dial settings tailored to your machine model.

Troubleshooting Common Issues

Troubleshooting common issues ensures smooth sewing. Address thread tension problems, machine jams, and bobbin issues promptly. Refer to the manual for step-by-step solutions and optimal machine performance.

Thread Tension Problems

Thread tension issues are common but easily resolved. If stitches are uneven or loops form, check the thread guides and tension dials. Ensure the bobbin is correctly seated and thread is evenly tightened. Refer to your manual for model-specific adjustments. Proper tension ensures balanced stitching and prevents fabric puckering. Regularly clean and oil the machine to maintain smooth thread flow. For persistent issues, consult troubleshooting guides or contact support for further assistance.

Jamming and Bobbin Issues

Jamming and bobbin issues can disrupt your sewing flow. Ensure the bobbin is correctly installed and aligned with the machine’s spindle. Regularly clean lint and debris from the bobbin area to prevent thread tangles. If fabric jams, turn the handwheel gently to release tension. Avoid forcing the machine, as this can damage internal components. For persistent bobbin issues, consult your manual for specific troubleshooting steps or seek professional assistance to restore smooth operation and maintain your machine’s performance.

Advanced Features and Techniques

Explore advanced stitching options and specialized functions to enhance your sewing projects. Utilize programmable patterns, quilting modes, and customizable settings for precise, professional results. Experiment with fabrics and techniques.

Special Stitches and Patterns

Discover the versatility of your sewing machine with its wide range of special stitches and patterns. From decorative embroidery to functional utility stitches, this manual guides you through creating intricate designs. Learn how to use zigzag, blind hem, and buttonhole stitches for tailored finishes. Explore programmable patterns and customizable settings to suit your projects. Whether quilting, sewing apparel, or crafting home decor, these advanced features help you achieve professional results. Experiment with fabric-specific settings and stitching techniques to elevate your creations.

Using Different Fabrics and Accessories

Expand your sewing capabilities by exploring various fabrics and accessories compatible with your New Home sewing machine. From delicate silks to heavy denim, the machine adapts to different materials with adjustable settings. Utilize specialized presser feet for zippers, buttonholes, and quilting to enhance your projects. Learn how to handle stretch fabrics, leather, and lace with ease. The manual provides tips for selecting the right needles, threads, and tensions, ensuring optimal results. Experiment with embroidery hoops, walking feet, and other attachments to unlock creative possibilities for both apparel and home decor sewing.

Safety Precautions

Always unplug the machine when not in use or during maintenance. Keep loose clothing and long hair tied back. Never leave the sewing machine unattended while plugged in.

General Safety Guidelines

Safety is crucial when operating your New Home sewing machine. Always unplug the machine when not in use or during maintenance. Keep loose clothing and long hair tied back to avoid accidents. Never leave the sewing machine unattended while plugged in, especially if children are present. Ensure the machine is placed on a stable surface and avoid overloading it. Use the machine only for its intended household purpose. Read the manual carefully and follow all instructions to minimize risks such as electric shock or injury.

Electrical Safety Tips

Always unplug the sewing machine when not in use or during maintenance to prevent electric shock. Avoid using damaged cords or plugs, as they can pose serious electrical hazards. Never expose the machine to water or operate it in damp environments. Use the correct power source specified in the manual to ensure safe operation. Regularly inspect the power cord for wear and tear. Keep the machine away from flammable materials and avoid overloading electrical outlets. Follow these guidelines to ensure safe and reliable operation of your New Home sewing machine.

Additional Resources and Support

Access online manuals, guides, and community forums for troubleshooting and expert advice. Explore resources like downloadable PDFs and video tutorials to enhance your sewing skills and machine maintenance.

Accessing Online Manuals and Guides

Accessing online manuals and guides for your New Home sewing machine is straightforward. Visit official websites or platforms like Sewing Machines Plus for downloadable PDFs. These resources often include detailed instructions for setup, maintenance, and troubleshooting. Many manuals are available for specific models, such as the New Home 535 or 551, ensuring you find the right guide. Additionally, community forums and sewing enthusiast groups offer expert advice and tips. These online resources are invaluable for mastering your machine and resolving common issues efficiently.

Community Forums and Expert Advice

Community forums and expert advice are invaluable resources for New Home sewing machine users. Platforms like ISMACS and Singer sewing communities offer extensive support, where enthusiasts share tips and solutions. Experts provide guidance on troubleshooting common issues, such as thread tension and bobbin problems. Additionally, many sewing machine brands, including Janome and Husqvarna Viking, host forums where users can ask questions and receive tailored advice. These communities are a great way to connect with experienced sewists and gain insights into maximizing your machine’s potential.

el secreto de aprender a invertir yoel sardiñas pdf

El Secreto de Aprender a Invertir by Yoel Sardiñas is a transformative guide offering practical strategies to achieve financial freedom. Designed for both newcomers and experienced investors, the book breaks down myths about investing, emphasizing the importance of mindset shifts and accessible tools for success in the stock market.

Overview of the Book

El Secreto de Aprender a Invertir by Yoel Sardiñas is a comprehensive guide to mastering investment strategies. It introduces eight proven methods to generate wealth, focusing on financial freedom and debunking common myths. The book is designed for both beginners and experienced investors, offering practical tools and insights to navigate the stock market with confidence. Its clear, step-by-step approach makes investing accessible to all, regardless of prior knowledge or resources.

Importance of Financial Literacy

Financial literacy is empowerment, enabling individuals to break free from financial constraints. It equips them with the knowledge to make informed decisions, grow their income, and secure their future. By understanding how money works, anyone can overcome limitations and build lasting prosperity, making financial freedom an achievable reality for all.

Author Background: Yoel Sardiñas

Yoel Sardiñas is a Cuban-American entrepreneur and investor, renowned for his expertise in U.S. stock market strategies. His journey from entrepreneurship to financial education has empowered thousands seeking financial freedom.

Yoel Sardiñas’ Journey in Investments

Yoel Sardiñas began his investment journey at 24, driven by a passion for financial independence. Over the years, he developed expertise in U.S. stock market strategies, including options trading and dividend investing. His experience, spanning over a decade, led him to create educational resources like El Secreto de Aprender a Invertir, helping others achieve financial freedom through practical, accessible strategies.

Experience in the U.S. Stock Market

Yoel Sardiñas has over a decade of experience in the U.S. stock market, focusing on derivatives and options trading. His expertise has enabled him to generate significant returns, ranging from 100% to 4000% on investments. This success led him to author El Secreto de Aprender a Invertir, sharing his strategies to help others navigate and thrive in the financial markets with confidence.

Key Concepts in the Book

El Secreto de Aprender a Invertir introduces 8 powerful investment strategies, including options trading, dividend investing, and swing trading. It emphasizes financial freedom, debunking myths and shifting mindsets about money to empower readers with practical tools for market success.

Financial Freedom and Its Significance

Financial freedom is a universal aspiration, offering peace of mind and independence from financial burdens. El Secreto de Aprender a Invertir highlights that achieving this freedom requires more than wealth—it demands education, strategy, and a mindset shift. By debunking myths and providing accessible tools, the book empowers readers to transform their financial lives and secure a stable future through informed investing.

Breaking Myths About Investing

The book dispels common misconceptions about investing, such as the belief that significant capital or complex knowledge is required. Yoel Sardiñas emphasizes that financial success stems from education, strategy, and mindset, not just wealth. By breaking these myths, the guide makes investing accessible to everyone, encouraging readers to take control of their financial futures with confidence and clarity.

The Eight Investment Strategies

The book outlines eight investment strategies designed to generate wealth. These methods, including market cycles and options trading, offer readers clear paths to financial success through disciplined approaches.

Strategy 1: Understanding Market Cycles

Yoel Sardiñas emphasizes the importance of recognizing market cycles, which are repetitive patterns driven by economic conditions. By understanding these cycles, investors can identify optimal entry and exit points, minimizing risks and maximizing returns. This strategy is foundational for making informed decisions in the stock market, as highlighted in the book.

Strategy 2: Leveraging Options Trading

Yoel Sardiñas highlights options trading as a powerful tool for wealth multiplication. This strategy allows investors to generate consistent income and protect their investments. By mastering call and put options, readers can leverage market volatility while minimizing risk. Sardiñas emphasizes that options trading, when understood and applied correctly, can significantly enhance portfolio performance and create opportunities for financial growth.

Strategy 3: Dividend Investing

Dividend investing is a cornerstone of sustainable wealth-building. Yoel Sardiñas explains how to identify stable companies paying consistent dividends, creating a passive income stream. This strategy reduces reliance on market volatility, offering steady returns. By focusing on dividend-paying stocks, investors can build a portfolio that generates income while growing in value over time, aligning with long-term financial goals.

Strategy 4: Swing Trading

Swing trading is a short-term strategy focusing on capturing gains within a few days to weeks. Yoel Sardiñas highlights how to use technical analysis to identify trends and time entries/exits precisely. This approach balances risk and reward, allowing investors to capitalize on market fluctuations without long-term commitments, making it a versatile tool for active traders seeking consistent returns in dynamic markets.

Strategy 5: Long-Term Stock Picks

Long-term stock picks involve selecting companies with strong fundamentals for extended holding periods. Yoel Sardiñas emphasizes researching companies with growth potential and stable financials. This strategy reduces market timing pressures, allowing investors to ride out volatility and benefit from compounding. It’s ideal for those seeking steady wealth growth through patience and disciplined investing in quality stocks.

Strategy 6: Risk Management Techniques

Risk management is crucial for protecting investments and balancing volatility. Yoel Sardiñas shares techniques like diversification, stop-loss orders, and position sizing to mitigate losses. These strategies help investors navigate market uncertainties while maximizing returns. By implementing these tools, readers can build resilience in their portfolios and maintain confidence during market fluctuations, ensuring long-term financial stability and success.

Strategy 7: Technical Analysis Fundamentals

Technical analysis is a core strategy in El Secreto de Aprender a Invertir. Yoel Sardiñas explains how to interpret charts, identify trends, and use indicators like moving averages and RSI. These tools help investors predict market movements and make data-driven decisions. By mastering technical analysis, readers can enhance their trading accuracy and confidence, ensuring informed and profitable investment choices in the stock market.

Strategy 8: Building a Diversified Portfolio

Building a diversified portfolio is a cornerstone of successful investing. Yoel Sardiñas emphasizes spreading investments across various asset classes to minimize risk and maximize returns. By balancing stocks, options, and other vehicles, investors can reduce vulnerability to market volatility. Diversification ensures stability and growth, making it a key strategy for achieving long-term financial goals and securing wealth.

Mindset Shift for Successful Investing

Yoel Sardiñas emphasizes that financial success begins with a mindset shift. Changing perceptions about money and embracing a growth-oriented perspective are crucial for achieving long-term prosperity.

Changing Perceptions About Money

El Secreto de Aprender a Invertir challenges readers to rethink their relationship with money, moving beyond mere accumulation to creating wealth. Sardiñas addresses common stigmas and misconceptions, revealing how financial freedom involves mindset transformation and strategic action, not just savings. This shift empowers individuals to view money as a tool for growth and prosperity, rather than a limitation.

Developing a Growth Mindset

El Secreto de Aprender a Invertir emphasizes the importance of embracing a growth mindset to unlock financial potential. By fostering resilience, curiosity, and continuous learning, readers are encouraged to view challenges as opportunities for growth. Sardiñas’ approach helps investors shift from fear to confidence, enabling them to make informed decisions and achieve long-term success in the financial markets.

Book Structure and Content

El Secreto de Aprender a Invertir is structured into clear chapters, each offering key takeaways and practical tools. Designed for both beginners and experienced investors, it provides a step-by-step guide to mastering investment strategies and achieving financial freedom through accessible, actionable content.

Chapter Highlights and Key Takeaways

The book is divided into chapters, each focusing on essential investment strategies, such as market cycles, options trading, and dividend investing. Key takeaways include practical tools for beginners, emphasizing the importance of a growth mindset and risk management. Each chapter provides actionable insights, helping readers apply the strategies to achieve their financial goals effectively.

Practical Tools for Beginners

The book provides practical tools and resources tailored for newcomers, including guides on market cycles, options trading, and swing trading. Readers gain access to step-by-step strategies, glossaries, and real-world examples to simplify complex concepts. These tools empower beginners to start investing confidently, even without prior financial knowledge, making the journey to financial freedom accessible and achievable.

Success Stories and Reviews

Readers praise El Secreto de Aprender a Invertir for its life-changing strategies and clarity. With a 4.8-star rating, many share stories of achieving financial freedom through its guidance.

Reader Testimonials and Experiences

Readers praise El Secreto de Aprender a Invertir for its life-changing impact. Many share stories of achieving financial freedom, highlighting how the book simplified complex concepts and shifted their mindset about money. One reader noted, “It took me to another level, perfect for personal and financial growth,” while another called it “the best guide to starting investments with confidence.” The book’s practical strategies and clear explanations have empowered many to transform their financial lives.

Impact on Financial Journeys

Yoel Sardiñas’ book has profoundly impacted readers’ financial journeys, helping them achieve clarity and confidence in investing. Many credit it with transforming their lives, enabling them to break financial barriers and build sustainable wealth. The practical strategies and mindset shifts taught in the book have empowered individuals to take control of their financial futures, making it a cornerstone of their investment success.

Why This Book Stands Out

El Secreto de Aprender a Invertir stands out for its unique, accessible approach to investment education, offering practical tools and mindset shifts that empower readers of all levels to achieve financial freedom.

Unique Approach to Investment Education

Yoel Sardiñas offers a distinctive approach by simplifying complex investment concepts; His book focuses on breaking myths and providing actionable strategies, making it accessible to all. By combining personal anecdotes with proven techniques, he creates an engaging and effective guide for those seeking financial independence.

Accessibility for All Knowledge Levels

El Secreto de Aprender a Invertir stands out for its inclusive approach, catering to both novices and experienced investors. Sardiñas uses clear, jargon-free language, ensuring complex concepts are understandable. The book’s structured format, with practical examples and step-by-step guidance, makes it accessible to anyone seeking to build financial literacy and confidence, regardless of their starting knowledge level.

Where to Access the Book

El Secreto de Aprender a Invertir is available in PDF, EPUB, Kindle, and paperback formats on platforms like Amazon, Google Books, and Yoel Sardiñas’ official website.

Available Formats and Platforms

El Secreto de Aprender a Invertir is available in multiple formats, including PDF, EPUB, Kindle, and paperback. It can be accessed on platforms like Amazon, Google Books, Apple Books, Barnes & Noble, and Kobo. The PDF version is particularly popular for its ease of use across devices. Additionally, the book is available on Yoel Sardiñas’ official website, with options for free shipping or discounts on select platforms.

Purchase Options and Special Offers

El Secreto de Aprender a Invertir can be purchased on Amazon, Yoel Sardiñas’ official website, and other major bookstores. Special offers include free shipping, discounts, and a payment plan with no interest. Readers can also access exclusive deals by subscribing to Yoel Sardiñas’ community or purchasing directly from his platform, making it easier to start their financial journey.

The Importance of Continuous Learning

Continuous learning is crucial in investing, as markets evolve and strategies adapt. Staying updated with trends ensures sustained growth and financial success, aligning with Yoel Sardiñas’ teachings.

Evolution in Investment Strategies

Investment strategies evolve as markets change, requiring adaptability to stay effective. Yoel Sardiñas highlights the importance of updating techniques to align with market trends, ensuring long-term success and financial growth through continuous learning and refinement of investment approaches.

Staying Updated with Market Trends

Staying updated with market trends is crucial for successful investing in today’s dynamic financial landscape. Yoel Sardiñas emphasizes the importance of understanding and adapting to these trends, offering readers practical tools to analyze and respond effectively. This ensures informed decision-making and strategies aligned with current market conditions, helping investors achieve their financial goals.

El Secreto de Aprender a Invertir empowers readers with timeless strategies and mindset shifts, making financial freedom accessible. A must-read for anyone seeking to transform their financial future through investing.

Final Thoughts on the Book’s Value

El Secreto de Aprender a Invertir offers unparalleled value, blending practical strategies with mindset transformation. Readers gain clarity on breaking financial barriers and building wealth through actionable insights. Yoel Sardiñas’ expertise shines, making this book an essential resource for anyone committed to achieving financial freedom and long-term success in the stock market.

Encouragement to Start Investing

Yoel Sardiñas inspires readers to take the first step toward investing, emphasizing that financial freedom is attainable for everyone. His book demystifies investing, showing that success depends more on mindset and determination than initial capital. With clear strategies and real-life examples, Sardiñas motivates readers to overcome fears and begin their investment journey with confidence and clarity.

manual breathing can’t sleep

Manual breathing techniques offer a natural, non-invasive solution to improve sleep quality. By focusing on deliberate breath patterns, these practices help calm the mind and body, promoting relaxation and reducing stress.

Understanding the Connection Between Breathing and Sleep Quality

Manual breathing plays a crucial role in sleep quality by influencing the body’s relaxation response. When breathing is slow and deliberate, it signals the brain to calm down, reducing stress and anxiety. This, in turn, helps lower cortisol levels and activates the parasympathetic nervous system, which promotes relaxation. Shallow or erratic breathing, often caused by stress, can disrupt sleep patterns and make it harder to fall asleep or stay asleep. By practicing controlled breathing techniques, individuals can regulate their breath, calm their minds, and create a conducive environment for restful sleep. This connection highlights how breathing is not just a biological function but also a powerful tool for improving sleep hygiene and overall well-being.

Benefits of Manual Breathing Techniques for Insomnia

Manual breathing techniques provide significant relief for individuals struggling with insomnia. By slowing down breath and focusing on specific patterns, these practices reduce stress and anxiety, common triggers for sleeplessness. Techniques like the 4-7-8 method and diaphragmatic breathing lower cortisol levels, promoting relaxation and making it easier to fall asleep. They also train the mind to stay present, reducing racing thoughts that often disrupt sleep. Over time, regular practice can improve sleep duration and quality, leading to better overall well-being without medication. These methods are simple, accessible, and can be done anywhere, making them a valuable tool for managing insomnia and enhancing sleep hygiene.

Popular Breathing Techniques for Better Sleep

Techniques like the 4-7-8 method, diaphragmatic breathing, box breathing, and tactical breathing are widely used to improve sleep. They promote relaxation, reduce stress, and quiet the mind for better rest.

The 4-7-8 Breathing Technique: A Step-by-Step Guide

The 4-7-8 breathing technique, also known as the “relaxation breath,” is a simple yet effective method to calm the mind and body. It involves three distinct steps:

  1. Inhale quietly through your nose for a count of four seconds, filling your lungs completely.
  2. Hold your breath for seven seconds, allowing your body to absorb the oxygen fully.
  3. Exhale slowly through your mouth for eight seconds, emptying your lungs completely and making a soft “whoosh” sound.

Repeating this cycle several times can help reduce stress, lower heart rate, and prepare your body for restful sleep. This technique, popularized by Dr. Andrew Weil, is particularly effective for individuals struggling with insomnia or anxiety-related sleep issues.

Diaphragmatic Breathing: How to Practice It for Sleep

Diaphragmatic breathing, also known as belly breathing, is a powerful technique to promote relaxation and improve sleep quality. To practice it:

  1. Lie on your back and place one hand on your chest and the other on your abdomen.
  2. Inhale deeply through your nose, ensuring your abdomen rises while your chest remains still.
  3. Exhale slowly through pursed lips, allowing your abdomen to fall as your diaphragm descends.

Focus on deep, slow breaths, aiming for 5-8 cycles per minute. This technique engages the parasympathetic nervous system, calming your body and mind. Regular practice can reduce stress and help you fall asleep faster. For best results, practice diaphragmatic breathing in a quiet, comfortable space before bed. Over time, it can become a natural part of your sleep routine, enhancing overall sleep hygiene and relaxation.

Box Breathing: A Simple Method to Calm Your Mind

Box breathing is a straightforward yet effective technique to calm your mind and prepare your body for sleep. This method involves four equal steps:

  1. Inhale deeply through your nose for a count of 4, filling your lungs completely.
  2. Hold your breath for another count of 4, allowing your body to absorb the oxygen.
  3. Exhale slowly through your mouth for a count of 4, emptying your lungs fully.
  4. Hold your breath again for a final count of 4 before repeating the cycle.

This structured breathing pattern helps quiet the mind, reduce stress, and promote relaxation. By focusing on the counting and rhythm, you distract yourself from racing thoughts, making it easier to unwind before bed. Regular practice of box breathing can improve sleep quality and overall mental clarity. Its simplicity makes it an accessible tool for anyone struggling with insomnia or restlessness.

Tactical Breathing: Used by Navy SEALs for Relaxation

Tactical breathing, also known as the 4-7-8 technique, is a powerful method used by Navy SEALs to manage stress and stay calm under pressure. This technique involves:

  1. Inhaling quietly through your nose for a count of 4, filling your lungs fully.
  2. Holding your breath for a count of 7, allowing your body to relax and unwind.
  3. Exhaling completely through your mouth for a count of 8, releasing all tension and stress.

This structured breathing pattern activates the parasympathetic nervous system, which promotes relaxation and reduces anxiety. Tactical breathing is particularly effective for calming the mind before sleep, as it distracts from racing thoughts and slows down your heart rate. Its simplicity and proven results make it a popular choice for overcoming insomnia and improving sleep quality. By mastering this technique, you can harness the same tools used by elite professionals to achieve deep relaxation and restful sleep.

The Science Behind Manual Breathing and Sleep

Manual breathing techniques influence the parasympathetic nervous system, slowing heart rate and reducing stress hormones like cortisol. This promotes relaxation, making it easier to fall asleep and stay asleep.

How Breathing Affects the Parasympathetic Nervous System

Manual breathing techniques, such as slow, deep breathing, directly stimulate the parasympathetic nervous system (PNS), which promotes relaxation and reduces stress. The PNS counters the sympathetic nervous system’s “fight-or-flight” response by slowing heart rate, lowering cortisol levels, and relaxing muscles. When practiced consistently, these breathing exercises enhance the body’s ability to activate the PNS, creating a calmer state conducive to sleep. Studies show that breathing patterns like the 4-7-8 technique activate the vagus nerve, a key component of the PNS, leading to reduced anxiety and improved sleep quality. By focusing on deliberate breath control, individuals can harness the PNS’s natural relaxation response, making it easier to fall asleep and stay asleep.

The Role of Slow, Deep Breathing in Initiating Sleep

Slow, deep breathing plays a crucial role in initiating sleep by calming the nervous system and preparing the body for rest. This technique involves taking deliberate, extended breaths that slow down the heart rate and lower cortisol levels, creating a relaxing environment conducive to sleep. By engaging in slow, deep breathing, individuals can shift their body from an active, stress-response state to a restful, recovery-oriented state. Research indicates that breathing at a frequency of 0.1 Hz, which can be achieved through slow, deep breaths, is particularly effective in initiating sleep and combating insomnia. This method works by activating the parasympathetic nervous system, which promotes relaxation and reduces anxiety. Regular practice of slow, deep breathing can lead to improved sleep quality, making it easier to fall asleep and stay asleep.

Combining Breathing Techniques with Other Relaxation Methods

Enhancing sleep by pairing manual breathing with meditation, progressive muscle relaxation, or mindfulness can deepen relaxation and improve sleep quality effectively, creating a holistic approach to restful nights.

Pairing Breathing Exercises with Meditation for Deep Relaxation

Combining manual breathing techniques with meditation creates a powerful synergy for deep relaxation. Start by finding a quiet, comfortable space to sit or lie down. Close your eyes and focus on your breath, inhaling deeply through your nose and exhaling slowly through your mouth. As you breathe, bring your attention to the sensation of the air moving in and out of your body. If your mind wanders, gently bring it back to your breath without judgment. Gradually, incorporate specific breathing patterns like the 4-7-8 technique or diaphragmatic breathing to enhance relaxation. Over time, this practice can help quiet the mind, reduce stress, and prepare your body for restful sleep. Regular practice strengthens the connection between your breath and mental calmness, leading to improved sleep quality and overall well-being.

Incorporating Progressive Muscle Relaxation with Breathing

Combining manual breathing techniques with progressive muscle relaxation (PMR) offers a holistic approach to unwind and prepare for sleep. Begin by lying down or sitting comfortably, then focus on deep, slow breaths to calm your nervous system. Inhale deeply through your nose, hold your breath briefly, and exhale slowly through your mouth. As you breathe, systematically tense and relax each muscle group, starting from your toes and moving up to your head. This practice helps release physical tension while the breathing slows your heart rate and quiets your mind. The synergy of these techniques can reduce restlessness and promote a deeper state of relaxation, making it easier to fall asleep and stay asleep. Regular practice enhances sleep quality and overall well-being by addressing both physical and mental stress.

Enhancing Sleep Hygiene Practices with Manual Breathing

Manual breathing techniques can significantly enhance sleep hygiene practices, creating a conducive environment for restful sleep. By incorporating slow, deep breathing exercises into your bedtime routine, you can signal your body to transition into relaxation mode. Start with techniques like diaphragmatic breathing or the 4-7-8 method to calm your mind and reduce stress. Pair these exercises with a consistent sleep schedule, a dark, quiet bedroom, and a cool temperature. Avoid screens and stimulating activities before bed, as they can interfere with relaxation. Regular practice of these combined practices trains your body to associate these cues with sleep, improving sleep quality and duration. Over time, this holistic approach helps address insomnia and other sleep challenges, fostering a deeper, more restorative sleep experience without relying on medication. Consistency is key to making these practices effective and sustainable for long-term benefits.

Manual breathing techniques offer a powerful, natural solution to improve sleep quality. By incorporating practices like 4-7-8 and diaphragmatic breathing, you can enhance relaxation, reduce stress, and promote deeper sleep consistently.

Final Tips for Incorporating Breathing Techniques into Your Bedtime Routine

Consistency is key when incorporating manual breathing techniques into your bedtime routine. Start by creating a calming pre-sleep environment, such as dimming lights and reducing noise. Practice breathing exercises 15-30 minutes before bed to signal your body that it’s time to relax. Begin with short sessions, like 5-10 minutes, and gradually increase as you become more comfortable with the techniques. Be patient with yourself—mastering these methods takes time. Focus on your breath and let go of distracting thoughts. For added effectiveness, pair breathing with mindfulness or meditation. Experiment with different techniques to find what works best for you. By making manual breathing a nightly habit, you can improve sleep quality and wake up feeling refreshed and rejuvenated.