Discover the versatility of printable classroom decor free PDFs, offering vibrant, customizable designs to enhance learning environments. Perfect for educators seeking budget-friendly, accessible solutions to create inviting spaces.
The Importance of Classroom Decor in Education
Classroom decor plays a vital role in shaping the learning environment, fostering engagement, and supporting academic growth. Thoughtfully designed spaces inspire creativity, promote positivity, and encourage active participation. Decorative elements like posters, labels, and themed designs help create an organized, welcoming atmosphere that reflects the curriculum and student diversity, ultimately enhancing the educational experience for both teachers and students.
Benefits of Using Free Printable Resources
Free printable resources offer a cost-effective and customizable way to enhance classroom environments. They save time and money, allowing educators to allocate resources elsewhere. These printables are easily downloadable, adaptable to various themes, and provide consistent, professional-looking decor. Additionally, they support organization, engagement, and learning, making them a versatile and practical choice for teachers seeking to create an inviting and functional classroom space.
Popular Themes for Printable Classroom Decor
Explore vibrant themes like Boho Rainbow, Groovy Retro, and Growth Mindset to create engaging learning spaces. These customizable designs add personality and inspiration to any classroom environment effortlessly.
Boho Rainbow Classroom Printables
Bring vibrancy to your classroom with Boho Rainbow printables, featuring colorful designs and fresh eucalyptus themes. These free PDFs include desk labels, posters, and bilingual elements in English and Spanish, perfect for teaching letter sounds. Ideal for creating a welcoming, visually appealing space that fosters engagement and positivity among students of all ages.
Groovy Retro Classroom Decor
Add a vibrant retro vibe to your classroom with groovy printable decor. Bright, fun designs featuring posters, labels, and educational tools in a nostalgic flair. Perfect for engaging students, these free PDFs offer a colorful, dynamic learning environment that captures attention and inspires creativity, making learning an enjoyable experience for all ages.
Essential Printable Classroom Decor Items
Discover fundamental classroom decor items like desk labels, name tags, and welcome signs, all available as free PDFs. These printable essentials help create a positive, organized learning environment.
Desk Labels and Name Tags
Enhance classroom organization with customizable desk labels and name tags from free PDFs. These printable designs help students identify their spaces and belongings, promoting a structured environment. Editable options allow personalization, while bilingual versions support multilingual classrooms. Vibrant themes and clear layouts ensure visibility, making them essential for creating an inclusive and orderly classroom setting.
Welcome Signs and Posters
Welcome students and visitors with customizable welcome signs and posters from free PDFs. These printable designs feature vibrant themes, from boho rainbows to retro styles, ensuring a warm and inviting atmosphere. Editable options allow personalization with names or messages, while inspirational quotes and positive affirmations foster a supportive environment. Display them near entrances or on bulletin boards to create a lasting first impression.
Seasonal and Holiday Classroom Decor
Elevate your classroom ambiance with seasonal and holiday-themed free PDF printables. From winter snowflakes to summer themes, these vibrant designs add festive charm and student engagement year-round.
Winter and Christmas Classroom Printables
Transform your classroom into a winter wonderland with festive printable decor. Snowflake templates, Christmas tree cutouts, and holiday-themed posters add a seasonal touch. Use these free PDFs to create engaging bulletin boards, desk decorations, and learning activities. Incorporate math problems on snowflakes or reading exercises with holiday-themed stories to blend education with celebration, fostering a joyful learning environment for students.
Summer and Back-to-School Decor
Elevate your classroom ambiance with summer-themed printables, featuring beach balls, ice cream cones, and tropical designs. Transition seamlessly to back-to-school season with apples, chalkboard motifs, and school supply-inspired decor. These vibrant PDFs help create a welcoming environment, blending summer fun with the excitement of a new academic year, ensuring a smooth and engaging transition for students.

DIY Classroom Decor Projects
Transform your classroom with creative DIY projects using printable decor. From customizable bulletin boards to themed wall art, these easy-to-make designs inspire learning and student involvement.
Creating a Reading Nook with Printables
Easily create a cozy reading nook using printable classroom decor. Add vibrant posters, themed labels, and whimsical designs to transform a corner into a inviting space. Use free PDF printables featuring educational themes, such as alphabet letters or book-related artwork, to enhance the area. This setup fosters a love for reading while maintaining an organized and visually appealing environment for students.
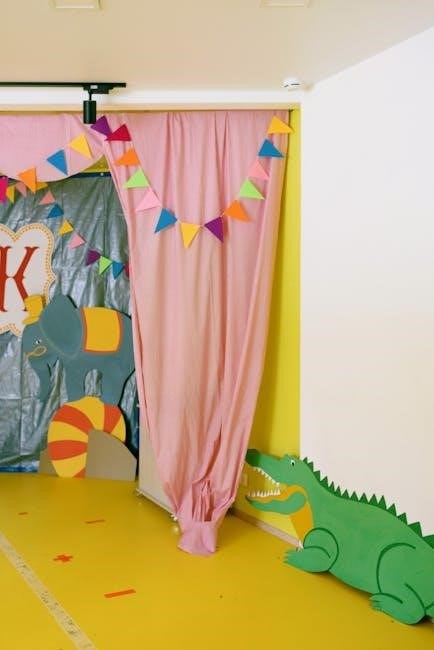
Customizable Bulletin Board Ideas
Elevate your classroom decor with customizable bulletin board ideas using free printable PDFs. Choose from themed designs like boho rainbows or retro styles to match your classroom aesthetic. Add inspirational quotes, educational content, or student work to make it interactive. These printables allow you to create visually appealing displays that reinforce lessons, celebrate achievements, and inspire learning in a budget-friendly way.
Budget-Friendly Classroom Decorating Ideas
Transform your classroom with budget-friendly decorating ideas using free printable PDFs. Enjoy versatile, customizable designs that save money while creating an engaging, organized, and inspiring learning space.
Using Free PDF Printables to Save Money
Free PDF printables are a cost-effective way to enhance your classroom decor without breaking the bank. These customizable designs allow you to create vibrant, versatile materials that cater to your specific needs. From labels to posters, printable resources reduce expenses while maintaining a professional and engaging learning environment. They are easily downloadable and can be updated frequently to keep your decor fresh and relevant.
Repurposing Materials for Classroom Decor
Transform everyday items into unique classroom decor by repurposing materials like old jars, cardboard boxes, or printed paper. For instance, jars can become colorful storage containers, while cardboard can be shaped into 3D decorations. This eco-friendly approach aligns with budget-friendly decorating and encourages creativity. Printable labels and signs can enhance these repurposed items, making them both functional and visually appealing for the learning environment.
Mental Health and Positivity in Classroom Decor
Printable classroom decor free PDFs promote mental well-being by offering positive affirmation posters, uplifting quotes, and motivational messages. These tools foster resilience, self-confidence, and a supportive learning atmosphere for students.
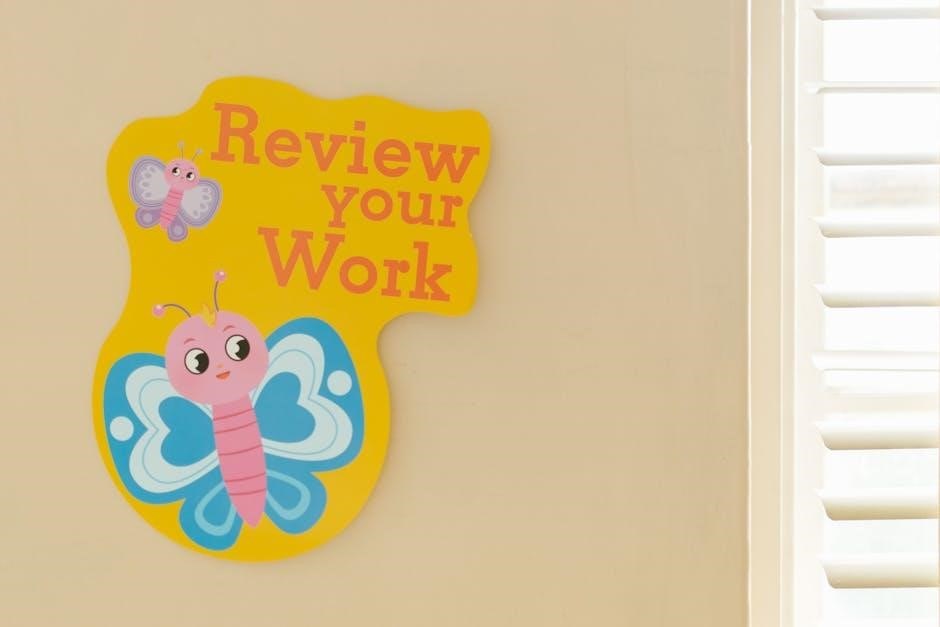
Positive Affirmation Posters for Students
Positive affirmation posters are a powerful tool to promote mental well-being and resilience in students. These free printable classroom decor PDFs feature uplifting messages like “It’s Okay to Ask for Help” or “You Are Amazing,” creating a supportive environment. They encourage self-confidence, kindness, and mindfulness, while their vibrant designs make them visually appealing. Perfect for fostering a positive classroom culture, these posters help students develop a growth mindset and embrace their individuality. Teachers can easily download and print them to inspire daily positivity and motivation in their students.
Mental Health Awareness Decor
Mental health awareness decor plays a crucial role in fostering a supportive classroom environment. These free printable PDFs feature themes like “It’s Okay to Feel” and calming visuals, helping students express emotions and reduce stigma. They promote mindfulness and self-care, creating a space where students feel comfortable discussing their well-being. Such decor not only educates but also encourages open conversations, nurturing a culture of empathy and understanding.
Multilingual Classroom Decor
Enhance diversity with free printable classroom decor featuring bilingual posters and labels. These resources promote cultural awareness and inclusivity, supporting multilingual students while enriching the learning environment.
Bilingual Posters and Labels
Bilingual posters and labels are excellent tools for multilingual classrooms, offering content in both English and Spanish. These free printable resources help bridge language gaps, making learning accessible and inclusive. They feature letter sounds, vocabulary, and classroom instructions, supporting diverse student needs. Use them to create a welcoming environment that fosters cultural awareness and language development, ensuring all students feel included and supported in their learning journey.
Cultural Diversity in Classroom Decor
Cultural diversity in classroom decor fosters inclusivity and representation, celebrating students’ backgrounds. Use free printable resources featuring diverse themes, languages, and imagery to create a welcoming environment. Incorporate multilingual posters, traditional patterns, and global-inspired designs to promote cultural awareness and appreciation. These decorations help students feel valued and connected, enriching their learning experience and encouraging respect for all cultures.
Classroom Storage and Organization
Maximize classroom efficiency with printable storage solutions like labels and tags. These designs help organize supplies, creating a tidy and functional learning environment for students and teachers alike.
Printable Labels for Storage Bins
Printable labels for storage bins are a practical solution for organizing classroom supplies. These customizable designs allow teachers to clearly label bins, fostering a tidy and efficient learning environment. With themes to match your classroom decor, they not only keep materials sorted but also add a decorative touch, making it easier for students to locate what they need. This simple tool promotes order and accountability, while teaching students essential organization skills.
Organizing Supplies with Decorative Tags
Decorative tags are a charming yet functional way to organize classroom supplies. Available in various designs, these tags can be printed and customized to match your classroom theme. They not only help identify contents but also add a stylish touch to bins, folders, and materials. Use them to label art supplies, books, or storage containers, ensuring everything has its place while enhancing the room’s aesthetic appeal.
Technology Integration in Classroom Decor
Integrate technology into your classroom decor with editable digital designs and interactive PDFs. These tools allow customization, interactivity, and easy updates, creating a modern, engaging learning space.
Editable Digital Classroom Decor
Editable digital classroom decor offers flexibility and customization, allowing teachers to tailor designs to their needs. With customizable templates, educators can easily personalize names, dates, and themes. Digital tools enable quick updates and modifications, ensuring decor stays relevant throughout the year. This modern approach enhances engagement and organization, making it easier to create a dynamic, student-friendly environment that aligns with curriculum goals and classroom themes.
Interactive PDFs for Student Engagement
Interactive PDFs for student engagement bring learning to life with clickable buttons, fillable forms, and animations. These dynamic tools captivate students’ attention, fostering active participation. From quizzes to puzzles, interactive PDFs make learning fun and immersive. They also support differentiated instruction, catering to various learning styles. Easy to share and display, these resources enhance classroom interactivity and provide hands-on learning experiences tailored to modern educational needs.
Classroom Safety and Rules
Printable safety posters and rules charts help establish clear guidelines, promoting a secure and organized learning environment while encouraging responsibility and respect among students and staff.
Printable Safety Posters
Eye-catching and informative, printable safety posters are essential for classrooms. They highlight emergency procedures, fire drills, and lab safety, ensuring visibility and understanding. These posters promote a responsible and secure learning environment, encouraging students to follow key safety protocols. Easily downloadable and customizable, they help teachers reinforce safety awareness and preparedness, contributing to a safer and more organized classroom space for everyone.
Classroom Expectations Charts
Classroom expectations charts are vital tools for establishing clear guidelines and fostering positive behavior. Available as free printable PDFs, these charts can be customized to align with your teaching style and themes. They provide visual reminders of classroom rules, helping students stay focused and disciplined. Use these charts to create a structured, respectful, and productive learning environment that supports academic success and social growth.
Printable classroom decor free PDFs offer a cost-effective, customizable way to create engaging, organized learning spaces. They empower educators to inspire students while saving time and resources.
Final Tips for Creating an Inviting Classroom
Combine printable decor with personal touches like student artwork to foster a sense of ownership. Use lighting to create a warm ambiance and incorporate plants for a calming atmosphere. Mix themes to reflect your teaching style and update decor seasonally to keep the space fresh and engaging for students.
Where to Find More Free Printable Resources
Explore websites like Pinterest, Teachers Pay Teachers, and Google Classroom for a wide variety of free printable classroom decor. Blogs and educational platforms often offer themed collections, from boho rainbows to retro designs. Many resources are customizable, ensuring they fit your unique teaching style and classroom needs. Happy decorating!