
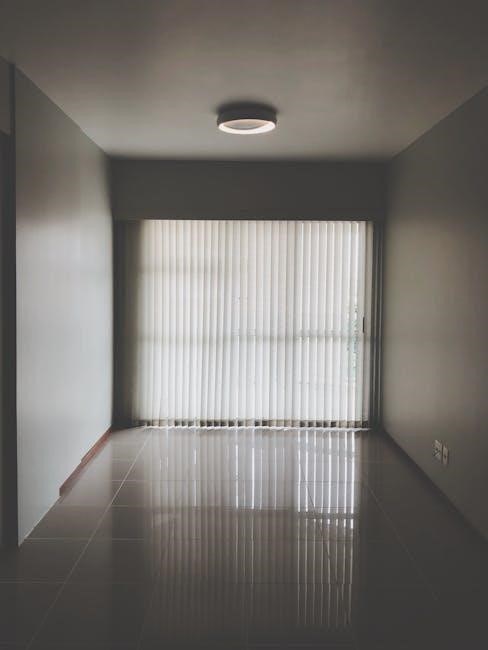
Roman blind fitting is a straightforward process that requires careful planning and preparation. It involves attaching brackets, securing the headrail, and ensuring smooth operation. Proper measurement and alignment are key to achieving a neat, professional finish. Understanding the installation steps and mechanisms, such as cord systems or cordless options, ensures functionality and safety. Follow this guide to master the installation process and enjoy your stylish, functional Roman blinds.
Overview of the Installation Process
The installation process for Roman blinds involves several key steps, starting with bracket fitting. Brackets can be top-fixed or face-fixed, ensuring secure attachment to the window recess or wall. Positioning brackets at least 5cm from the ends of the rail is crucial for stability. Attaching the headrail to the brackets is next, followed by securing the blind using the swing arm mechanism. Proper alignment and tightening ensure smooth operation. Finally, testing the blind’s movement guarantees functionality and safety, completing the installation process effectively.
Importance of Proper Measurement and Preparation
Accurate measurements are essential for a seamless Roman blind installation. Incorrect sizing can lead to poor fit, operational issues, or even safety hazards. Measure the width and height of your window recess precisely, ensuring the headrail fits snugly. Proper preparation includes aligning brackets correctly and verifying all components are included. This step ensures the blind operates smoothly, maintains its appearance, and provides the desired functionality, making measurement and preparation critical for a successful installation process.
Fitting the Brackets
Fitting brackets is the first step in installing Roman blinds. Ensure proper alignment and secure installation to support the blind’s weight and ensure smooth operation. Use a spirit level for accuracy and screw brackets into sturdy surfaces, avoiding damage to walls or window frames. Proper bracket placement is crucial for the blind’s functionality and appearance.
Top-Fixing vs. Face-Fixing Methods
Top-fixing involves attaching brackets to the lintel or ceiling of the recess, offering a sleek look with no visible fixings. Face-fixing mounts brackets directly onto the wall or window frame, providing extra stability. Choose based on your window type and desired aesthetic. Both methods ensure secure installation, but top-fixing is ideal for recesses, while face-fixing suits deeper windows or unique frames. Ensure proper screw anchorage for either method to guarantee durability and safety.
Positioning the Brackets (Minimum 5cm from Ends)
Positioning brackets correctly is crucial for proper Roman blind installation. The outermost brackets should be placed at least 5cm from the ends of the headrail to ensure a secure fit and prevent the blind from catching on the window frame. Measure accurately and mark the wall or recess with a pencil. Drill pilot holes if necessary, then screw the brackets firmly into place. Ensure even spacing between brackets for wider blinds to maintain stability and prevent sagging. Proper alignment ensures smooth operation and a professional finish.

Fitting the Blind
Fitting the blind involves attaching the headrail to the brackets using the swing arm mechanism. Ensure proper alignment and secure the blind firmly for smooth operation and functionality.
Attaching the Headrail to the Brackets
Attach the headrail by first easing its front lip into the bracket. Swing the arm counter-clockwise, align the headrail, then push the arm clockwise until it locks securely. Ensure the headrail is firmly seated to prevent movement and ensure smooth operation.
Securing the Blind with the Swing Arm Mechanism
To secure the blind, push the swing arm counter-clockwise to release it. Align the headrail with the bracket, gently swing the arm clockwise, and ensure it clicks into place. This mechanism holds the blind firmly, preventing movement. For a secure fit, angle the blind slightly if needed and verify the arm locks properly to ensure smooth operation and stability. Proper alignment ensures the blind functions smoothly and remains securely attached.

Operating the Roman Blind
Operating Roman blinds is simple, using a cord mechanism or cordless options. The swing arm ensures secure locking for smooth, controlled movement.
Understanding the Cord Mechanism
The cord mechanism allows easy operation of the Roman blind. Pull the cord to lift the blind, with the swing arm locking the headrail in place. To lower, release cord tension and gently push the blind down. This system ensures smooth, controlled movement. For cordless options, refer to the SmartView guide. Proper use extends the blind’s lifespan and ensures safety. Always operate with care to avoid damage or cord tangles.
Using Cordless or SmartView Options
Cordless or SmartView Roman blinds offer a sleek, modern alternative to traditional cord systems. These blinds are operated manually or via remote control, eliminating cords for enhanced safety and convenience. The SmartView mechanism allows smooth, precise adjustments with a gentle pull or automated control. This feature is ideal for homes with pets or children. The cordless design also simplifies installation and maintenance, providing a hassle-free experience while maintaining functionality and style.

Troubleshooting Common Issues
Common issues with Roman blinds include difficulty releasing the blind from brackets or uneven operation. Check bracket alignment, ensure proper installation, and refer to specific guides for resolution.
Difficulties in Releasing the Blind from Brackets
If the Roman blind doesn’t release easily from the brackets, check the alignment and ensure the headrail is properly engaged. Gently push the blind forward to disengage the lip from the bracket. If issues persist, inspect for obstructions or misalignment. Refer to video guides or manufacturer instructions for specific release mechanisms, ensuring smooth operation and preventing damage to the blind or brackets.
Adjusting the Bracket Alignment for Smooth Operation
Proper bracket alignment is crucial for smooth Roman blind operation. If the blind hangs unevenly, check the bracket positions and ensure they are level. Use a spirit level to verify alignment and adjust the brackets as needed. If the blind catches or drags, slightly loosen the bracket screws, realign, and retighten. Ensure the headrail is evenly spaced between brackets for optimal functionality. Regularly check and adjust alignment to maintain smooth, hassle-free operation.
Tools and Materials Needed
Essential tools: Drill, screws, brackets, measuring tape, spirit level, and screwdriver. Materials: Headrail, blind fabric, and wall anchors for secure installation.
Essential Tools for Installation
Drill, screws, and brackets are must-haves for securing the blind. Use a measuring tape and spirit level to ensure accurate and straight installation. A screwdriver is needed for tightening. Additional materials include wall anchors for extra stability and a pencil for marking drill points. Ensure all components like the headrail and blind fabric are included in your kit for a seamless process. Proper tools ensure a safe and professional-looking result.
Specific Instructions for Click2Go Roman Blinds
Click2Go Roman Blinds offer a tool-free, no-drill installation. Perfect for renters, their hassle-free design allows quick and easy fitting without damaging walls, ensuring a sleek, professional finish.
Unique Features of Click2Go Fitting
Click2Go Roman Blinds boast innovative, tool-free installation, eliminating the need for drilling or screws. Their spring-loaded mechanism ensures a secure fit without wall damage, making them ideal for renters. The blind’s headrail simply clicks into place, providing a quick and hassle-free setup. This system allows for easy removal and reinstallation, offering flexibility and convenience. Its design ensures a perfect fit and smooth operation, enhancing both functionality and aesthetics.
Step-by-Step Guide for Click2Go Installation
Begin by preparing your Click2Go Roman Blind, ensuring all components are included. Align the headrail with your window recess, ensuring it fits snugly. Gently push the blind into place until it clicks securely into position. The spring-loaded mechanism will hold it firmly. No tools or drilling are required. To remove, simply pull the blind away from the window. This hassle-free process makes Click2Go ideal for temporary or rental situations, offering convenience and ease of use.
Tips for Renters and Temporary Installations
For renters, Click2Go Roman Blinds offer a no-drill, hassle-free solution. Their easy-install design allows for quick setup and removal without damaging walls, perfect for temporary use.
No-Drill and Hassle-Free Fitting Options
For temporary or rental situations, Click2Go Roman Blinds offer an ideal solution. Their unique no-drill system allows quick installation without damaging walls or requiring tools. Simply clip the brackets into place and secure the blind using the provided mechanisms. This hassle-free method ensures easy removal, leaving no marks or screws behind. Perfect for renters, it provides a stylish, functional solution without long-term commitments or property alterations.
Maintenance and Cleaning
Regular cleaning ensures longevity and functionality of Roman blinds. Use a soft, damp cloth to wipe fabric and rails. Avoid harsh chemicals to preserve materials and color.
Keeping Your Roman Blinds in Perfect Condition
Regular dusting with a soft cloth prevents dust buildup and maintains appearance. For deeper cleaning, use a damp cloth, avoiding harsh chemicals that might damage fabrics. Spot clean stains gently with mild detergent, ensuring not to soak the material. Ironing (if needed) should be done on a cool setting, from the reverse side. Avoid machine washing unless specified. Lubricate moving parts occasionally to ensure smooth operation. Proper care extends lifespan and keeps blinds looking fresh and functional.
Additional Resources
Access video guides, PDF instructions, and step-by-step tutorials for Roman blind fitting. Contact customer support for assistance or login with your order details to retrieve specific instructions online.
Accessing Video Guides and PDF Instructions
For a seamless installation experience, access detailed video guides and downloadable PDF instructions specific to your Roman blind model. These resources provide step-by-step visuals and written instructions to ensure accuracy. Simply login using your order number and email to retrieve your personalized guide. Additionally, video tutorials cover common tasks like bracket fitting and release mechanisms. If you encounter any issues, customer support is available to assist with your installation needs.
Contacting Customer Support for Assistance
If you encounter difficulties during installation, don’t hesitate to contact customer support. They offer expert guidance for troubleshooting issues like bracket alignment or release mechanisms. Visit the website to access contact details or submit a query directly. Support teams are trained to address specific concerns, ensuring your Roman blind installation proceeds smoothly. Their assistance is available to resolve any challenges, helping you achieve a perfect fit and functionality for your blinds.